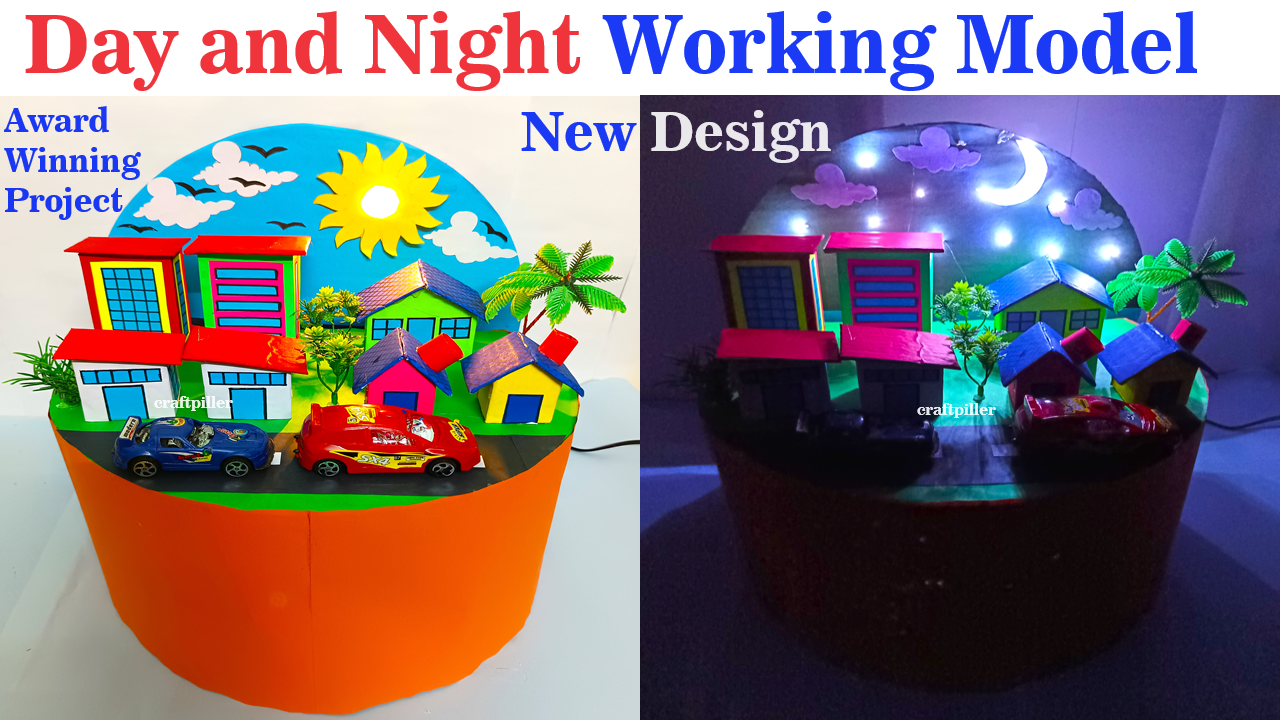
day and night working model(3d) – new innovative and creative design – science exhibition | craftpiller #dayandnight #workingmodel #newdesign #innovativeideas #creative #scienceexhibition #sciencemodel #scienceproject #craftpiller #diy #diyproject #3d

Creating a day and night working model using cardboard, colored paper, and a DC motor for rotation can be a fun and educational project. Here’s how you can make a simple 3D model:
Materials needed:
- Cardboard
- Colored paper (blue for the sky, black for the night sky, yellow for the sun, white for the moon)
- DC motor
- Batteries and battery holder
- Wires
- Switch
- Glue
- Scissors
- Compass or circular object for tracing
Step by Step Instructions:
- Prepare the base:
- Cut a large piece of cardboard to serve as the base of your model.
- This base will represent the ground or Earth’s surface.
- Create the backdrop:
- Cut a large circle from cardboard to represent the sky.
- Cover the cardboard with blue paper to represent the daytime sky and black paper to represent the nighttime sky.
- Glue the sky backdrop onto the base.
- Add the sun and moon:
- Cut out a yellow circle for the sun and a white circle for the moon from colored paper.
- Attach the sun and moon to the backdrop using small pieces of cardboard or wires to create a 3D effect.
- Place the sun and moon on opposite sides of the backdrop.
- Mount the DC motor:
- Attach the DC motor to the base using glue or tape.
- Make sure the motor shaft is perpendicular to the base.
- Create the rotating mechanism:
- Attach a circular cardboard disk to the motor shaft.
- Divide the disk into two halves: one half painted yellow to represent daytime, and the other half painted white to represent nighttime.
- Ensure that the yellow and white halves align with the positions of the sun and moon on the backdrop.
- Wire the motor:
- Connect the DC motor to a battery holder and switch using wires.
- Make sure to place the switch in an accessible location on the base.
- Test the model:
- Insert batteries into the battery holder and turn on the switch.
- The motor should rotate the cardboard disk, causing the sun and moon to move across the sky.
- As the disk rotates, it simulates the Earth’s rotation, creating the effect of day and night.
- Fine-tuning:
- Adjust the speed of the motor or the size of the cardboard disk to achieve the desired rotation speed.
- Make any necessary adjustments to ensure smooth operation.
Once completed, your day and night working model will demonstrate the rotation of the Earth and the alternation between day and night as the sun and moon move across the sky. It’s a great way to visually understand the concept of day and night and the Earth’s rotation.