To provide learners with an opportunity to explore the mechanisms of day and night, including the Earth’s rotation on its axis and its orbit around the Sun.
The model serves as a visual aid for understanding how these motions contribute to the alternation of light and darkness on Earth’s surface.
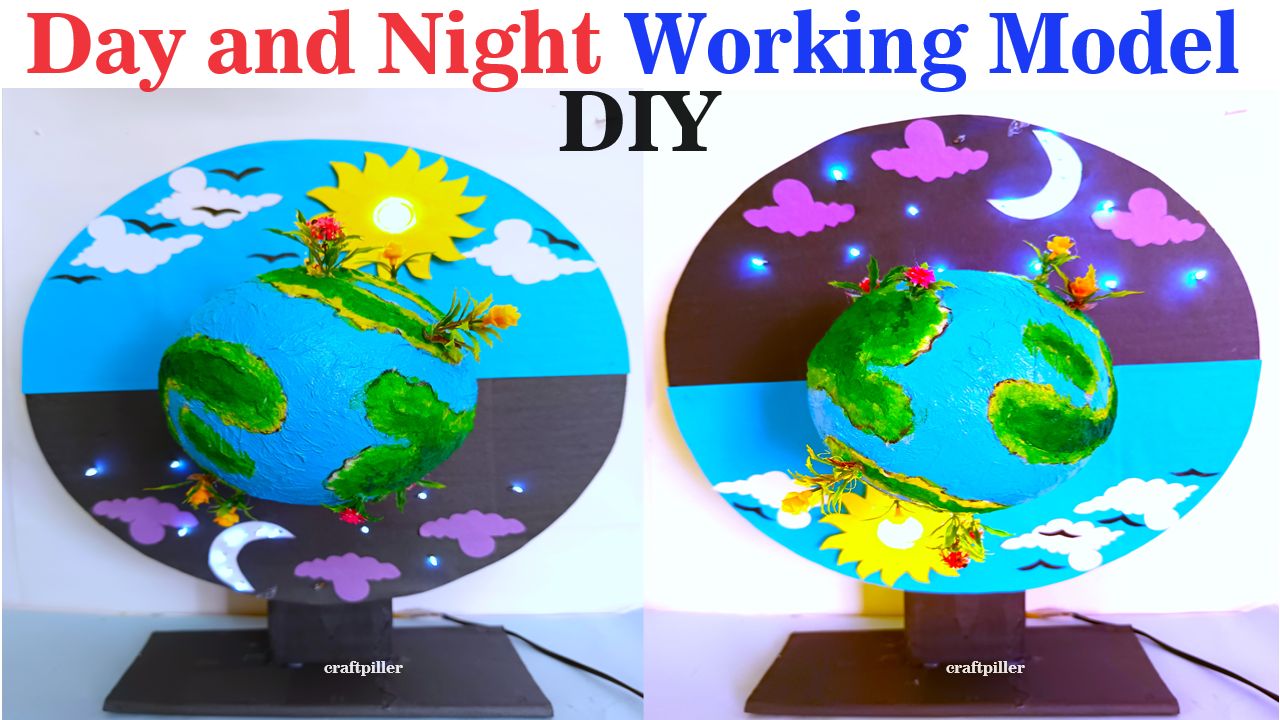
Creating a day and night working model to demonstrate Earth’s rotation using a big ball for Earth, LED lights for the sun, moon, and stars is an engaging project.
Here’s how you can make it:

Materials Needed:
- Big ball (for the Earth)
- LED lights (for the sun, moon, and stars)
- DC motor
- Cardboard or foam board
- Paints or markers
- Hot glue gun or strong adhesive
- Scissors or utility knife
- Wire
- Power source (battery or adapter)
- Wire strippers
- String or fishing line
Steps by Step Video Instructions day and night working model:
1. Prepare the Earth:
- Paint or draw continents on the big ball to represent the Earth.
- Add details like oceans, mountains, and landmasses.
- Let it dry completely.
2. Create the Sun, Moon, and Stars:
- Attach the LED lights to pieces of cardboard or foam board.
- Shape the sun, moon, and stars using cardboard or foam board.
- Paint or cover the shapes with colored paper to represent the sun (yellow), moon (white), and stars (white or various colors).
- Let them dry and then attach the LED lights to represent their illumination.
3. Set Up the Motor:
- Mount the DC motor to the base or the side of the model.
- This motor will represent the rotation of the Earth.
4. Wire the Motor and LED Lights:
- Connect the positive terminal of each LED light to the positive terminal of the power source.
- Connect the negative terminal of each LED light to the negative terminal of the power source.
- Connect the positive and negative terminals of the DC motor to the corresponding terminals of the power source.
5. Attach the Earth and Celestial Bodies:
- Use wire or fishing line to suspend the Earth, moon, and stars above the base.
- Ensure they are positioned in such a way that they can move freely.
6. Create the Rotation Mechanism:
- Attach the Earth to the motor shaft.
- Ensure the Earth is positioned in such a way that it can rotate smoothly.
7. Test the Model:
- Turn on the power source to activate the motor and LED lights.
- Observe how the Earth rotates, causing day and night as the sun, moon, and stars move across the sky.
Explanation:
- As the motor rotates, it moves the Earth, simulating Earth’s rotation on its axis.
- The LED lights represent the sun, moon, and stars.
- As the Earth rotates, it experiences day and night as different parts of its surface are illuminated by the sun or in shadow.
This model effectively demonstrates the concept of day and night caused by Earth’s rotation and the positions of the sun, moon, and stars. It’s an engaging and educational project for a science exhibition.