
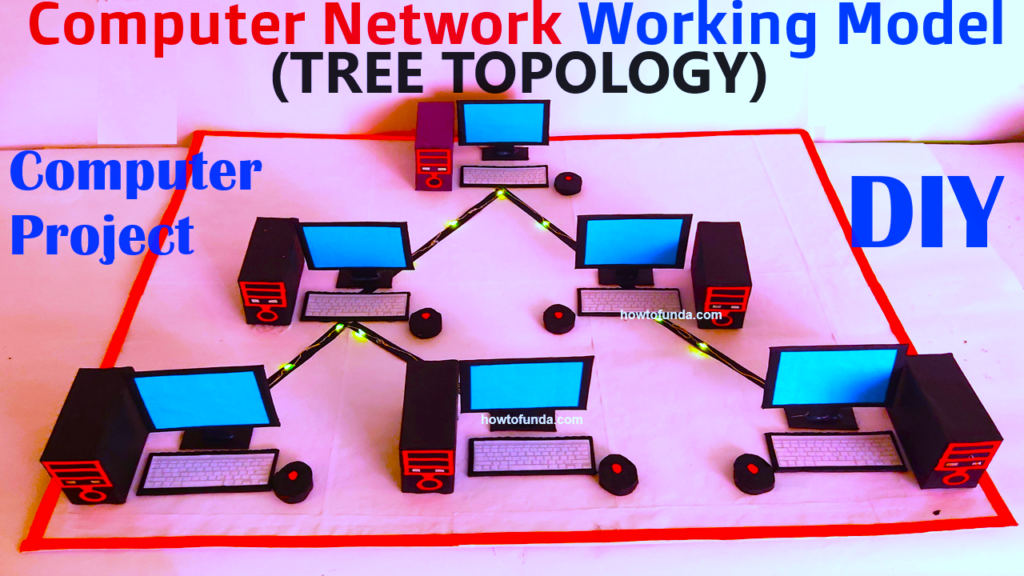
Creating a computer network working model with a tree topology using cardboard for CPU box, monitor, and keyboard, along with LED rice lights to showcase network connections, is a fun and creative project.
Here’s how you can do it:
Materials Needed:
- Cardboard sheets
- Scissors
- Glue or adhesive
- Markers or paints
- LED rice lights (you can use different colored lights for different connections)
- Small containers (for CPU, monitor, and keyboard)
- Small pieces of paper or stickers (to label devices)
- Tape
- Ruler (optional)
Step by Step Instructions Tree Topology computer network:
- Prepare the Devices:
- Cut out pieces of cardboard to create the CPU box, monitor, and keyboard. You can use rectangular shapes for the CPU and monitor and a flat rectangular shape for the keyboard.
- Fold the cardboard pieces along the edges to create the 3D shapes of the devices. Use glue or adhesive to secure the edges in place.
- Use markers or paints to add details to the devices, such as buttons on the keyboard or ports on the CPU.
- Place each device in a small container to keep them stable.
- Create the Tree Topology:
- Decide on the layout for your tree topology. You can have one central device (root) connected to multiple branches (devices).
- Cut out cardboard strips to create the branches of the tree. The central device (root) will be at the top, and the other devices will be connected below.
- Use tape or glue to attach the branches to the central device and arrange them in a tree-like structure. Leave some space between each branch for the LED rice lights.
- Add LED Rice Lights:
- Attach LED rice lights along each branch of the tree to represent the network connections. You can use different colored lights for different connections to distinguish between them.
- Start by securing one end of the LED rice lights to the central device (root) using tape or glue. Then, run the lights along each branch, securing them in place with tape as you go.
- Leave a small gap between each LED light to represent the distance between devices in the network.
- Label the Devices:
- Use small pieces of paper or stickers to label each device in the network. Write the name or type of device on each label and attach them to the corresponding device.
- For example, label the CPU, monitor, and keyboard with their respective names.
- Test the Lights:
- Before finalizing the model, test the LED rice lights to ensure they are working properly. Plug in the lights and make sure they illuminate along each branch of the tree.
- Final Touches:
- Once everything is in place and working, make any final adjustments to the model. Ensure that all the devices are securely attached and that the LED lights are positioned correctly.
- You can add additional decorations or details to the model to enhance its appearance.
Your computer network working model with a tree topology is now complete! This creative project not only helps you understand how tree topologies work in computer networks but also serves as a visually appealing decoration.