Chandrayaan 1:
Chandrayaan 1 was India’s first lunar exploration mission. It was launched on October 22, 2008, by the Indian Space Research Organisation (ISRO).
The primary objective of Chandrayaan 1 was to conduct various scientific experiments and studies on the Moon.
The spacecraft was equipped with 11 scientific instruments, including a Moon Impact Probe (MIP) that was released and impacted the lunar surface.
One of the most significant discoveries of Chandrayaan 1 was the presence of water molecules on the Moon’s surface.
Unfortunately, Chandrayaan 1 lost communication with ISRO in August 2009 and was declared lost. Despite this, the mission was considered a partial success due to the data it gathered before losing contact.
Chandrayaan 2:
Chandrayaan 2 was the successor mission to Chandrayaan 1. It was launched on July 22, 2019, by ISRO. This mission was more ambitious and included an orbiter, a lander named Vikram, and a rover named Pragyan. The primary goal of Chandrayaan 2 was to study the lunar terrain, map the distribution of elements and minerals, and analyze the exosphere of the Moon.
While the orbiter successfully continues to study the Moon, the lander Vikram faced a hard landing and communication was lost shortly before it was supposed to make a soft landing on the lunar surface. Despite this setback, Chandrayaan 2 is considered a significant milestone in India’s space exploration endeavors.
Chandrayaan 3 :

Chandrayaan 3 is a mission that is aimed at rectifying the issues faced during the Chandrayaan 2 landing attempt.
ISRO’s mission objectives for the Chandrayaan-3 mission are: Engineering and implementing a lander to land safely and softly on the surface of the Moon. Observing and demonstrating the rover’s driving capabilities on the Moon
Chandrayaan 1, Chandrayaan 2, and the Chandrayaan 3 missions are all significant contributions to India’s space exploration program and have contributed valuable data and insights to the global scientific community’s understanding of the Moon
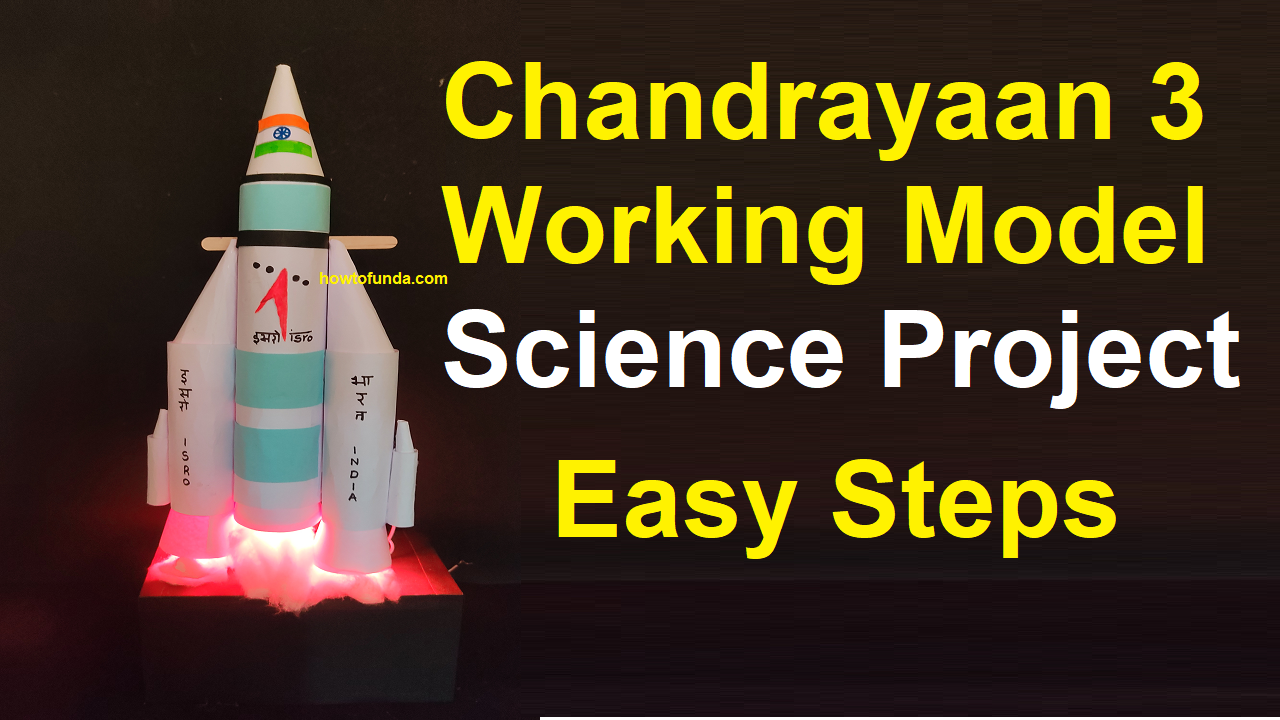
Chandrayaan 3 Model Creation
Creating a Chandrayaan 3 working model using chart paper, a DC motor, a 9V battery, and a chopstick can be a fun and educational project. Here’s a step-by-step guide to help you build it:
Materials Needed:
- Chart paper
- DC motor
- 9V battery
- Battery connector or clip
- On/Off switch (optional)
- Wires
- Chopstick
- Glue
- Tape
- Craft knife or scissors
- Hot glue gun (optional, for added stability)
Chandrayaan 3 working model making Steps:
- Create the Chandrayaan 3 Body:
- Cut the chart paper into two rectangular pieces. One piece will be the base, and the other will be used to make the body of Chandrayaan 3.
- Roll the second piece of chart paper into a cylinder to form the body of the spacecraft. Use glue or tape to secure it in place.
- Attach the cylinder to the base using glue. Make sure it stands upright.
- Attach the DC Motor:
- Position the DC motor on the top of the spacecraft to represent the propulsion system.
- Secure it in place using glue or tape.
- Attach the Battery:
- Connect the DC motor to the 9V battery. You can use wires to make the connection.
- If desired, add an on/off switch between the battery and motor to control the power supply.
- Create the Rocket Thrusters:
- To represent the rocket thrusters, cut out small flames from orange or red chart paper.
- Attach them to the bottom of the spacecraft, around the DC motor.
- Attach the Chopstick:
- This will represent the communication antenna or other instrument. Attach it to the top of the spacecraft using glue.
- Test and Adjust:
- Turn on the power and observe the motor spinning, simulating the spacecraft’s propulsion system.
- Launch Simulation:
- Hold the chopstick and gently “launch” the spacecraft by tilting it upward.
- You can imagine the spacecraft leaving Earth for its journey.
- Secure Components (Optional):
- If needed, reinforce the connections and components with additional glue or tape for stability.
Remember to exercise caution while working with the DC motor, battery, and hot glue gun (if used). Ensure all connections are secure and the model is stable before testing it. This model provides a simplified representation of a spacecraft and is meant for educational purposes.