“Aditya L1” appears to refer to the Aditya-L1 mission, an Indian space mission dedicated to studying the Sun.
If you are looking for information on Aditya L1, here’s a brief explanation:
Aditya-L1 Mission:
- Objective: The Aditya-L1 mission, led by the Indian Space Research Organisation (ISRO), aims to study the Sun, particularly focusing on understanding its outermost layer, the corona.
- Launch Date: As of my last knowledge update in January 2022, the Aditya-L1 mission had not been launched. Please check the latest sources for any updates on the mission’s status and launch date.
- Payloads and Instruments:
- The satellite is equipped with various instruments to observe the Sun’s outer layers and the impact of solar activities on space weather.
- Instruments include a Visible Emission Line Coronagraph (VELC) for studying the solar corona, a Solar Ultraviolet Imaging Telescope (SUIT), and other tools.
- Significance:
- Studying the Sun is crucial for understanding its influence on space weather and its impact on Earth.
- Solar activities, such as solar flares and coronal mass ejections, can affect communication systems, satellites, and power grids on Earth.
- International Collaboration:
- The Aditya-L1 mission involves international collaboration, and data from the mission will contribute to global solar research efforts.

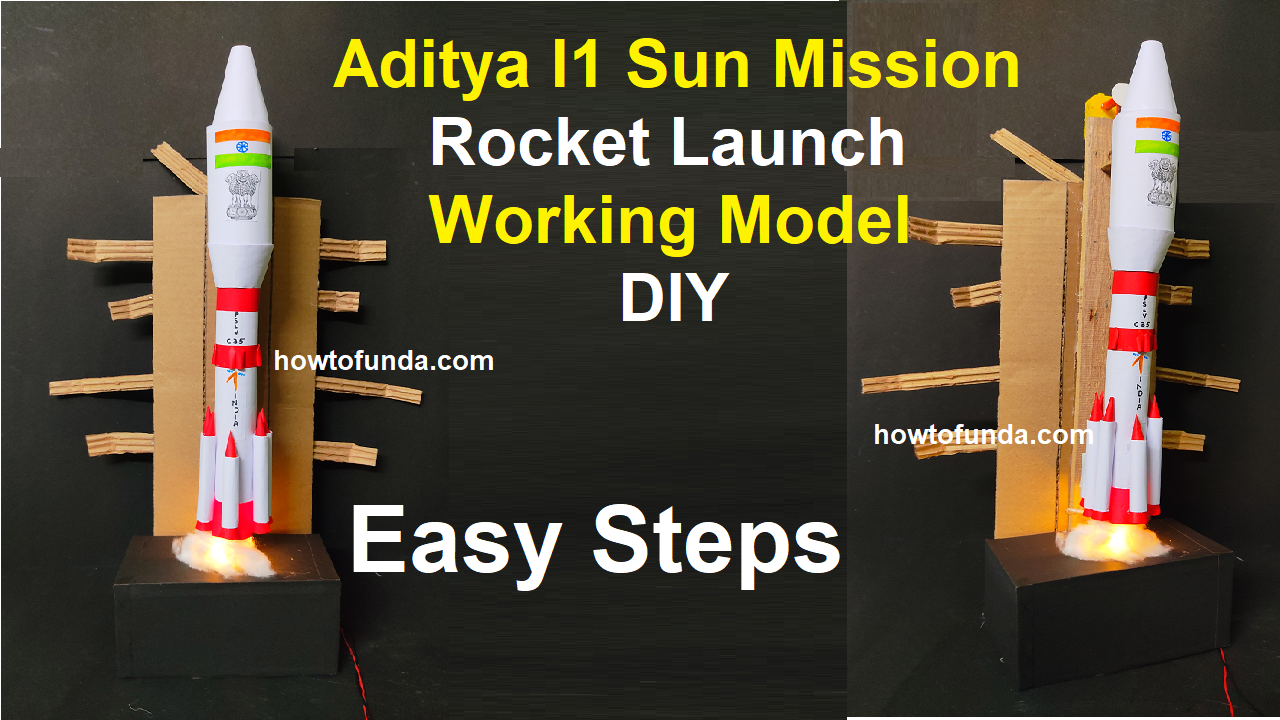
Creating a working model of the Aditya L1 rocket using cardboard, paper, a DC motor for launching, and a 9V battery can be an exciting and educational project. Below is a step-by-step guide to help you get started:
Materials Needed:
- Cardboard sheets
- Paper (for rocket body and fins)
- DC motor with propeller
- 9V battery and battery connector
- Switch
- Wires
- Hot glue gun and glue sticks
- Scissors and cutting tools
- Paints and brushes (optional)
- Craft knife or cutter
Step 1: Design the Rocket Body
- Research and find detailed diagrams or images of the Aditya L1 rocket. Use these as references to design the rocket body on paper. Make sure to include details like the main body, nose cone, and fins.
- Transfer the design onto cardboard and cut out the different components.
Step 2: Assemble the Rocket Body
- Fold the main body piece into a cylindrical shape and secure it with hot glue. This will be the main structure of your rocket.
- Attach the nose cone to the top of the rocket body. This can be a separate piece of cardboard shaped into a cone.
- Attach the fins to the bottom of the rocket. Ensure they are evenly spaced for stability during flight.
Step 3: Prepare the Launch Mechanism
- Create a launch pad using cardboard and attach it securely to a stable surface.
- Attach the DC motor to the launch pad. This will be responsible for launching the rocket.
- Connect the motor to the switch and then to the battery. Make sure to create a safe and stable circuit.
Step 4: Attach the Rocket to the Launch Mechanism
- Create a small compartment at the bottom of the rocket to hold the launch rod (a thin, sturdy rod that will guide the rocket during launch).
- Attach the rocket to the launch rod using hot glue or any secure adhesive. Ensure it’s aligned properly.
Step 5: Launching the Rocket
- Connect the battery to the launch mechanism and switch it on. The DC motor will start, generating the necessary thrust to launch the rocket.
- Make sure the launch area is clear and safe. Launch the rocket and observe its flight.
Remember, safety is a priority. Always conduct experiments in a controlled environment, and adult supervision may be required, especially when using tools like hot glue guns or sharp objects. Happy experimenting!