
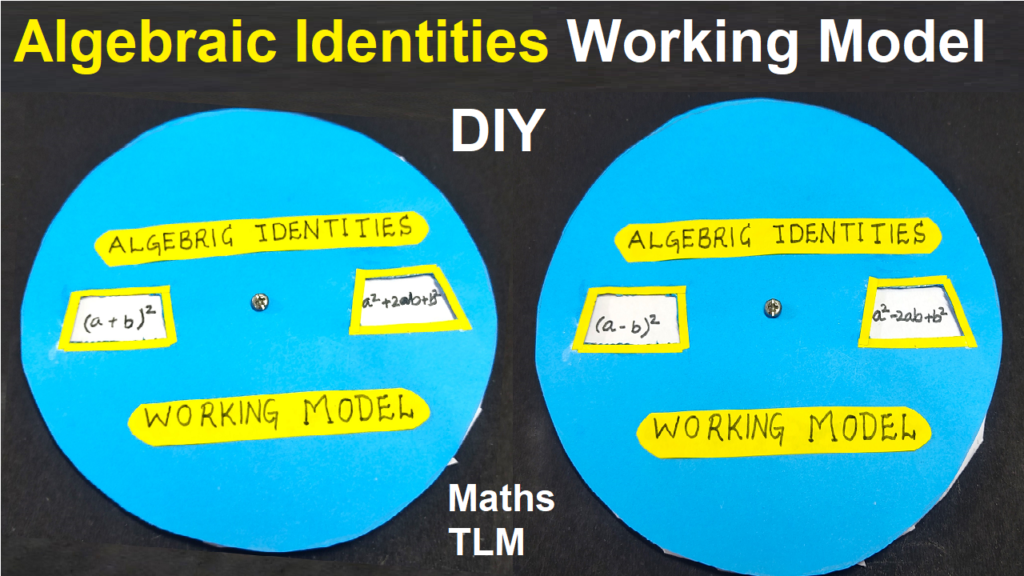
Creating a working model to demonstrate algebraic identities using cardboard and two holes can be an interesting and visual way to showcase mathematical concepts.
Here’s a simple DIY project for an algebraic identities working model:
Materials Needed:
- Cardboard
- Ruler
- Pencil
- Scissors
- String or yarn
- Markers
- Colored paper
- Glue or tape
- Compass
- Brass fasteners (optional)
Steps to Create the Algebraic Identities Working Model:
Step 1: Cut Cardboard:
- Cut a large piece of cardboard to serve as the base for your working model.
Step 2: Draw Circles:
- Use a compass to draw two circles on the cardboard. These will represent the holes.
Step 3: Cut Holes:
- Cut out the circles to create the holes in the cardboard.
Step 4: Label the Circles:
- Label each hole with a variable, such as ‘a’ and ‘b,’ to represent the algebraic expressions.
Step 5: Create Flaps:
- Cut rectangular flaps on the cardboard around each hole, leaving enough space to write or attach the algebraic expressions.
Step 6: Write or Attach Expressions:
- Write the algebraic expressions corresponding to each identity on the flaps or attach colored paper with the expressions.
Step 7: Attach Strings:
- Cut two pieces of string or yarn, and thread them through the holes. Tie knots on the backside to secure them.
Step 8: Display and Explain:
- Set up your working model at the exhibition table.
- Pull the strings through the holes to visually demonstrate the algebraic identities.
Step 9: Optional – Brass Fasteners:
- Instead of string, you can use brass fasteners to attach the expressions to the holes, allowing for easy rotation.
Explanation:
- During your exhibition, explain each algebraic identity and how pulling the strings or rotating the expressions visually demonstrates the validity of the identities.
This working model provides a tangible representation of algebraic identities, making it an engaging and interactive display for a math project or exhibition. It allows students and visitors to physically manipulate the expressions, enhancing their understanding of algebraic concepts.