
1. Introduction
Mathematics is an important subject that we use in our everyday lives. Geometry is one of the major branches of mathematics that helps us understand different shapes, sizes, angles and measurements.
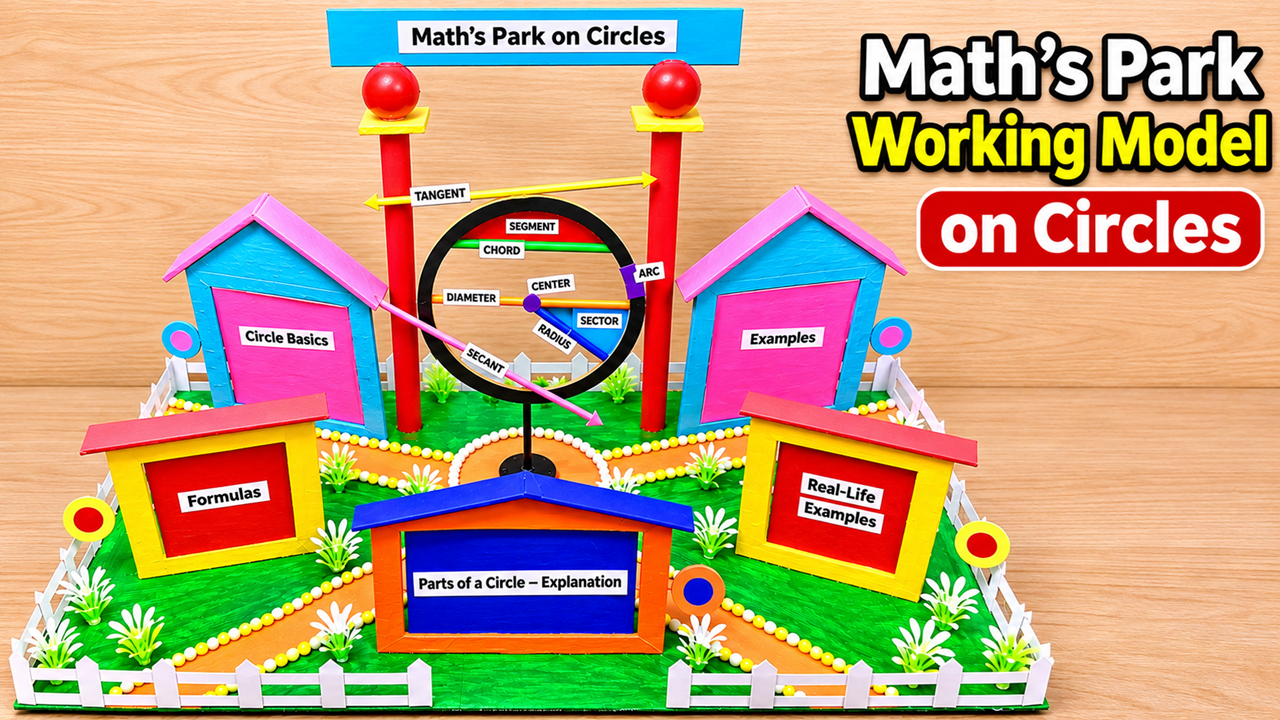
Our project is called Maths Park Working Model on Circles. This model explains the important parts, properties, formulas and real-life applications of circles in an interesting and interactive way.
A circle is a closed two-dimensional geometrical shape in which every point on its boundary is at an equal distance from a fixed point called the centre.
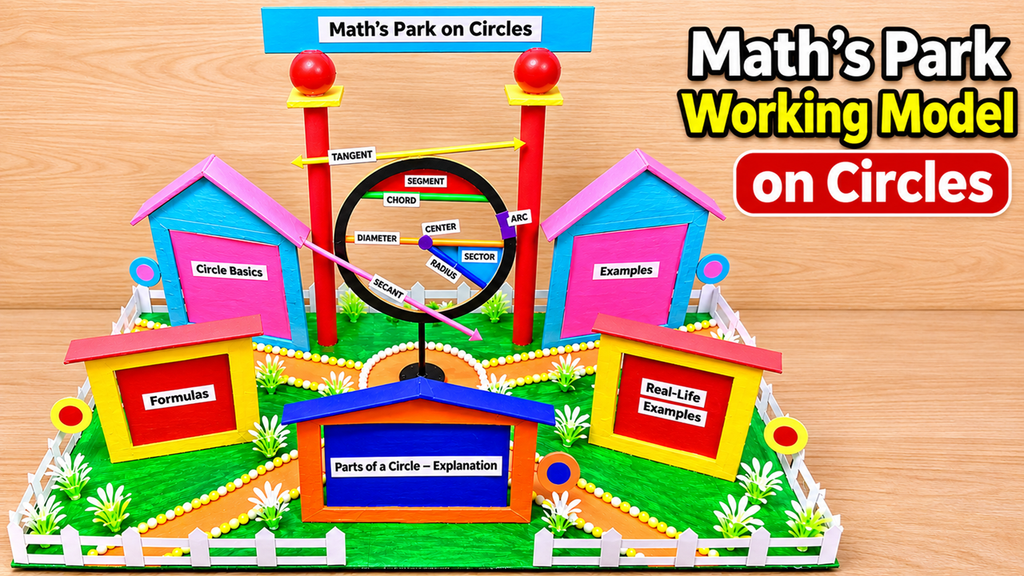
In this model, we have designed a beautiful mathematics park with different sections explaining circle basics, examples, formulas, real-life applications and parts of a circle.
The main objective of this project is to make learning geometry simple, visual and interesting for students.
2. Materials Required
To prepare this working model, we need the following materials:
- Large cardboard or thermocol sheet for the base.
- Green colour paper or artificial grass.
- Red, blue, yellow, pink and orange colour papers.
- Thick cardboard sheets for making small buildings.
- Ice cream sticks for fencing.
- White plastic straws or small cardboard strips.
- One circular cardboard piece.
- Black chart paper for the circle boundary.
- Small plastic balls for decoration.
- Wooden sticks or plastic rods.
- Colourful paper strips for marking circle parts.
- Small LED lights (optional).
- Glue gun, scissors, cutter and adhesive tape.
- Printed labels for mathematical terms.
3. How to Make the Model
Step 1: Prepare the Base
Take a large rectangular cardboard sheet. Cover it with green colour paper or artificial grass to represent a beautiful mathematics park.
Create small pathways using orange or yellow chart paper. Divide the park into different sections for Circle Basics, Examples, Formulas, Real-Life Examples and Parts of a Circle.
Make a boundary fence using ice cream sticks or cardboard strips.
Step 2: Prepare the Circle Basics Building
Take cardboard pieces and construct a small rectangular building. Cover it with blue and pink colour paper.
Write the title “Circle Basics” on the front side. This section represents the basic definition and properties of a circle.
Step 3: Prepare the Main Circle Diagram
Take a circular cardboard sheet and cut out a perfect circle.
Cover the outer boundary with black chart paper. Draw the centre point using a marker.
Now use colourful straws or paper strips to represent different parts of the circle:
- Centre – Mark the middle point.
- Radius – Draw a line from the centre to the boundary.
- Diameter – Draw a line passing through the centre and connecting two points on the boundary.
- Chord – Draw a line connecting any two points on the circumference.
- Arc – Highlight a small portion of the circumference.
- Sector – Colour a portion enclosed by two radii and an arc.
- Segment – Colour the region enclosed by a chord and its corresponding arc.
Fix this circular diagram vertically on a stand in the centre of the park.
Step 4: Demonstrate Tangent and Secant
Take two long colourful straws or wooden sticks.
Place one stick outside the circle so that it touches the circumference at exactly one point. This represents a tangent.
Place another stick so that it passes through the circle and intersects the circumference at two points. This represents a secant.
Step 5: Prepare the Examples Building
Construct another small cardboard building and cover it with colourful paper. Write “Examples” on the front.
Display pictures of circular objects such as coins, wheels, plates, clocks and bangles to explain where circles are found in everyday life.
Step 6: Prepare the Formulas Building
Make another small building using cardboard and red or yellow colour paper.
Display the important formulas of a circle:
- Diameter = 2 × Radius
- Radius = Diameter ÷ 2
- Circumference = 2πr
- Area = πr²
Step 7: Prepare the Real-Life Examples Building
Construct another small building and display pictures of bicycle wheels, round tables, clocks, coins and circular traffic signs.
Explain how circles are used in transportation, construction, sports and daily activities.
Step 8: Final Decoration
Place the main circle diagram in the centre. Arrange all the buildings around it. Add small plants, colourful pathways, decorative poles and fencing.
Finally, attach labels to all sections. Your Maths Park Working Model on Circles is ready.
4. Explanation of Different Parts of a Circle
Our model demonstrates nine important parts of a circle.
1. Centre: The fixed point located exactly in the middle of a circle. Every point on the circumference is at an equal distance from the centre.
2. Radius: A straight line connecting the centre of the circle to any point on its circumference.
3. Diameter: A straight line passing through the centre and connecting two points on the circumference. It is twice the radius.
4. Chord: A straight line segment connecting any two points on the circumference.
5. Arc: A part of the circumference of a circle.
6. Sector: The region enclosed by two radii and the connecting arc.
7. Segment: The region enclosed by a chord and its corresponding arc.
8. Tangent: A straight line that touches a circle at exactly one point.
9. Secant: A straight line that intersects a circle at two different points.
5. Important Formulas of a Circle
The following formulas help us calculate different measurements of a circle.
| Mathematical Term | Formula |
|---|---|
| Diameter | \(d = 2r\) |
| Radius | \(r = d/2\) |
| Circumference | \(C = 2\pi r\) |
| Area | \(A = \pi r^2\) |
Here, π (pi) is approximately 3.14, r represents radius and d represents diameter.
For example, if the radius of a circle is 7 cm:
- Diameter = 2 × 7 = 14 cm.
- Circumference = 2 × 3.14 × 7 = 43.96 cm.
- Area = 3.14 × 7 × 7 = 153.86 cm².
6. Real-Life Applications of Circles
- Wheels of bicycles, cars and buses.
- Clocks and watches.
- Coins and circular plates.
- Round tables and bangles.
- Circular gardens and playgrounds.
- Ferris wheels in amusement parks.
- Pipes and water tanks.
- Circular traffic signs.
7. Advantages of This Project
- Makes geometry easy to understand.
- Explains different parts of a circle visually.
- Helps students remember mathematical formulas.
- Connects mathematics with real-life examples.
- Encourages creativity and practical learning.
- Makes mathematics interesting through a park concept.
8. Conclusion
Our Maths Park Working Model on Circles demonstrates the basic concepts, properties, parts and formulas of circles in an attractive and educational way.
Through this project, students can understand the centre, radius, diameter, chord, arc, sector, segment, tangent and secant.
It also explains how mathematical concepts are used in our everyday lives.
Our message is: LEARN MATHEMATICS THROUGH MODELS, EXPLORE GEOMETRY AND MAKE LEARNING FUN!
9. Science Exhibition – Short Presentation Script
Good morning, respected judges, teachers and my dear friends.
My project name is Maths Park Working Model on Circles.
The main aim of this project is to explain the important parts, properties and formulas of circles in a simple and interesting way.
A circle is a closed two-dimensional shape in which every point on its boundary is at an equal distance from the centre.
In our model, we have created different sections such as Circle Basics, Examples, Formulas, Real-Life Examples and Parts of a Circle.
Here, we can see nine important parts of a circle: centre, radius, diameter, chord, arc, sector, segment, tangent and secant.
We have also displayed important formulas.
The circumference of a circle is 2πr, and the area of a circle is πr².
We can see circles in our everyday lives, such as wheels, clocks, coins, plates and round tables.
Through this project, we can understand geometry easily by observing and learning practically.
My message is: MATHEMATICS IS NOT JUST ABOUT NUMBERS; IT IS ABOUT UNDERSTANDING THE WORLD AROUND US!
Thank you!