
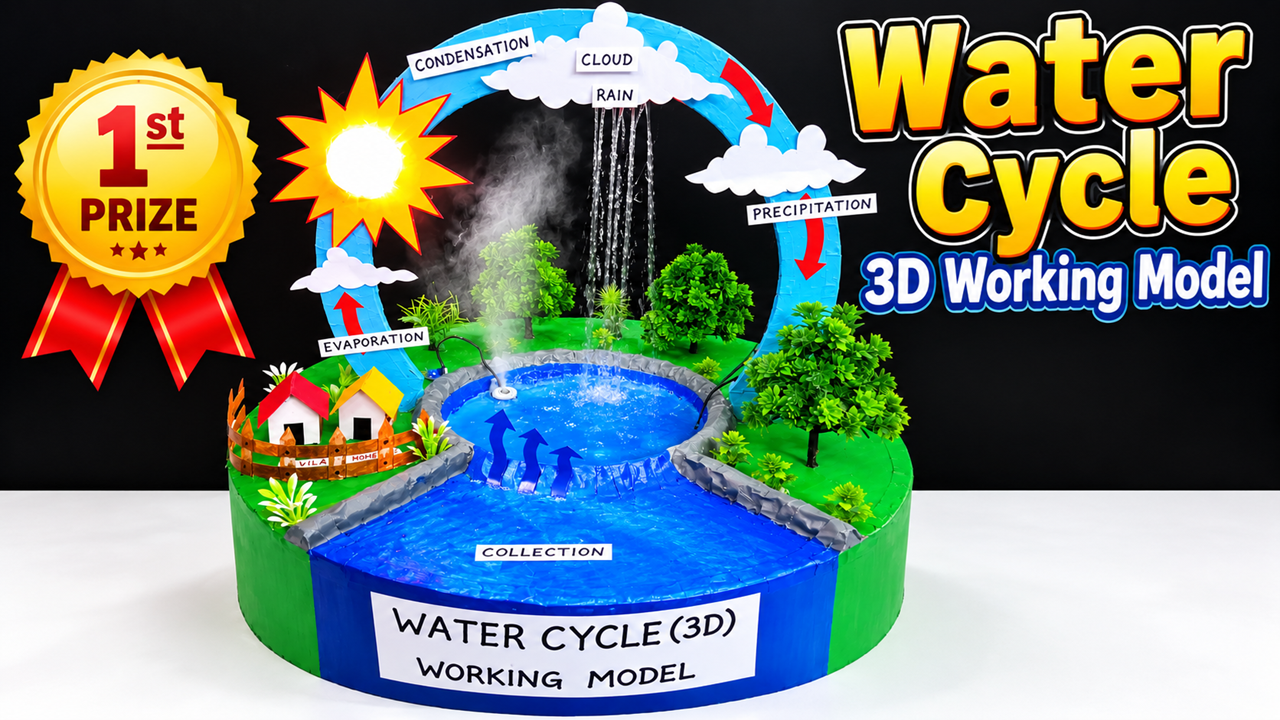
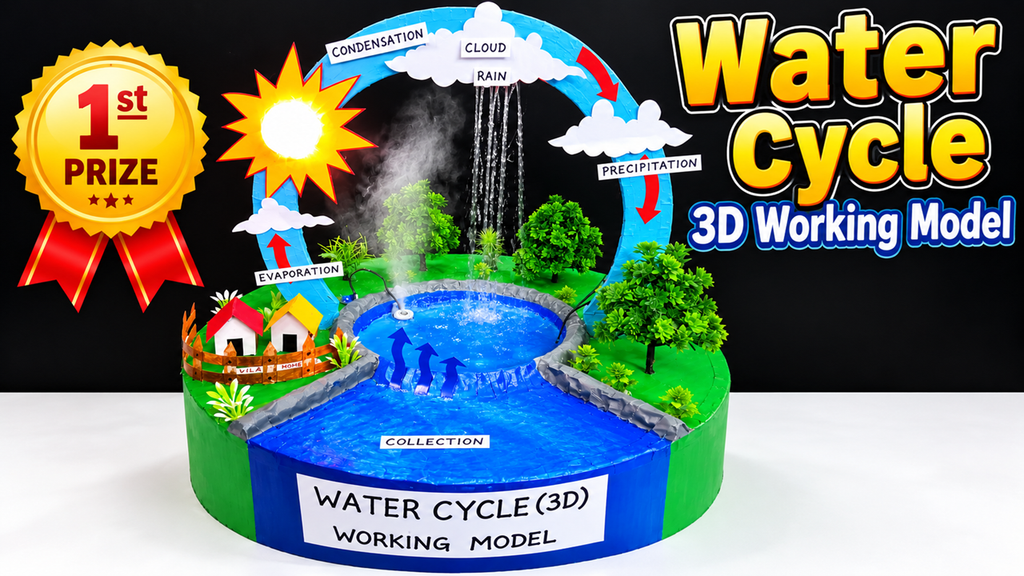
This Water Cycle 3D Working Model demonstrates the major stages of the natural water cycle—evaporation, condensation, precipitation, collection, and runoff—using a small humidifier and a DC water pump. It is suitable for a school science exhibition because the processes can be demonstrated visibly.
Materials Required
- Cardboard or foam board for the base
- Green chart paper/colour paper
- Blue colour paper or blue acrylic paint
- Small plastic bowl/container for the water reservoir
- Small USB/DC humidifier for producing water vapour
- 5V or 12V DC water pump
- Suitable DC adapter/battery pack
- Transparent flexible pipe
- Cotton or thermocol for clouds
- Small artificial trees and houses
- Blue arrows for showing water movement
- Glue gun, tape and scissors
- Small switch
- Wires and connectors
- Small stones, sand and decorative materials
Step 1: Prepare the Base
Take a strong cardboard or foam-board sheet and make a circular or rectangular platform. Cover the base with green paper to represent land. Create a blue water body at the front using blue paper or paint. This represents the ocean, lake or collection area.
Step 2: Create the Evaporation Section
Place a small water container behind or underneath the central water body. Put the humidifier inside or beside the water container according to the manufacturer’s design and safety requirements.
When switched on, the humidifier produces a visible mist. This mist represents water vapour produced during evaporation.
Place an arrow from the water body upward and label it EVAPORATION.
For a school model, use a low-voltage USB/DC humidifier rather than attempting to heat water with an exposed electrical heating element.
Step 3: Make the Clouds
Create large clouds using cotton, thermocol or white foam sheets. Fix them above the humidifier using cardboard supports or wooden sticks.
As the mist rises toward the clouds, it visually represents water vapour reaching the atmosphere. Label this section CONDENSATION and CLOUD FORMATION.
Step 4: Create the Rain System
Use a small DC water pump to circulate water from the collection reservoir. Connect the pump outlet to a transparent pipe.
Run the pipe upward and hide it behind the model’s cloud structure. Make several tiny holes in a suitable rain-distribution section at the top so that water can fall downward like rain.
Important: The pump voltage must match its power supply. For example, use a 5V supply with a 5V pump or a 12V supply with a 12V pump.
Step 5: Show Precipitation
When the DC pump is switched on, water travels through the transparent pipe and comes out from the rain outlet. The falling water represents PRECIPITATION.
Use blue arrows pointing downward from the clouds and label the section RAIN / PRECIPITATION.
Step 6: Create Collection and Runoff
Allow the rainwater to fall into the lower blue water body. This represents COLLECTION.
Create small channels using cardboard or thermocol so that some water flows from the higher land toward the main water body. These channels represent SURFACE RUNOFF.
Step 7: Demonstrate the Complete Cycle
Switch on the humidifier to demonstrate evaporation. The mist rises toward the cloud area, representing atmospheric water vapour. Then switch on the DC pump. Water travels through the pipe and falls from the cloud section as rain.
The rainwater collects in the lower reservoir and can be pumped again through the system. Therefore, the model creates a continuous demonstration of the water cycle.
Working Principle
Water → Evaporation → Water Vapour → Condensation → Clouds → Precipitation → Collection → Evaporation
The humidifier provides the visible mist for evaporation, while the DC pump circulates water to create artificial rainfall. Together, these components make the natural water cycle easy to understand and demonstrate in a science exhibition.