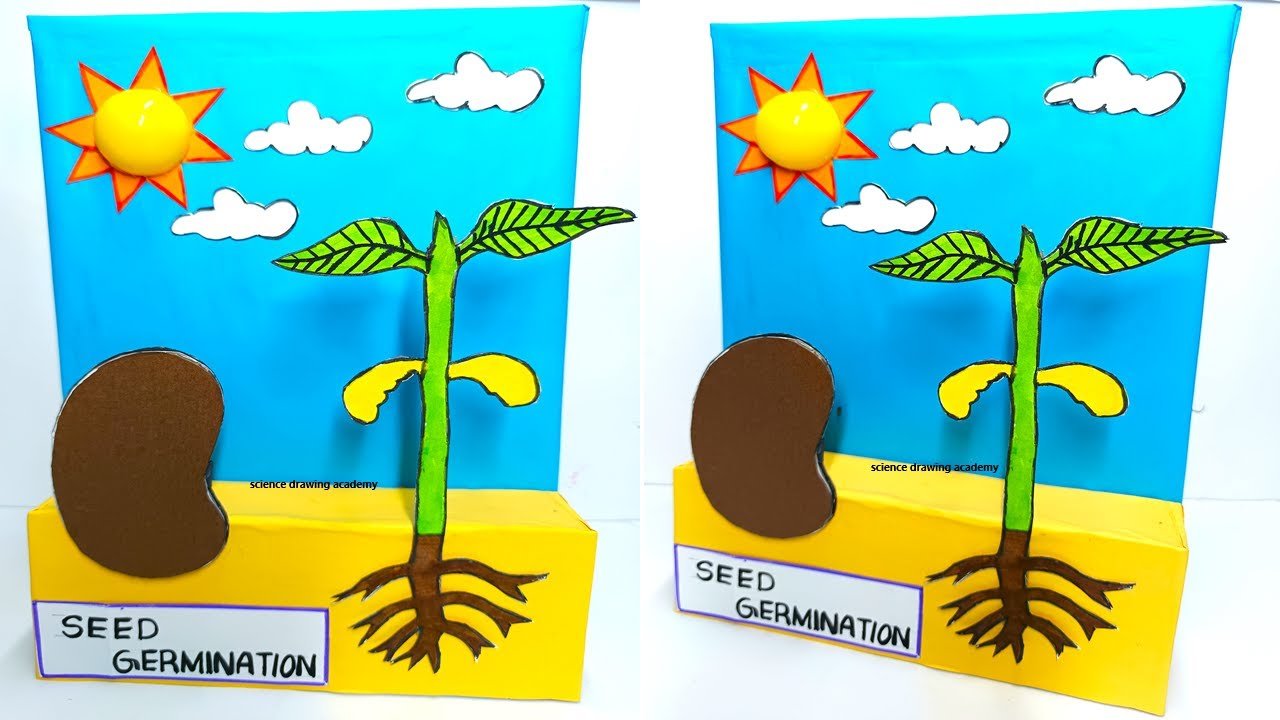
Creating a seed germination working model using cardboard and colored paper is a fun and educational project that can visually represent the stages of seed germination in a simple and creative way.
This Teaching-Learning Material (TLM) model will help students understand the germination process, from a seed sprouting to its early growth stages. Here’s how you can create this working model step-by-step.

Objective:
To create a working model that demonstrates the different stages of seed germination using cardboard, colored paper, and basic craft materials.
Materials Needed:
- Cardboard (for the base and background)
- Colored paper (green, brown, yellow, etc., to represent soil, plants, roots, etc.)
- Glue or tape (for sticking parts together)
- Scissors (to cut out shapes)
- Markers or crayons (for labeling and detailing)
- Cotton balls (optional, to represent the growth medium or moisture)
- Plastic sheet (optional, for covering the seed to simulate a greenhouse effect)
- Small toy plant figures or additional props (optional, for decoration)
Steps to Create the Seed Germination Working Model:
1. Prepare the Base and Background:
- Take a large piece of cardboard (around 20 cm x 30 cm) as the base. This will represent the ground.
- Cut out a vertical piece of cardboard and attach it to the back of the base to act as a background. You can paint or cover this background with colored paper for a more realistic look (sky, plants, or sun).
2. Cut Out Soil Layers:
- Use brown colored paper to represent the soil. Cut out different layers of soil in the shape of waves or curves and glue them to the base.
- You can create a 3D effect by stacking multiple layers of brown paper, giving the appearance of soil depth.
- Leave spaces between the layers to represent where the seeds will be placed during different germination stages.
3. Create the Seed and Roots:
- Cut out small seed shapes using yellow or light brown colored paper. Place these seeds at different levels in the soil to represent the different stages of growth.
- Draw or cut out small roots using white or brown colored paper to show how the seed develops roots. Attach these roots below the seed at different stages.
4. Represent Different Stages of Seed Germination:
- Stage 1: Dormant Seed (Before Germination):
- Place a seed at the deepest soil layer, showing the seed before it starts to germinate. Add small cotton pieces around it to simulate moisture.
- Stage 2: Seed Swelling and Root Growth:
- Move up a layer and place a seed that has begun to sprout a tiny radicle (the first root). You can use a tiny white paper to cut the sprouting radicle and glue it to the seed.
- Show how the seed swells when it absorbs water by making the seed slightly larger at this stage.
- Stage 3: Shoots Appear:
- In the next layer, show the growth of a small shoot or stem emerging from the seed. Use green paper to cut out a tiny sprout and glue it at this stage. The roots can also be a little longer here.
- Stage 4: Seedling Growth:
- In the top soil layer, show the seedling starting to grow leaves. Use green paper to cut out small leaves and attach them to the shoot. The roots should now be well developed and spreading into the soil.
- Stage 5: Growing Plant:
- On the surface of the soil, you can place a fully grown seedling with leaves, showing the plant that has emerged from the ground.
5. Create the Above-Ground Environment:
- On the upper surface (above the soil), cut out and attach green colored paper to create a grassy field where the plant emerges.
- You can also add a sun on the background using yellow paper, and maybe some clouds using white cotton or paper to show the environment the plant is growing in.
6. Label the Different Stages:
- Use markers or small labels to identify the various stages of seed germination:
- “Seed”
- “Germination Begins”
- “Root Development”
- “Shoot Emerges”
- “Seedling”
- “Young Plant”
- This helps in visually identifying the process step-by-step.
How the Model Works:
- Stage Progression: The model shows how the seed transforms from a dormant stage into a growing seedling with roots and shoots emerging.
- Germination Conditions: By adding water drops and cotton, you can show that moisture is essential for germination.
- Environmental Conditions: The sun, soil, and water components help explain the conditions required for a plant’s growth.
This TLM-based seed germination working model is a great way to teach students about plant biology while making the learning process fun and hands-on.

