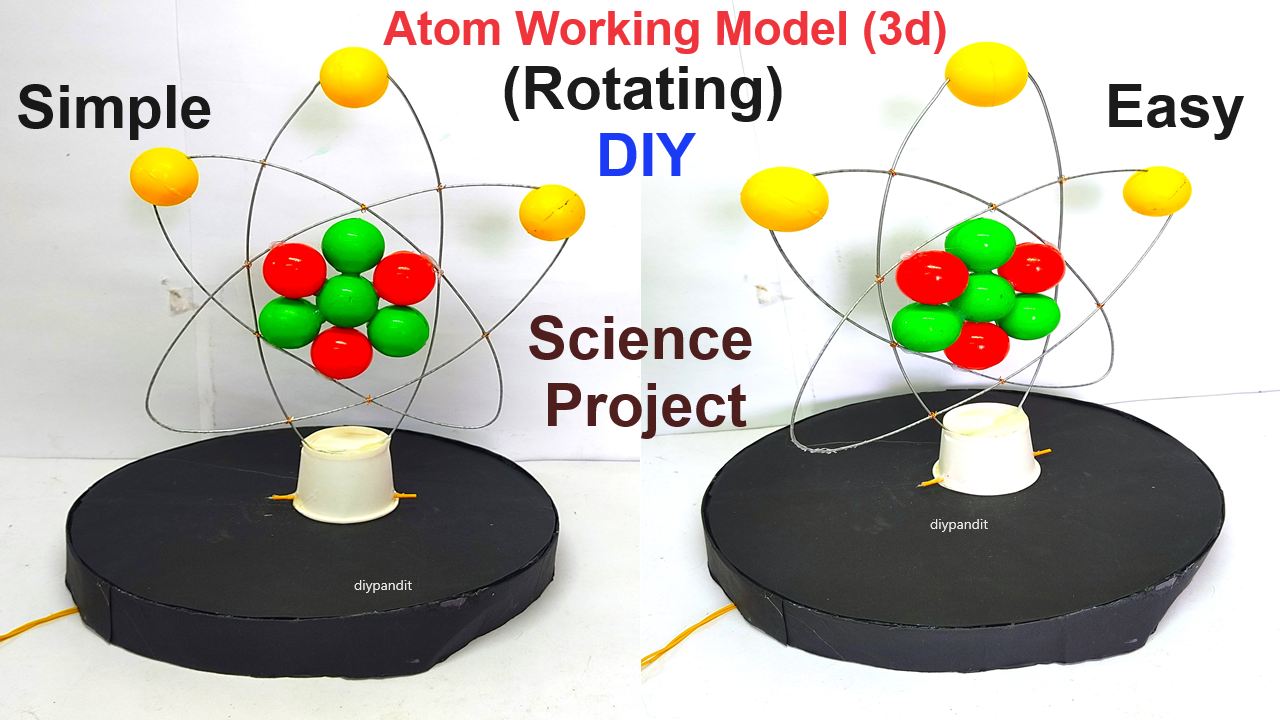
Creating a 3D atom model using GI metal wire, balls, a slow-running motor, cardboard, and color paper can effectively demonstrate atomic structure and electron orbits.

Here’s a step-by-step guide:
Materials Needed:
- GI metal wire (gauge suitable for crafting, such as 16 or 18)
- Plastic balls (different colors to represent protons, neutrons, and electrons)
- Slow rotating motor with battery pack and switch
- Cardboard or a sturdy base
- Colored paper
- Hot glue gun or strong adhesive
- Small battery holder and batteries
- Insulated wire
- Soldering iron and solder (optional, for secure connections)
- Needle-nose pliers
- Wire cutters
Steps by Steps Video instructions :
1. Prepare the Nucleus:
- Create the Nucleus Frame: Use the GI metal wire to create a small spherical frame to hold the protons and neutrons. Bend and twist the wire into a cage-like structure.
- Attach Protons and Neutrons: Glue the colored balls representing protons and neutrons inside the spherical frame. Use one color for protons and another for neutrons. Secure them with hot glue.
2. Prepare the Electron Orbits:
- Create Orbit Rings: Form circular rings using the GI metal wire to represent the electron orbits. The rings should be concentric and large enough to allow space between them. You will need multiple rings depending on the atom you are modeling (e.g., three rings for a nitrogen atom).
- Attach Electrons: Glue the colored balls representing electrons onto the orbit rings. Use a different color for electrons and space them evenly around the rings.
- Connect Orbits to Nucleus: Use small pieces of GI wire to attach the orbit rings to the nucleus frame. Ensure the rings are centered around the nucleus and secure them with glue or by twisting the wire.
3. Prepare the Rotating Mechanism:
- Mount the Motor: Secure the slow rotating motor to the center of the cardboard base using screws or strong adhesive.
- Attach the Nucleus to the Motor Shaft: Use a short piece of GI wire to connect the nucleus frame to the motor shaft. Ensure the connection is strong and balanced to prevent wobbling when the model rotates.
- Wire the Motor: Connect insulated wires from the motor to the battery holder. If using a soldering iron, solder the connections for a more secure setup.
- Add a Switch: Connect a switch between one of the motor wires and the battery holder to control the power.
4. Assemble the Model:
- Attach the Orbit Rings to the Base: Use additional GI wire to secure the outermost parts of the orbit rings to the base. This will provide additional stability.
- Test the Rotation: Insert batteries into the battery holder and test the motor. Ensure the nucleus and electron orbits rotate smoothly.
- Secure All Connections: Double-check all connections and glue points to make sure everything is securely attached.
5. Final Touches:
- Decorate the Base: Cover the base with colored paper or paint it to make the model more attractive.
- Label the Model: Add labels to indicate protons, neutrons, and electrons. You can also add a brief explanation of the atom model and its components.
- Instructions and Safety: Include a note on how to operate the switch and safety precautions regarding the rotating parts.
Example Layout for a Nitrogen Atom:
- Protons: 7 (red balls)
- Neutrons: 7 (white balls)
- Electrons: 7 (blue balls), distributed as 2 in the first orbit, 5 in the second orbit
This 3D rotating atom model will visually and interactively demonstrate the atomic structure, making it an excellent project for a science exhibition.

