
Angles formed by parallel lines and a transversal are a fundamental concept in geometry that helps understand the relationships between angles and parallel lines.
When a transversal intersects two parallel lines, it creates several pairs of angles with specific properties. These angles have consistent relationships, enabling us to make predictions and solve geometric problems.
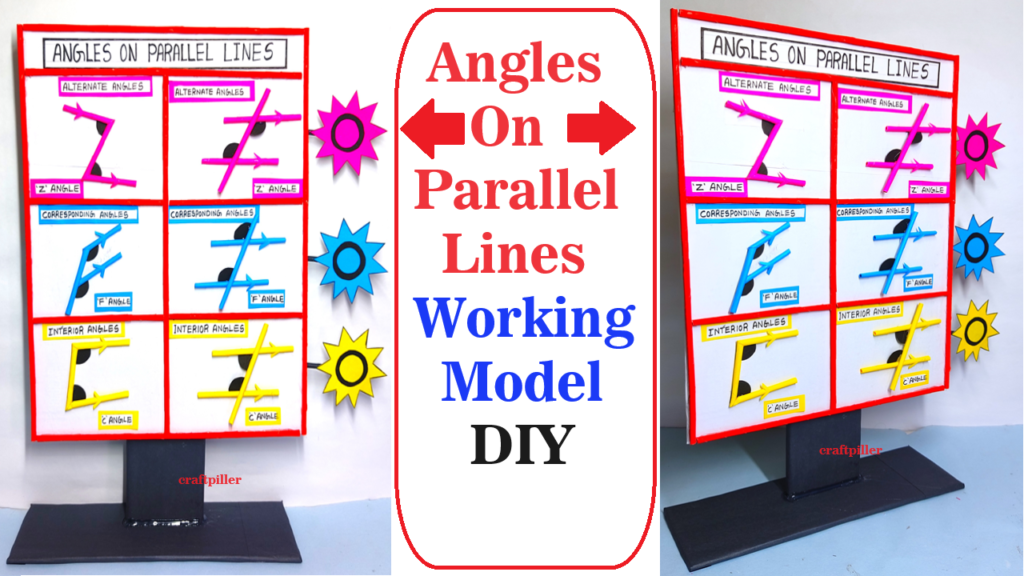
Creating a working model to demonstrate angles on parallel lines is a great way to help students understand the concepts of alternate angles, corresponding angles, and interior angles on parallel lines.
Here’s a simple yet effective way to make it:
Materials Needed:
- Cardboard or foam board
- Ruler
- Protractor
- Pencil
- Scissors
- Colored paper or paint
- Pushpins or small nails
- String or yarn
- Thumbtack
- Glue
Steps by Steps Video Instructions on angles on parallel lines:
1. Prepare the Base:
- Take a piece of cardboard or foam board as the base for your model.
- Cut it into a large rectangle to represent the parallel lines.
2. Draw Parallel Lines:
- Use a ruler and pencil to draw two parallel lines horizontally across the base.
- Ensure that the lines are straight and evenly spaced apart.
3. Mark Points and Angles:
- Along the parallel lines, mark several points at equal intervals.
- Use these points to draw various angles, such as alternate angles, corresponding angles, and interior angles.
4. Create Angles:
- Using a protractor, measure and draw alternate angles, corresponding angles, and interior angles at each marked point.
- Label each angle accordingly.
5. Cut Out Angles:
- Cut out some of the angles you have drawn from colored paper or cardboard.
- These will be used to demonstrate the angles on the model.
6. Attach Angles to the Base:
- Use glue to attach the cut-out angles onto the base at their respective marked points.
- Ensure they are positioned correctly according to their labels.
7. Create Strings for Transversal Lines:
- Tie one end of a string to a thumbtack and push the tack into the base at one end of the parallel lines.
- Attach the other end of the string to another thumbtack and push it into the base at the other end of the parallel lines.
- Repeat this process for another string to form the transversal lines.
8. Demonstrate Angle Relationships:
- Use the strings as transversal lines and move them across the parallel lines.
- Show how the angles change and how they relate to each other as the transversal lines move.
- Explain the concepts of alternate angles, corresponding angles, and interior angles as you demonstrate.
Explanation:
- The model represents two parallel lines intersected by one or more transversal lines.
- By moving the transversal lines, students can observe how the angles change and understand their relationships.
- The model helps visualize concepts such as alternate angles, corresponding angles, and interior angles.
This working model effectively demonstrates angle relationships on parallel lines and can aid in teaching geometry concepts to students.