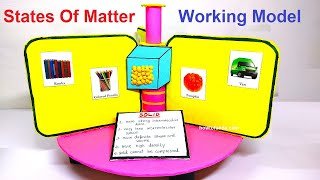
In this blog post we have written on how to make states of matter working model science project – diy | howtofunda

Creating a states of matter working model can be a fun and interactive way to understand the different states of matter: solid, liquid, and gas.
A simple states of matter working model that helps visualize and understand the concept of solid, liquid, and gas states
Creating a working model to demonstrate the three states of matter (solid, liquid, and gas) using cardboard and color paper is a fantastic science project. Here’s a step-by-step guide to help you build this model:
Materials Needed:
- Cardboard: For the base and partitions.
- Color Paper: For decorating and labeling.
- Glue or Hot Glue Gun: For assembling the parts.
- Scissors and Craft Knife: For cutting the cardboard and paper.
- Markers, Paint, or Colored Pencils: For adding details.
- Transparent Plastic or Cellophane: For representing liquids and gases.
- Cotton Balls or Sponges: To represent solids and add texture.
- Small Containers: To hold liquids.
- String: To suspend parts representing gases.
- Tape: To secure the components.
Step by Step Videos on states of matter working model science project – diy
1. Prepare the Base:
- Cut a rectangular piece of cardboard for the base of your model.
- Optionally, cover the base with color paper to make it more visually appealing.
2. Create the Partitions:
- Cut two pieces of cardboard to form partitions, creating three equal sections on the base.
- Glue the partitions vertically onto the base, dividing it into three sections.
3. Decorate the Partitions:
- Cover each section with color paper to differentiate the states of matter.
- Use a single color for each section: e.g., blue for solid, green for liquid, and yellow for gas.
- Label each section at the top: “Solid,” “Liquid,” and “Gas.”
Solid Section:
- Prepare the Display:
- Cut out a small cube from cardboard to represent a solid object.
- Paint or cover the cube with color paper.
- Optionally, use cotton balls or sponges to add texture and represent other solid materials.
- Assemble:
- Glue the solid objects firmly in place within the first section.
- Add a label or description about solids, mentioning their fixed shape and volume.
Liquid Section:
- Prepare the Display:
- Use a small transparent container or plastic cup to represent a liquid.
- Fill the container with colored water (using food coloring) to make it more visible.
- Alternatively, use a piece of blue cellophane or plastic to represent a liquid surface.
- Assemble:
- Place the container or cellophane within the middle section.
- Secure it with tape or glue to prevent it from moving.
- Add a label or description about liquids, mentioning their fixed volume but adaptable shape.
Gas Section:
- Prepare the Display:
- Use transparent plastic or cellophane to create a representation of gas particles.
- Cut small pieces of plastic and attach them to strings to suspend them in the air.
- Assemble:
- Attach the strings to the top of the third section, allowing the plastic pieces to hang and move freely.
- Add a label or description about gases, mentioning their adaptable shape and volume.
Final Touches:
- Use markers or paint to add any final details and descriptions.
- Ensure all components are securely attached and the model is stable.
- Optionally, add arrows or diagrams to show how particles are arranged in each state of matter.
Conclusion:
This working model visually and effectively demonstrates the three states of matter, making it a great educational tool for explaining the properties of solids, liquids, and gases. Enjoy creating your project!
#statesofmatter #workingmodel #scienceproject #diy #howtofunda
