To familiarize learners with the basic components and terminology associated with circles, including the center, radius, diameter, circumference, arc, sector, chord, and tangent.
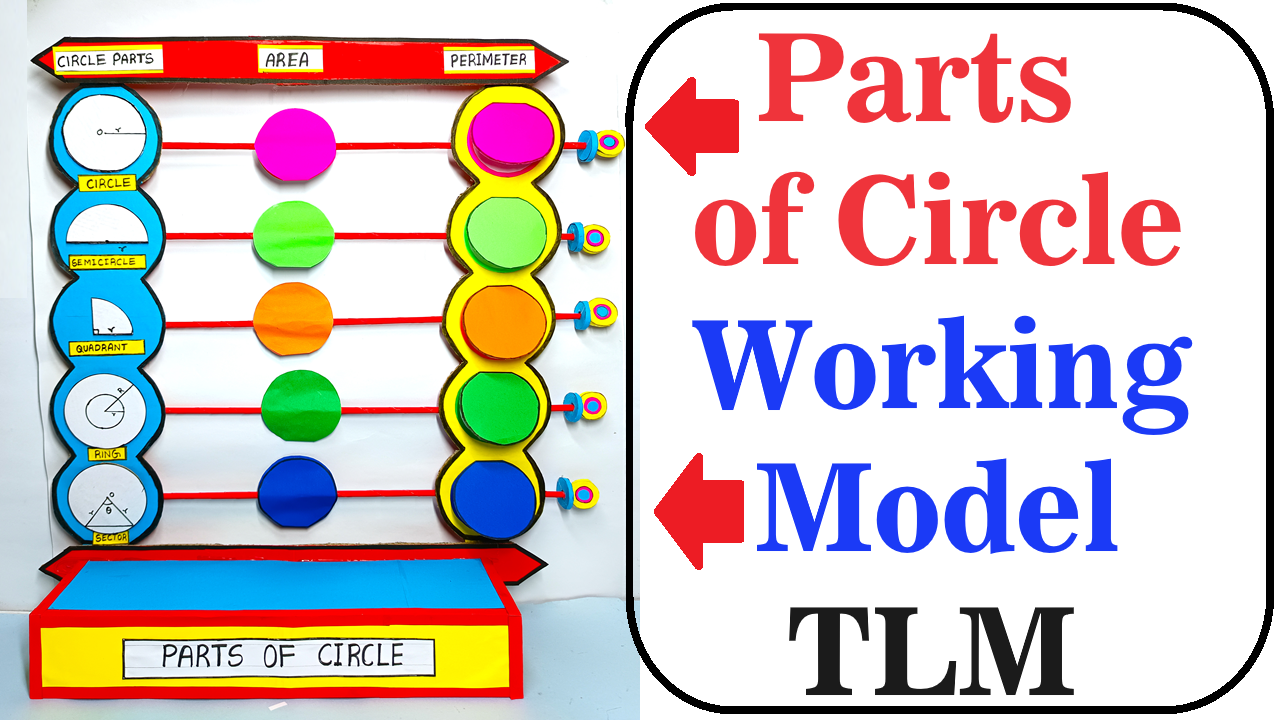
Creating a working model to demonstrate the parts of a circle for a mathematics teaching and learning material (TLM) is a great way to help students understand the components of a circle.
Here’s a simple yet effective way to make it:

Materials Needed:
- Cardboard or foam board
- Compass
- Protractor
- Ruler
- Scissors
- Colored paper or paint
- Marker
- Pushpin
- String or yarn
- Thumbtack
- Glue
Steps by Step Video Instructions on parts of circle :
1. Prepare the Base:
- Take a piece of cardboard or foam board as the base for your model.
- Cut it into a large circle to represent the circle itself.
2. Divide the Circle:
- Using a protractor, mark the center of the circle.
- With the compass, draw a large circle to represent the circumference of the circle.
- Draw diameters, radii, and chords within the circle, originating from the center.
- Label each part accordingly using markers.
3. Create a Sector:
- Cut out a sector from colored paper or cardboard.
- This will represent a portion of the circle enclosed by two radii and an arc.
- Label the parts of the sector: radius, arc, central angle, and area.
4. Make a Segment:
- Cut out a segment from colored paper or cardboard.
- This will represent a portion of the circle enclosed by a chord and an arc.
- Label the parts of the segment: chord, arc, and area.
5. Form a Sector and Segment with String:
- Tie one end of a string to a thumbtack and push the tack into the center of the circle.
- Attach the other end of the string to a pencil or marker.
- Stretch the string to the circumference of the circle and draw an arc.
- This forms a sector.
- Repeat the process for another length of string to form a segment.
6. Attach Parts to the Base:
- Glue the colored paper sector and segment onto the base.
- Ensure they are placed correctly according to their labels.
7. Label and Explain:
- Label each part of the model: center, circumference, radius, diameter, chord, arc, sector, and segment.
- Write brief explanations of each part next to them.
8. Demonstrate:
- Use the model to demonstrate the properties of each part of the circle.
- Show how the radius, diameter, chord, arc, sector, and segment are related.
Explanation:
- The model represents a circle and its various parts: center, circumference, radius, diameter, chord, arc, sector, and segment.
- By using colored paper, string, and labels, each part is visually distinct and identifiable.
- The model can be used to teach students about the properties and measurements of different parts of a circle.
This working model effectively demonstrates the parts of a circle and can be a valuable tool in teaching geometry concepts.