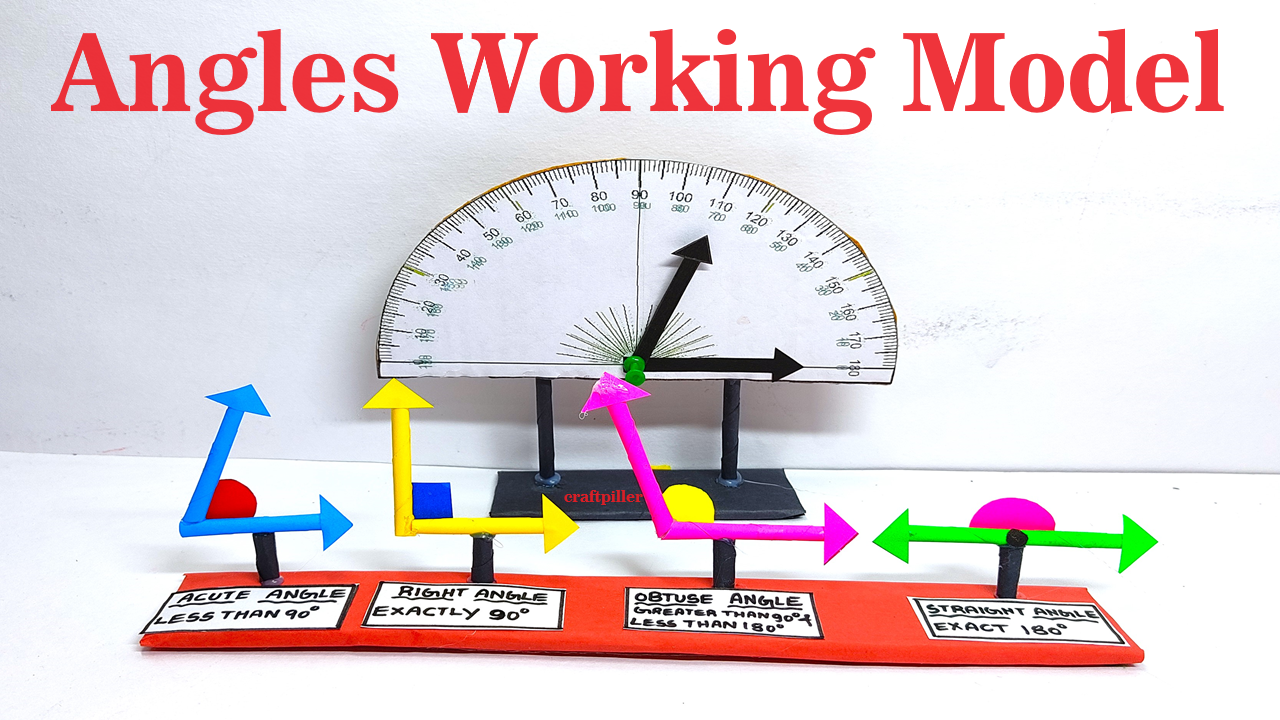
An angles working model provides an interactive and visual approach to exploring angle concepts, aiding learners in comprehending angle measurement, classification, and properties in a dynamic and engaging manner.
Creating a working model to demonstrate angles using cardboard and colored paper is a great hands-on approach to help students understand different types of angles.

Here’s how you can make it:
Materials Needed:
- Cardboard
- Colored paper (different colors)
- Ruler
- Pencil
- Protractor
- Scissors
- Glue or tape
- Marker
Steps by Steps video instructions on angles:
1. Prepare the Base:
- Take a piece of cardboard and cut it into a large square or rectangle to serve as the base of your model.
2. Draw Lines:
- Use a ruler and pencil to draw several straight lines of varying lengths across the cardboard base. These lines will represent the arms of different angles.
- Ensure the lines intersect each other at various points.
3. Create Angle Labels:
- Cut out small rectangles or squares from colored paper.
- Write labels for different types of angles on each paper piece: acute angle, right angle, obtuse angle, straight angle, and reflex angle.
4. Formulate the Model:
- Use the lines you drew as arms of angles.
- Identify and label each angle on the cardboard base. For example, label a right angle where two lines intersect to form a 90-degree angle.
5. Construct Angles:
- Use colored paper to create angle shapes for each labeled angle.
- For acute angles, cut out triangles with sharp corners.
- For right angles, cut out rectangles or squares.
- For obtuse angles, cut out angles larger than a right angle but smaller than a straight angle.
- For straight angles, cut out long strips.
- For reflex angles, cut out angles larger than a straight angle.
6. Attach Angles:
- Glue or tape each angle shape onto the appropriate intersection point on the cardboard base.
- Ensure the angles are positioned accurately and match their labels.
7. Optional: Label Degrees:
- Using a protractor, measure the degrees of each angle and write the measurements next to them.
- For example, write “90°” next to the right angle, “60°” next to the acute angle, and so on.
8. Decorate (Optional):
- Add decorative elements to make the model visually appealing.
- You can use markers to add designs or patterns to the angles or cardboard base.
9. Display and Explain:
- Once completed, display your working model in the classroom or on a wall where students can easily see it.
- Use the model to explain the concept of angles, their types, and measurements.
- Encourage students to interact with the model by identifying and measuring angles.
With this working model, students can visually grasp the concept of angles and their types, which will aid in their understanding of geometry.