What is water cycle?
The water cycle is nature’s way of recycling water around the Earth. It’s like a big, continuous loop where water moves from one place to another in different forms. Here’s a simple explanation:
- Evaporation: The water cycle starts with the sun heating up water in rivers, lakes, and oceans. This heat turns the water into vapor (a gas) and it rises up into the air.
- Condensation: As the warm air rises, it cools down high in the sky. When the water vapor cools, it turns back into tiny droplets of water. These droplets gather together to form clouds.
- Precipitation: When the clouds get heavy with water droplets, they release the water back to the ground as rain, snow, sleet, or hail. This is called precipitation.
- Runoff: After falling on the ground, the water flows downhill, gathering in rivers, streams, and oceans. Some of it also soaks into the ground, becoming groundwater.
- Collection: The water that flows downhill eventually makes its way back to the oceans, where the whole cycle starts again.
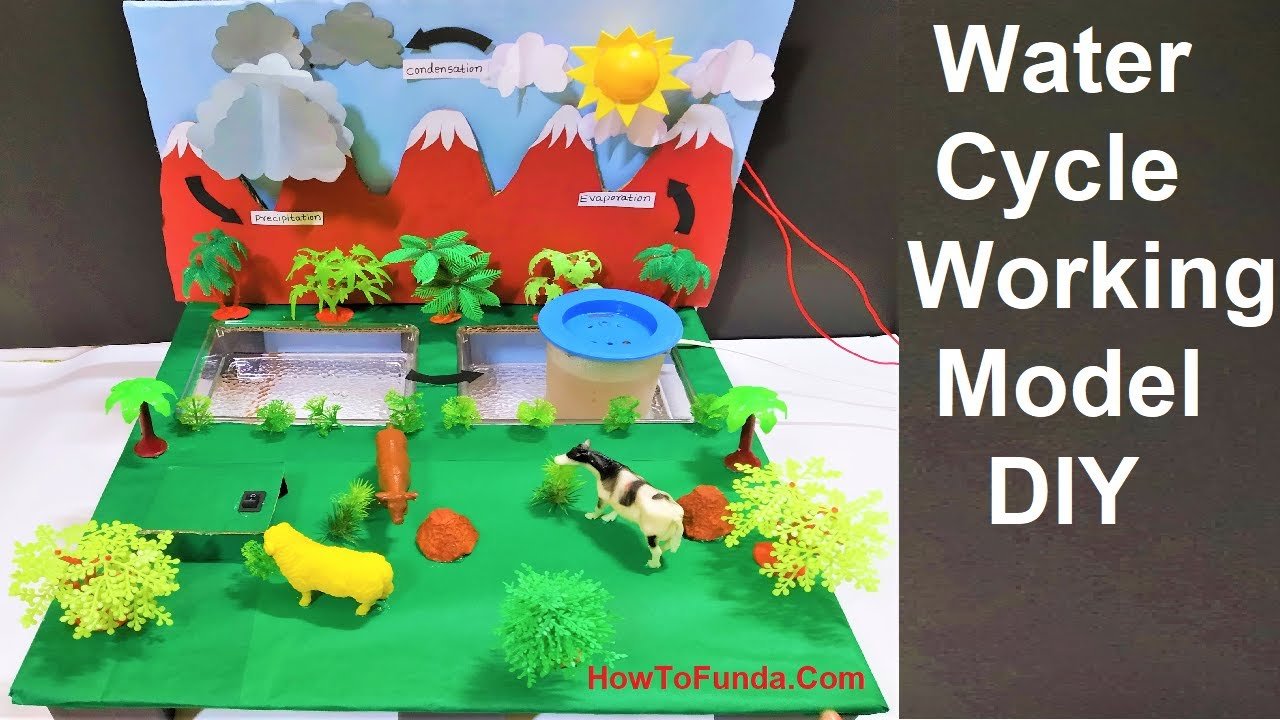
How to make water cycle working model
Creating a water cycle working model using a DC pump, vaporizer, sunlight using a bulb, cardboard, and colored paper can be an engaging and educational project.

Here’s a step-by-step guide:
Materials Needed:
- Cardboard sheets
- Colored paper
- DC water pump
- Vaporizer or humidifier
- Small water reservoir or container
- Small plastic tubing
- Small plastic container or bowl
- LED bulb or lamp (to simulate sunlight)
- Small plastic or glass container (to collect condensed water)
- Glue or adhesive
- Scissors
- Markers or pens
Step by Step Video Instructions Water cycle working model :
1. Prepare the Base:
- Cut a large rectangular piece of cardboard to serve as the base of your model.
- This will be the foundation for building your water cycle model.
2. Create the Sunlight Simulation:
- Attach an LED bulb or lamp to one corner of the cardboard base using glue or tape.
- This will represent the sunlight source in your model.
3. Construct the Water Reservoir and Pump System:
- Place a small water reservoir or container at the opposite corner of the cardboard base from the LED bulb.
- Connect a DC pump to the water reservoir using small plastic tubing.
- Position the pump so that it can draw water from the reservoir.
4. Build the Vaporization Chamber:
- Place a small plastic container or bowl on the cardboard base near the LED bulb.
- Fill the container with water to simulate the water source for evaporation.
- Position the container so that it is directly exposed to the heat from the LED bulb.
5. Create the Condensation Area:
- Place a small plastic or glass container on the cardboard base near the vaporization chamber.
- This will collect the condensed water vapor.
6. Decorate the Model:
- Use colored paper to add details and labels to the different components of the model, such as “Sunlight,” “Evaporation,” “Condensation,” and “Precipitation.”
- Decorate the cardboard base with drawings or illustrations of clouds, raindrops, and other elements of the water cycle.
7. Assembly and Testing:
- Assemble all the components of the model according to the layout described above.
- Fill the water reservoir with water and turn on the DC pump to start the water cycle process.
- Observe how the heat from the LED bulb causes water to evaporate from the vaporization chamber, condense on the walls of the container, and drip into the condensation area, simulating the water cycle in nature.
Educational Value:
- Use the model to demonstrate the different stages of the water cycle: evaporation, condensation, and precipitation.
- Explain how sunlight provides the energy needed for evaporation to occur.
- Discuss the importance of the water cycle in regulating Earth’s climate and supporting life on the planet.