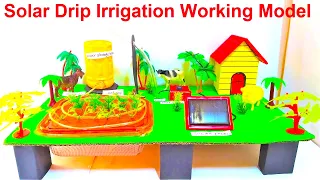
In this post we write about making of the solar drip irrigation working model for science exhibition project – diy at home
Creating a solar drip irrigation working model making using plastic tray, bottle, solar panel , 9 v battery , cardboard and color paper , sand & pipes

Here’s a step-by-step guide to help you build the model:
Materials needed:
- Plastic tray (to hold the soil and plants)
- Plastic bottle (to store and regulate water flow)
- Solar panel (to generate power)
- 9V battery (to store excess solar energy)
- Cardboard (for support and structure)
- Color paper (for decoration)
- Sand (for filling the tray)
- PVC pipes (for distributing water)
Step 1: Prepare the plastic tray Take the plastic tray and fill it with sand. The sand will act as the growing medium for the plants.
Step 2: Create the water reservoir Cut the plastic bottle in half horizontally. Use the bottom half as the water reservoir. Make a small hole in the bottle cap to regulate the water flow.
Step 3: Construct the support structure Using the cardboard, create a support structure that will hold the solar panel at an angle. The solar panel should be facing the sun to generate power efficiently. You can also use some color paper to decorate the structure and make it visually appealing.
Step 4: Install the solar panel and battery Attach the solar panel to the support structure at the desired angle. Connect the solar panel’s output to the 9V battery to store the generated energy.
Step 5: Set up the drip irrigation system Connect a PVC pipe to the small hole in the bottle cap. Position the other end of the pipe over the sand-filled tray. The water will flow from the bottle’s bottom half through the pipe and drip onto the sand, providing water to the plants.
Step 6: Test the system Place your model in direct sunlight and observe the water dripping onto the sand. Make sure the water flow is consistent and adjust the bottle cap if necessary.
Step 7: Planting Now that your drip irrigation system is set up, you can plant small potted plants or seeds in the sand-filled tray. Make sure the plants receive enough sunlight for optimal growth.
Step 8: Monitor and maintain Keep an eye on your plants and ensure the water level in the bottle is sufficient to meet their needs. Refill the bottle as necessary and take care of your plants.
#solardripirrigation #solar #dripirrigationsystem #dripirrigation #workingmodel #craftpiller