
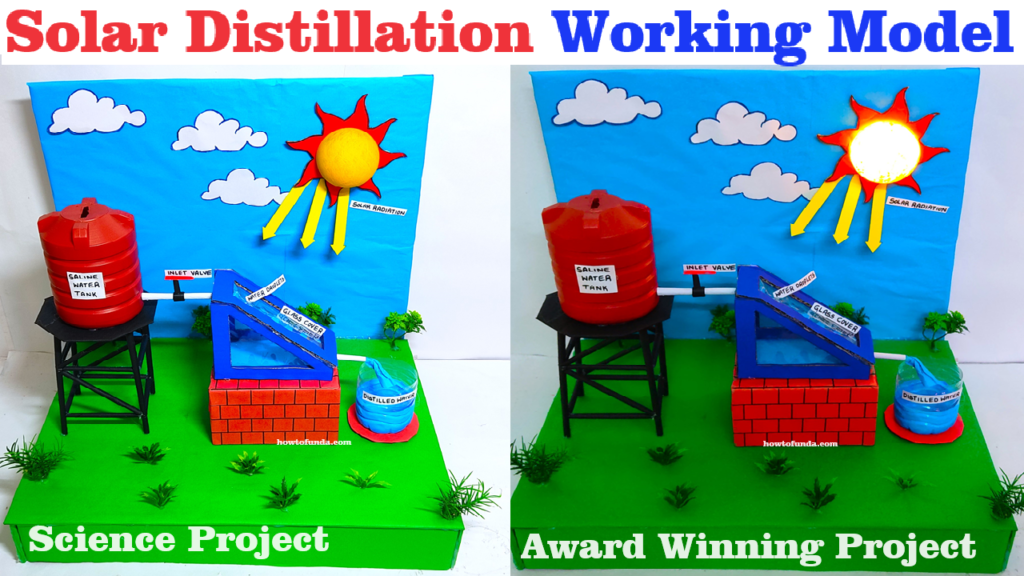
This model will demonstrate the principles of solar distillation. The Solar Sun light heats the water in the tank, causing it to evaporate. The water vapor then condenses on the transparent sheet and flows down into the collection tray, simulating the natural water cycle driven by solar energy.
Creating a solar distillation model using cardboard, a transparent sheet, an LED light, and a bulb cover to simulate the Earth is a great educational project.
Here’s a step-by-step guide to help you build it:
Materials Needed:
- Cardboard – To construct the main structure.
- Transparent sheet (plastic or glass) – To allow light to enter while preventing water vapor from escaping.
- LED light – To simulate the Sun’s radiation.
- Bulb cover (preferably hemispherical and transparent) – To simulate the Sun.
- Water tank – To hold the undistilled water.
- Tray – To collect distilled water.
- Black paint or black paper – To enhance absorption of light.
- Tape or glue – To assemble the parts.
- Scissors or craft knife – For cutting cardboard.
- Small container – To simulate the initial water source.
Step-by-Step Instructions:
Step 1: Create the Base Structure
- Cut the Base and Walls:
- Cut a large rectangle from the cardboard to serve as the base of the model.
- Cut four rectangular pieces to serve as the walls of the solar still. Make sure the walls are tall enough to hold the water tank and the transparent sheet at an angle.
- Assemble the Walls:
- Attach the walls to the base using tape or glue, forming an open-top box.
Step 2: Prepare the Water Tank
- Install the Water Tank:
- Place a small container (water tank) at one end of the base. This will hold the undistilled water.
- Paint the inside of the container black or line it with black paper to increase the absorption of light, enhancing the evaporation process.
Step 3: Create the Condensation Surface
- Position the Transparent Sheet:
- Cut the transparent sheet to fit over the top of the cardboard structure, but leave a gap at the higher end for the LED light.
- Position the transparent sheet at an angle so that condensed water will run down towards the collection tray.
- Secure the Transparent Sheet:
- Secure the transparent sheet in place using tape or glue. Make sure it’s sealed well along the edges to prevent vapor from escaping.
Step 4: Install the Collection Tray
- Place the Tray:
- Position a tray at the lower end of the angled transparent sheet to collect the distilled water.
Step 5: Simulate the Sun’s Radiation
- Prepare the LED Light:
- Install the LED light at the higher end of the transparent sheet. This will act as the Sun, providing the necessary heat for evaporation.
- Ensure the light is directed towards the water tank.
- Use the Bulb Cover:
- Place the transparent bulb cover over the LED light to simulate the Earth. This will diffuse the light evenly over the water tank.
Step 6: Testing and Final Adjustments
- Fill the Water Tank:
- Pour some water into the small container (water tank).
- Turn on the LED Light:
- Turn on the LED light and observe the process. The water in the tank should heat up, evaporate, condense on the transparent sheet, and then trickle down into the collection tray.
- Check for Leaks:
- Ensure there are no gaps where water vapor could escape.