In this article post we write about making of the room heater working model science project for exhibition – simple and easy – diy using cardboard | howtofunda
#roomheater #workingmodel #scienceexhibition #sciencefair #scienceproject #heater #cardboard

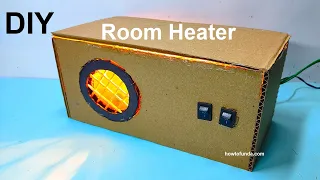
Creating a room heater working model is an excellent project to demonstrate the principles of heating and air circulation.
Here’s a step-by-step guide to making this model using a big AC bulb, a DC fan, a 9V battery, and a cardboard box with a window covered by chopsticks.
Materials Needed:
- Big AC bulb (to act as the heating element)
- DC fan
- 9V battery
- Cardboard box
- Chopsticks
- Color paper
- Scissors or craft knife
- Glue or hot glue gun
- Electrical wires and tape
- Switch (optional)
- Ruler
- Markers or pens
Step by step Guide on Making Room Heater
1. Prepare the Cardboard Box
- Base Preparation:
- Select a cardboard box large enough to accommodate the AC bulb and the DC fan.
- Cut a circular hole on one side of the box to fit the AC bulb. This will act as the window for the heat element.
- Chopstick Window:
- Cut the chopsticks to size and glue them horizontally across the circular hole to create a window-like appearance.
2. Install the Heating Element (AC Bulb)
- AC Bulb Installation:
- Securely fit the AC bulb into the circular hole. Ensure it is stable and positioned such that it will not touch the cardboard when in use.
- Note: Be cautious when using an AC bulb as it will get hot. Ensure all safety precautions are taken to avoid any fire hazards.
3. Install the Fan
- DC Fan Installation:
- Attach the DC fan to the opposite side of the box, facing inward, to circulate the air within the box.
- Make a small hole for the fan’s wires to pass through.
- Wiring the Fan:
- Connect the DC fan to the 9V battery using electrical wires. You can also add a switch to control the fan. Secure all connections with electrical tape.
4. Create the Airflow Path
- Air Vents:
- Cut small air vents on the sides of the box to allow fresh air to enter and warm air to exit.
- Internal Baffle (optional):
- Create a baffle inside the box using a piece of cardboard to direct the airflow from the fan towards the bulb and then out through the vents. This helps in better circulation of warm air.
5. Assemble the Model
- Assemble Components:
- Place the AC bulb in its holder and ensure it is properly wired and secure.
- Attach the DC fan to the box and ensure it is wired to the battery.
- Decorate the Box:
- Cover the exterior of the box with color paper for a neat finish. Label the components (e.g., “Heating Element,” “Fan,” “Air Vent”).
6. Demonstrate the Model
- Power On:
- Turn on the AC bulb (if connected to an AC power source) and the DC fan using the 9V battery.
- Observe how the fan circulates the air within the box, and the warm air exits through the vents.
- Safety Precautions:
- Ensure the model is supervised at all times during operation. Do not leave it unattended, especially since it involves an AC bulb.
By following these steps, you can create an interactive and educational room heater working model.