A simple mobile projector using a cardboard box, convex lens, and mobile phone works by utilizing the lens to focus light from the phone’s screen, projecting an enlarged image onto a surface.
By adjusting the distance between the phone and the lens and ensuring a dark environment, this model effectively demonstrates basic principles of optics and projection technology.

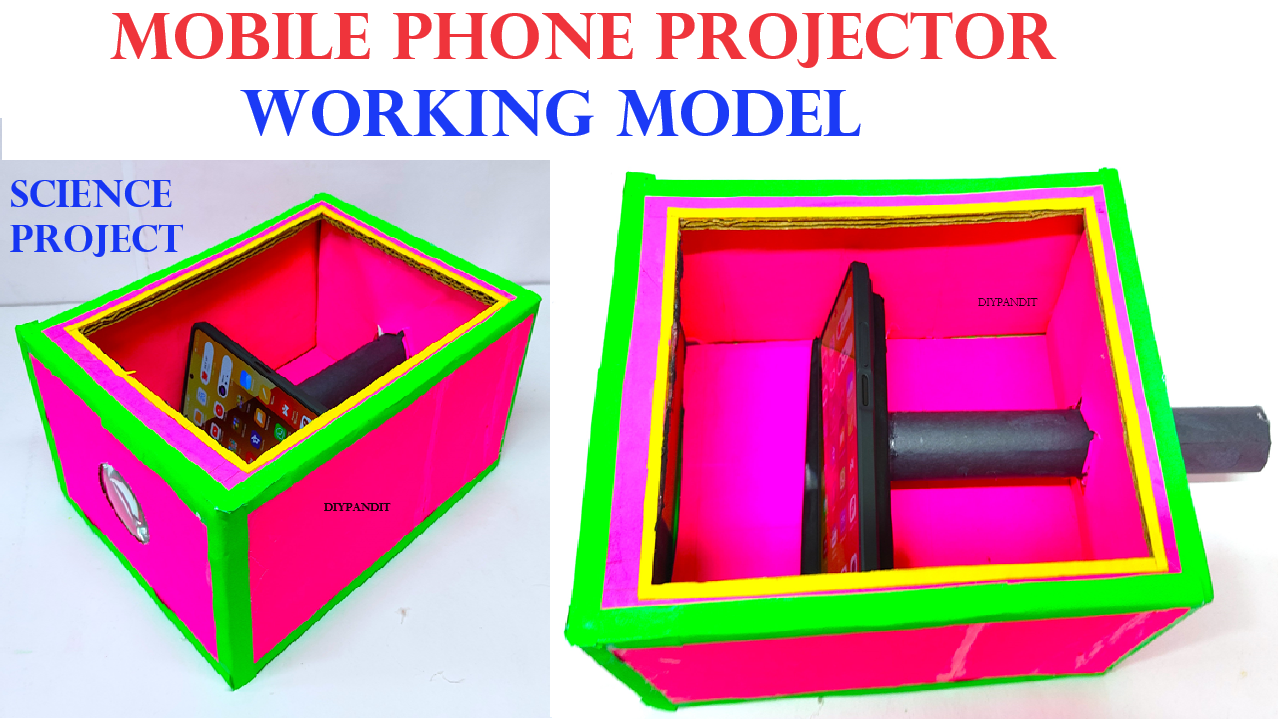
Creating a working model of a projector using a cardboard box, a mobile phone, and a cardboard pipe can be a fun and educational science project for a school exhibition. This project demonstrates basic optics principles, including magnification and light projection.
Materials Needed:
- Cardboard box (large enough to fit your mobile phone)
- Mobile phone
- Convex lens (magnifying glass lens)
- Cardboard pipe (for moving the mobile phone)
- Tape or glue
- Scissors or a craft knife
- Ruler
- Marker
- White paper or a piece of white cloth (for the projection screen)
- Dark room or a space where you can control lighting
Step by step video Instructions:
- Prepare the Cardboard Box:
- Choose a sturdy cardboard box. Cut out a rectangular opening on one side of the box that matches the size of your convex lens.
- Secure the lens in this opening using tape or glue. Ensure it is firmly in place and centered.
- Create the Phone Holder:
- Cut a piece of cardboard slightly larger than your mobile phone. This will act as the phone holder.
- Cut two parallel slits on either side of the box’s interior to hold the cardboard pipe. These slits should allow the pipe to move back and forth.
- Attach the Cardboard Pipe:
- Insert the cardboard pipe through the slits in the box. This pipe will act as a slider to move the phone back and forth.
- Attach the phone holder to the cardboard pipe using tape or glue. Make sure it is secure and can move smoothly within the box.
- Position the Phone:
- Place your mobile phone on the phone holder, screen facing the lens. Secure it with tape or an elastic band to prevent it from falling.
- Create the Projection Screen:
- Place a piece of white paper or a white cloth on a wall or a flat surface to act as your projection screen. Ensure it is positioned directly in front of the lens and at a suitable distance.
- Prepare the Phone for Projection:
- Adjust the phone’s display settings to maximum brightness.
- Flip the screen upside down. This is because the lens will invert the image, so the projected image will appear correctly oriented.
- Test and Adjust:
- Turn off the lights in the room to make it as dark as possible.
- Play a video or display an image on your mobile phone.
- Move the phone holder back and forth using the cardboard pipe to adjust the focus until the image on the screen is clear.
- Enhance the Projection:
- If the image is not bright enough, try using a more powerful lens or placing the projector closer to the screen.
- Ensure there are no light leaks from the box. Cover any holes or gaps with black tape or additional pieces of cardboard.