Points and lines are foundational concepts in geometry, forming the basis for more complex geometric structures and theorems. A point represents a precise location in space with no dimensions—no length, width, or height.
It is typically denoted by a dot and labeled with a capital letter. A line, on the other hand, is an infinite set of points extending in both directions with one dimension—length—but no width or height.
Lines can be straight or curved, but in elementary geometry, we usually refer to straight lines. Understanding the properties and relationships between points and lines is essential for studying geometry, algebra, and other branches of mathematics.
Creating a points and lines math model using cardboard and colored paper is a great way to illustrate basic geometry concepts. Here’s how you can make it:

Materials Needed:
- Cardboard or foam board
- Colored paper (different colors)
- Ruler
- Pencil
- Scissors
- Glue or tape
- Markers
Steps by step video instructions:
1. Prepare the Base:
- Take a piece of cardboard or foam board as the base for your model.
- Cut it into a large square or rectangle to serve as the display area.
2. Draw Points:
- Use a pencil to draw dots of different sizes on the base to represent points.
- You can draw small circles or use colored paper cut into small circles for points.
- Ensure you have a variety of points spread across the base.
3. Label Points:
- Write labels (letters or numbers) next to each point to identify them.
- Use a marker for clear visibility.
4. Draw Lines:
- Use a ruler and pencil to draw straight lines between various points on the base.
- Draw different types of lines such as horizontal, vertical, diagonal, and slanted lines.
- Ensure the lines are of different lengths and angles.
5. Cut Out Lines (Optional):
- Cut thin strips of colored paper to represent lines.
- Label each strip with its length or name if necessary.
6. Create Intersections:
- Draw points where the lines intersect.
- Label these points with their corresponding letters or numbers.
7. Arrange Points and Lines:
- Arrange the points and lines on the base to create various geometric shapes and patterns.
- For example, connect points to form triangles, squares, rectangles, or any other polygons.
8. Glue or Tape:
- Once you’re satisfied with the arrangement, glue or tape the points and lines onto the base.
- Ensure they are securely attached and won’t fall off.
9. Label Shapes:
- Write labels next to the shapes you’ve created (e.g., triangle, square, etc.).
- You can also label specific lines or segments if needed.
10. Decorate (Optional):
- Use markers or colored paper to add decorative elements to your model.
- For example, draw patterns around the shapes or color-code the points and lines.
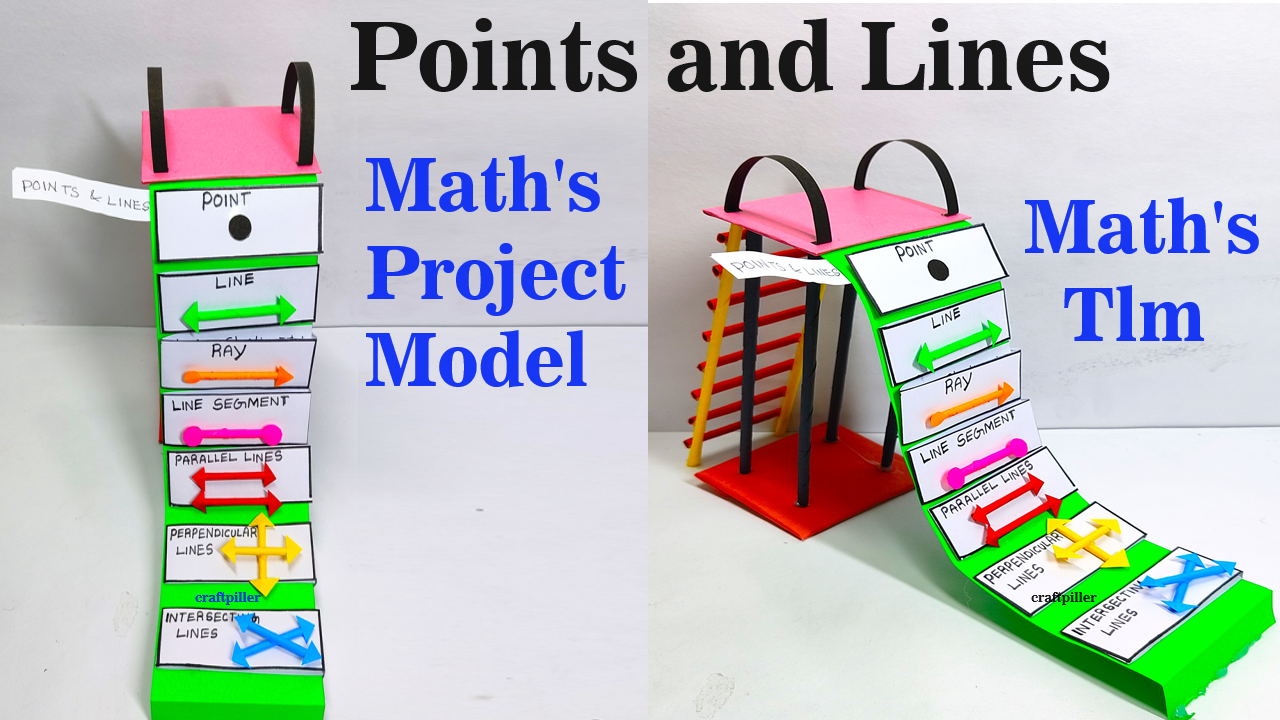
11. Explain and Demonstrate:
- Display your points and lines model at the math exhibition or in the classroom.
- Use the model to explain basic geometry concepts such as points, lines, line segments, and shapes.
- Encourage students to interact with the model by identifying points, lines, and shapes.
By following these steps, you can create an informative and visually appealing points and lines math model for your math exhibition or classroom.