
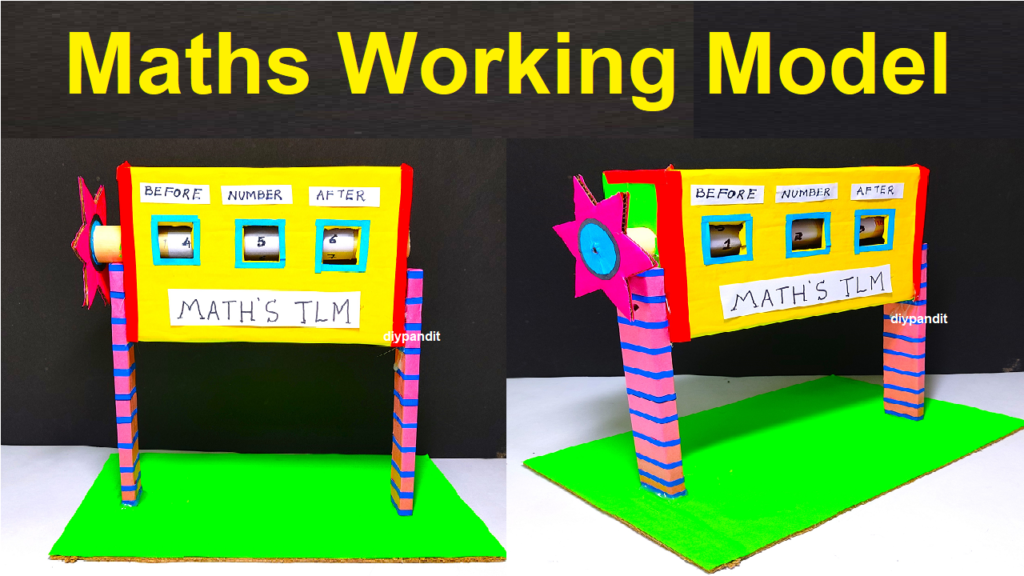
Creating a “Before and After” 3D model for a math project using a cardboard box and color paper is a creative and engaging idea. This model can help students visualize the concept of numbers and their transformations.
Here’s a step-by-step guide:
Materials Needed:
- Cardboard box
- Color paper
- Scissors
- Glue
- Markers
- Pencil
- Ruler
- Craft knife (optional for precision cutting)
- Wooden dowels or cardboard strips (for stands)
Video Steps by Steps on Numbers:
1. Prepare the Box:
- Open the cardboard box and remove the top flaps.
- Reinforce the sides if needed for stability.
2. Create the Number Shapes:
- Cut out large, bold numbers from color paper. Choose two numbers that represent a “before” and “after” scenario. For example, you might choose 5 and 10.
- Ensure the numbers are large enough to be easily visible inside the box.
3. Design the “Before” Scene:
- Use color paper to create a background for the “before” scene inside the box. This could be a simple representation of a setting or context related to the chosen numbers. For example, if the numbers represent apples, you might have a tree with five apples.
4. Design the “After” Scene:
- Create a different background for the “after” scene. Use color paper to represent the transformation or change. For instance, if the “before” scene had five apples on a tree, the “after” scene could show ten apples.
5. Attach the Numbers:
- Glue the “before” and “after” numbers onto the corresponding scenes in the box. Ensure they are positioned prominently and are easily visible.
6. Create Stands:
- Cut cardboard strips or use wooden dowels to create stands for the numbers.
- Attach the stands to the back of the numbers and then attach them securely to the base of the box. This gives the illusion that the numbers are standing in the scene.
7. Add Labels:
- Label the scenes as “Before” and “After” using color paper or markers.
8. Decorate the Box Exterior:
- Use additional color paper to decorate the exterior of the box. You can add relevant mathematical symbols, patterns, or any other elements that enhance the overall theme.
9. Title and Explanation:
- Create a title for your model using color paper or markers. Place it prominently on the box.
- Include a brief explanation or key to help viewers understand the mathematical concept being illustrated.
10. Display:
- Set up your model on a stable surface during your math project presentation or exhibition.
This “Before and After” 3D model not only demonstrates the concept of numbers in a dynamic way but also provides an opportunity for creative expression. It allows students to showcase their understanding of mathematical transformations using a tangible and visually appealing model.