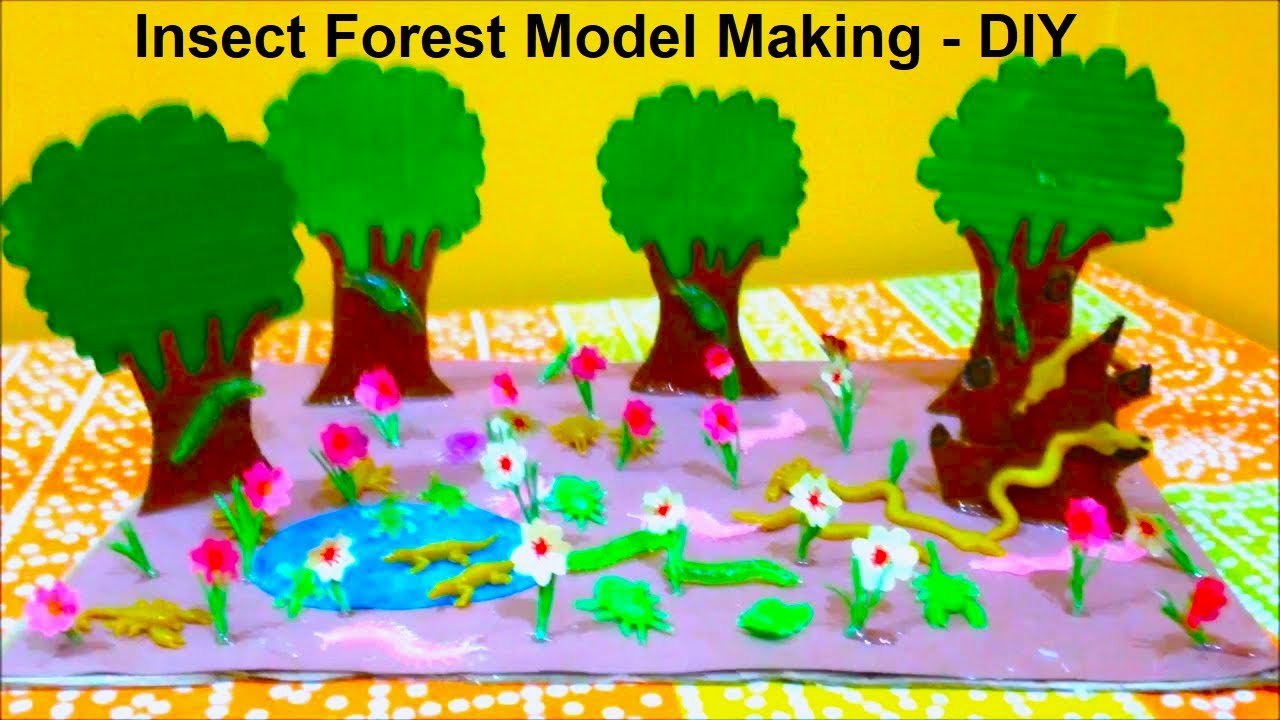
This video mainly focuses on making the insect forest craft model | insect amusement park model | insect forest model for school project with the theme of best out of waste project which you can easily do it at home.
Making an insect forest or insect amusement park model for a school project using cardboard and color paper is a fun and educational way to learn about insects and their habitats.
Here’s a step-by-step guide to help you build this project:
Materials Needed:
- Cardboard
- Color paper
- Scissors or craft knife
- Glue (hot glue gun or white glue)
- Markers, crayons, or paint
- Small plastic insects (optional, you can also make insects from paper)
- Green craft paper or green paint (for grass and trees)
- Craft sticks or toothpicks (for support structures)
Step by Step Video Instructions:
Step 1: Prepare the Base
-
Cut the Base:
- Cut a large piece of cardboard to act as the base of your insect forest or amusement park. Ensure it’s sturdy enough to hold all the elements you plan to add.
-
Create the Ground:
- Cover the cardboard base with green craft paper or paint it green to represent grass. Allow the paint to dry if you choose to paint.
Step 2: Make Trees and Plants
-
Create Trees:
- Roll green paper into cone shapes and glue the ends to make trees. Alternatively, cut tree shapes out of green paper and glue them onto the base.
- Use brown paper or paint to create tree trunks. Attach the tree tops to the trunks and then glue them to the base.
-
Add Bushes and Plants:
- Cut small bush shapes out of green paper and glue them around the base. You can also use fake moss or small twigs for a more realistic effect.
Step 3: Create Insects
-
Paper Insects:
- Draw and cut out different insect shapes (like butterflies, beetles, and ants) from color paper. Decorate them with markers, crayons, or paint.
- Use pipe cleaners to create legs and antennae. Attach them to the paper insects with glue.
-
Plastic Insects (Optional):
- If you have small plastic insects, you can use these instead of making them from paper.
Step 5: Assemble the Model
-
Attach Insects:
- Place your paper or plastic insects around the forest or amusement park. You can glue them to trees, plants, or amusement park rides.
-
Add Details:
- Use markers or paint to add details to the scene, like flowers, rocks, or water bodies.
- Add any other decorative items to enhance the look of your model.
insect forest model making explanation:
This project demonstrates a creative way to learn about different insects and their habitats, combining natural and fun elements to show how insects might interact in a forest or amusement park setting.
- Trees and Plants: These represent the natural habitat of many insects, providing shelter and food.
- Insects: We have various insects like butterflies, beetles, and ants, each made from paper and decorated with markers and pipe cleaners for legs and antennae.
- Details: The additional decorations like flowers, rocks, and water bodies make the scene more realistic and engaging.
By following these steps, you can create a vibrant and educational insect forest or amusement park model. This project helps students learn about insects while having fun with arts and crafts.

