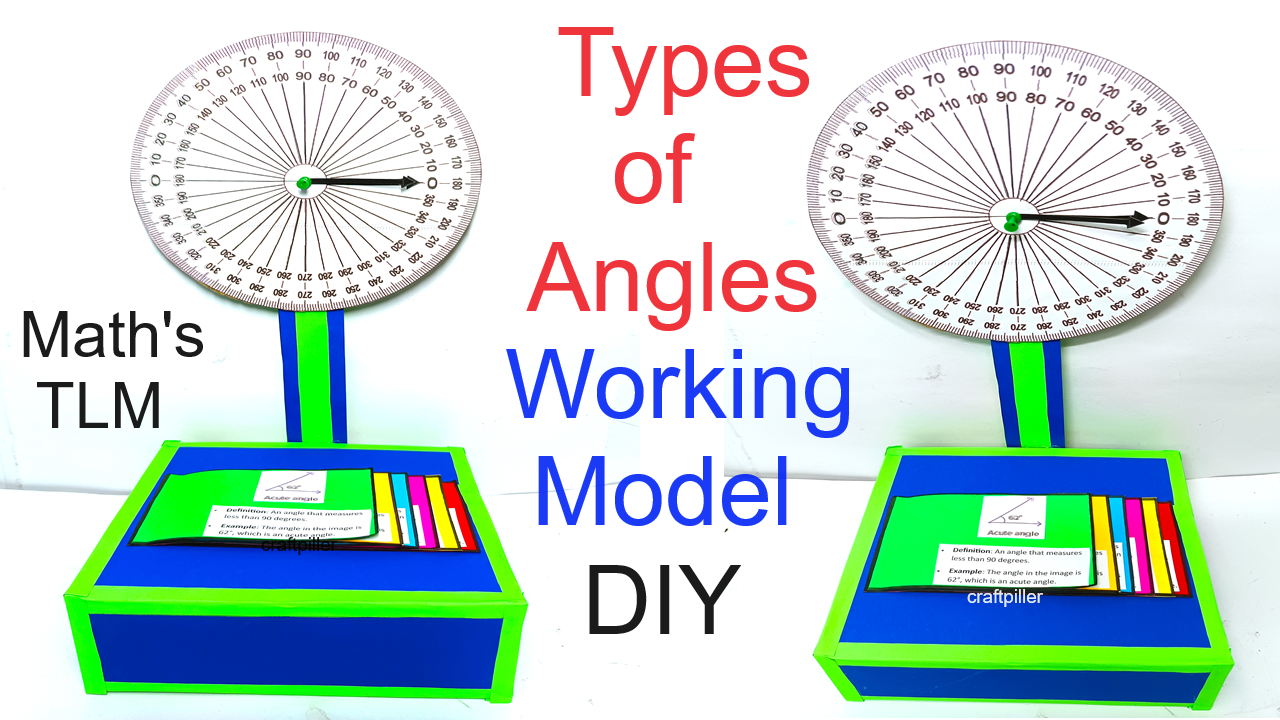
Creating a working model that demonstrates the types of angles using a protractor and their definitions is an excellent way to visually teach students about angles.

The model will showcase various angles like acute, right, obtuse, straight, and reflex, with the protractor as a reference.
Materials Needed:
- Cardboard or Foam Board: For the base and structure.
- Protractor (360 degrees): To demonstrate the angles.
- Colored Paper or Markers: To draw and highlight the angles.
- Glue and Tape: For assembling the parts.
- Scissors or Craft Knife: For cutting materials.
- Brass Fastener or Paperclip: To allow the angles to be adjustable.
- Labels: To identify and define the different types of angles.
Step-by-Step Video Instructions:
1. Creating the Base:
- Cut the Base: Cut a large piece of cardboard or foam board to serve as the base of your model.
- Attach the Protractor: Place the protractor at the center of the base. Make sure it is firmly attached using glue or tape. The flat edge of the protractor should be aligned with the edge of the cardboard.
2. Creating the Movable Angle Arm:
- Cut the Angle Arm: Cut a strip of cardboard or thick paper about 1–2 inches wide and long enough to reach from the center of the protractor to the edge.
- Attach the Arm to the Protractor: Use a brass fastener or paperclip to attach one end of the angle arm to the center of the protractor. This will allow the arm to rotate freely and measure different angles.
- Mark a Fixed Line: Draw a fixed line on the base extending from the center of the protractor to the edge. This line will act as the base of your angles.
3. Demonstrating Different Angles:
- Measure and Mark Angles: Move the angle arm to various positions to demonstrate different types of angles. Mark and label the following:
- Acute Angle: Less than 90 degrees.
- Right Angle: Exactly 90 degrees.
- Obtuse Angle: Greater than 90 degrees but less than 180 degrees.
- Straight Angle: Exactly 180 degrees.
- Reflex Angle: Greater than 180 degrees but less than 360 degrees.
- Draw and Color: Use colored markers or paper to fill in each angle, making them visually distinct.
4. Adding Definitions:
- Write Definitions: On separate pieces of paper or directly on the base, write the definitions of each type of angle. Include examples of where these angles might be found in everyday life.
- Attach the Definitions: Glue the definitions near the corresponding angles on the base.
5. Final Touches:
- Decorate the Model: You can decorate the model to make it more appealing, such as adding a title like “Types of Angles” at the top.
- Label the Protractor: Clearly label the protractor with degree marks if they are not already present. Highlight key angles like 0°, 90°, 180°, and 360°.
Display and Demonstration:
- Interactive Demonstration: Show how the angle arm can be rotated to form different angles. Explain the types of angles as the arm moves to the appropriate degree mark.
- Educational Explanation: Discuss where these angles are found in the real world, such as in architecture, art, or nature.
This interactive model will help students visualize and understand different angles, making the learning process more engaging and effective.

