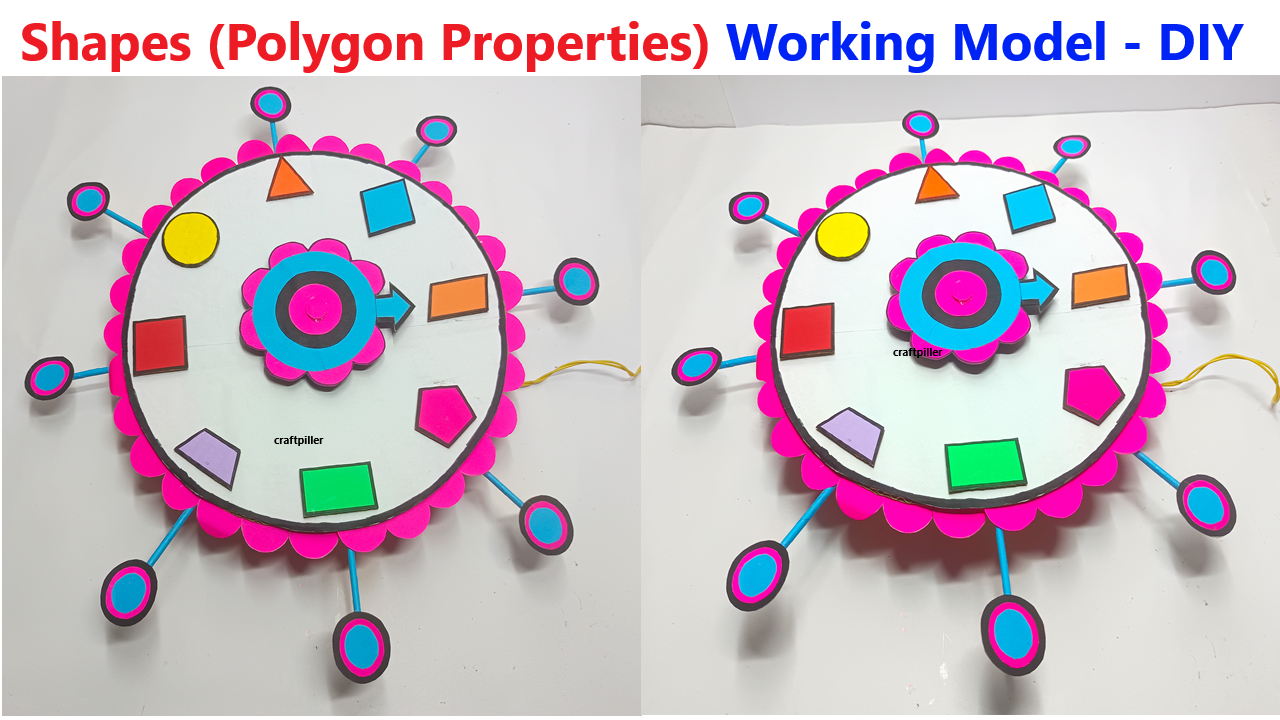
Creating a working model to demonstrate the properties of polygons (including sides, vertices, and angles) is an engaging way to visualize geometric concepts.
This project can be interactive, allowing students to explore different polygons and understand their properties.
Objective:
To build a model that illustrates various polygons, highlighting their sides, vertices, and angles, while providing a hands-on learning experience.

Materials Needed:
- Cardboard or foam board (for creating polygon shapes)
- Colored paper (for decorating and labeling polygons)
- Scissors (for cutting shapes)
- Ruler (for measuring and drawing straight lines)
- Protractor (for measuring angles)
- Markers or pens (for labeling and decoration)
- Push pins or brads (for creating movable angles)
- String or yarn (optional, for demonstrating perimeter)
- Glue or tape (for assembling the model)
- Baseboard (like a piece of cardboard) to mount the polygons for display
Steps to Create the Polygon Properties Model:
1. Select and Prepare the Polygons:
- Choose a variety of polygons to include in your model, such as:
- Triangle (3 sides)
- Quadrilateral (4 sides, e.g., square, rectangle, trapezoid)
- Pentagon (5 sides)
- Hexagon (6 sides)
- Heptagon (7 sides)
- Octagon (8 sides)
- Draw each polygon on the cardboard or foam board using a ruler to ensure straight lines. Make each polygon large enough to be visible.
2. Cut Out the Shapes:
- Carefully cut out each polygon using scissors. Ensure that all sides are straight and that the shapes are recognizable.
3. Label the Shapes:
- Use colored paper or markers to label each polygon with its name and the number of sides and vertices. You can place this information next to or on the polygon.
- For example, for a triangle, write:
- “Triangle”
- “Sides: 3”
- “Vertices: 3”
- “Angle Sum: 180°”
4. Demonstrate Properties:
- For each polygon, indicate:
- Sides: Use a different color or pattern to highlight each side.
- Vertices: Mark each vertex with a small dot or star.
- Angles:
- Use a protractor to measure and label the angles in each polygon (for triangles and quadrilaterals, this is particularly useful).
- For example, in a triangle, label each angle as A, B, and C, and note that the sum is 180°.
5. Create Interactive Elements:
- Use push pins or brads to attach movable angle measures to the vertices of polygons (like triangles). This allows students to adjust the angles and see how the sum changes.
- Alternatively, you can create a flip card system where students can lift cards to reveal the properties of each polygon.
6. Assemble the Model:
- Use a large baseboard to display all the polygons. Arrange them in an organized manner, ensuring they are clearly visible.
- If using string or yarn, you can attach it to show the perimeter of each polygon. You could create a perimeter measurement chart next to each polygon.
7. Add Decorative Elements:
- Decorate the baseboard with additional information about polygons, such as:
- Definitions of sides, vertices, and angles
- Examples of where these shapes are found in real life
- Fun facts about polygons
- Use different colors for each polygon to make the model visually appealing.
Educational Value:
- This model serves as a hands-on tool for understanding the properties of polygons, reinforcing knowledge about sides, vertices, angles, and the relationship between them.
- Students can interact with the model, measure angles, and see how they change when adjusting the shapes, fostering a deeper understanding of geometric concepts.
- By visualizing different polygons, students can better grasp the variety of shapes in geometry and their properties.
This working model of polygon properties will not only enhance the learning experience but also make geometry more accessible and engaging for students!

