
To make a working model of a Vertical Axis Wind Turbine (VAWT) using cardboard pipes, a DC generator motor, and an LED light, follow these steps:
Materials Needed:
- Cardboard pipes (for the turbine blades)
- DC generator motor (a small motor that can generate electricity)
- LED light (to show the generated electricity)
- Cardboard sheets (for the base and supports)
- Wooden or metal rod (for the turbine’s main shaft)
- Glue, tape, or other adhesives
- Wires (to connect the motor to the LED light)
- Small screws or strong adhesive (to attach the motor)
- Bearings (optional, for smoother rotation)
- Scissors or craft knife (for cutting cardboard)
Video Steps:
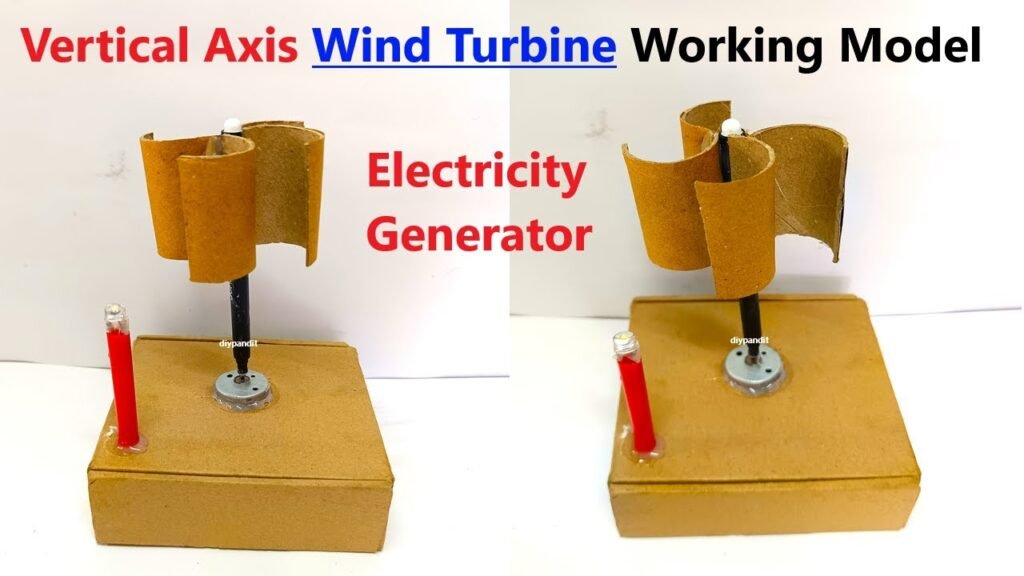
1. Design the Blades
- Cut four to four blades from cardboard pipes. The shape of the blades is important. Each blade should be slightly curved, similar to the letter “C,” so it can catch the wind.
- The length of the blades depends on the size of the model, but make sure they are all the same size for balance.
2. Assemble the Rotor
- Attach the blades to a circular piece of cardboard (which acts as a hub). The blades should be evenly spaced around the hub and attached at an angle, so they can catch wind.
- Ensure that the blades are securely attached and won’t bend or fall off when the turbine rotates.
3. Build the Turbine Shaft
- Insert a wooden or metal rod through the center of the rotor. This will act as the main shaft of the turbine.
- Secure the rotor to the shaft so that when the blades rotate, the shaft also turns.
4. Mount the Shaft and Motor
- Make a stand using cardboard sheets to hold the shaft vertically. The shaft should be free to rotate.
- Fix the DC generator motor at the bottom of the shaft. Connect the shaft to the motor’s rotating part (the motor’s shaft). This can be done with a coupling or by directly connecting the two with glue or a small connector.
- When the wind turbine blades rotate, the shaft should turn the motor, generating electricity.
5. Wiring the LED Light
- Connect wires from the motor terminals to the LED light. When the wind turns the blades, the motor will generate electricity and power the LED.
- Test the wiring with a small breeze or by manually rotating the blades to ensure that the LED lights up.
6. Final Assembly and Testing
- Ensure all the parts (blades, shaft, motor, LED) are securely in place.
- Place your wind turbine model in a place where it can catch wind, or use a fan to simulate wind.
- The rotation of the blades should generate enough electricity to light up the LED.