Objective
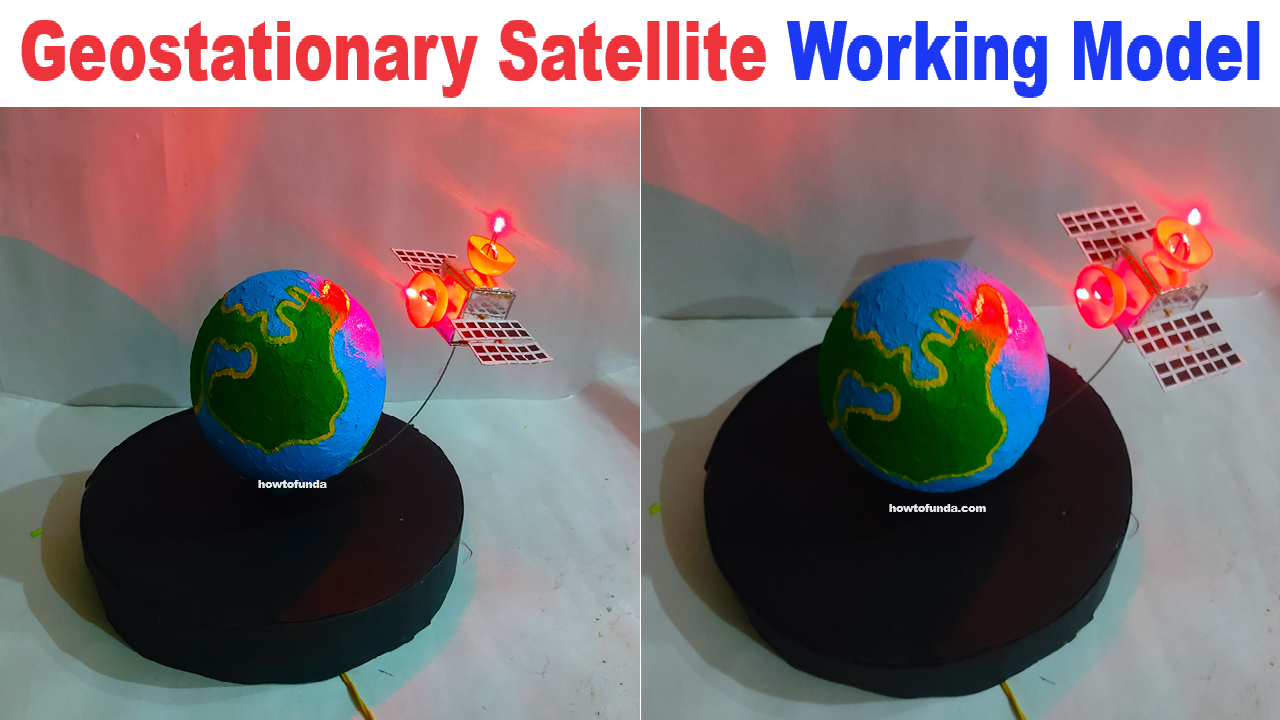
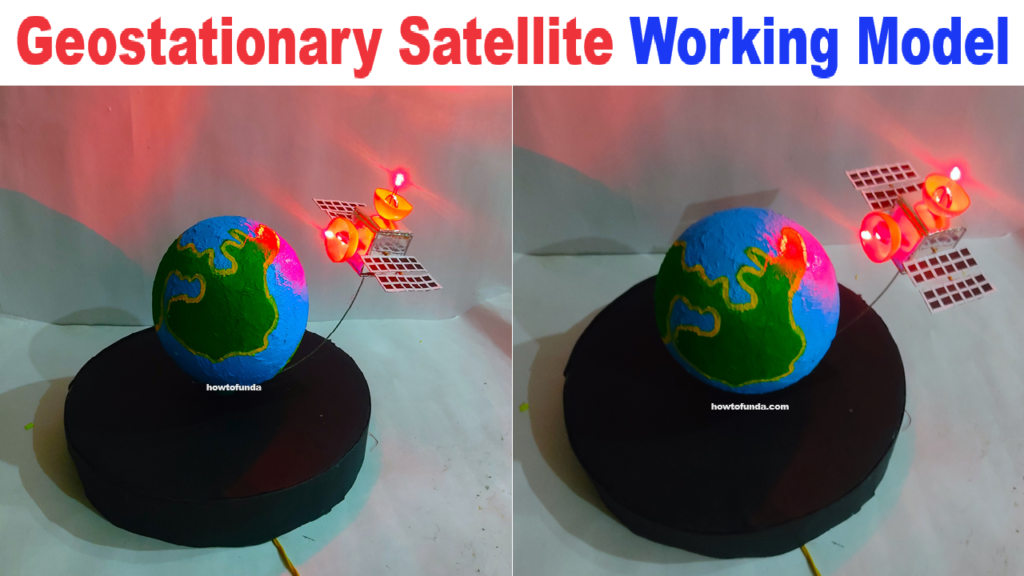
To create a working model of a geostationary satellite using a large ball to represent Earth, an LED-equipped satellite, and a motor to demonstrate the satellite’s orbit.
Materials Needed
- Large ball (to represent Earth)
- Small model or craft satellite (lightweight)
- LED light
- Battery for LED light
- GI (Galvanized Iron) wire
- Slow running motor
- Stand or base for motor
- Power source for motor
- Paint and markers (to decorate the Earth and satellite)
- Hot glue gun or strong adhesive
- Insulated wire (for LED connections)
- Switch (optional, to control the LED)
Step by step video Instructions on making working model of a geostationary satellite
Step 1: Prepare the Earth Model
- Decorate the Ball:
- Paint the large ball to resemble Earth, with continents and oceans. Use markers for details.
- Allow the paint to dry completely.
Step 2: Prepare the Satellite
- Build the Satellite:
- Create a small satellite model using lightweight materials like cardboard, plastic, or craft materials.
- Ensure the satellite has an attachment point for the GI wire.
- Attach the LED:
- Securely attach the LED light to the satellite. Connect the LED to the battery using insulated wire.
- If using a switch, connect it in line with the battery and LED to control the light.
Step 3: Assemble the Geostationary System
- Attach the Satellite to the GI Wire:
- Cut a piece of GI wire long enough to reach from the surface of the Earth model to a height that simulates a geostationary orbit (approximately 36,000 km scaled down).
- Attach one end of the GI wire to the satellite. Ensure it is firmly attached and balanced.
- Attach the Other End of the GI Wire to the Earth Model:
- Secure the other end of the GI wire to the ball (Earth model). You may need to use a hot glue gun or strong adhesive to keep it in place.
Step 4: Motor Setup
- Prepare the Motor:
- Set up the slow running motor on a stable stand or base.
- Ensure the motor can support and rotate the Earth model without tipping over.
- Attach the Earth Model to the Motor:
- Secure the Earth model to the rotating shaft of the motor. Ensure it is centered and balanced to rotate smoothly.
- Connect the Power Source:
- Connect the motor to its power source. Make sure it is set to a slow speed to simulate the 24-hour rotation of Earth.
Step 5: Final Assembly and Testing
- Position the Satellite:
- Adjust the GI wire so the satellite is positioned at a fixed point relative to the rotating Earth model. The satellite should appear to stay in the same position above a specific point on Earth.
- Power On:
- Turn on the motor to start the rotation of the Earth model.
- If using a switch, turn on the LED light on the satellite.
- Observe the Model:
- As the Earth model rotates, observe how the satellite remains geostationary, staying above the same point on the Earth’s surface.
Conclusion
This working model effectively demonstrates the concept of a geostationary satellite, showing how it orbits the Earth at the same rotational speed, remaining over a fixed point.
This hands-on project helps students visualize and understand the mechanics behind geostationary satellites used for telecommunications, weather monitoring, and more.