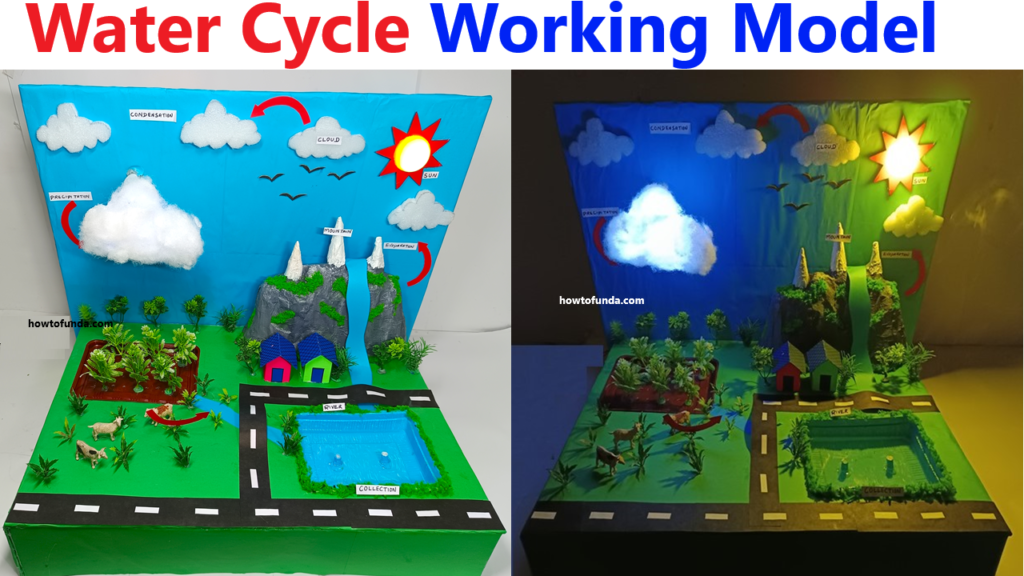
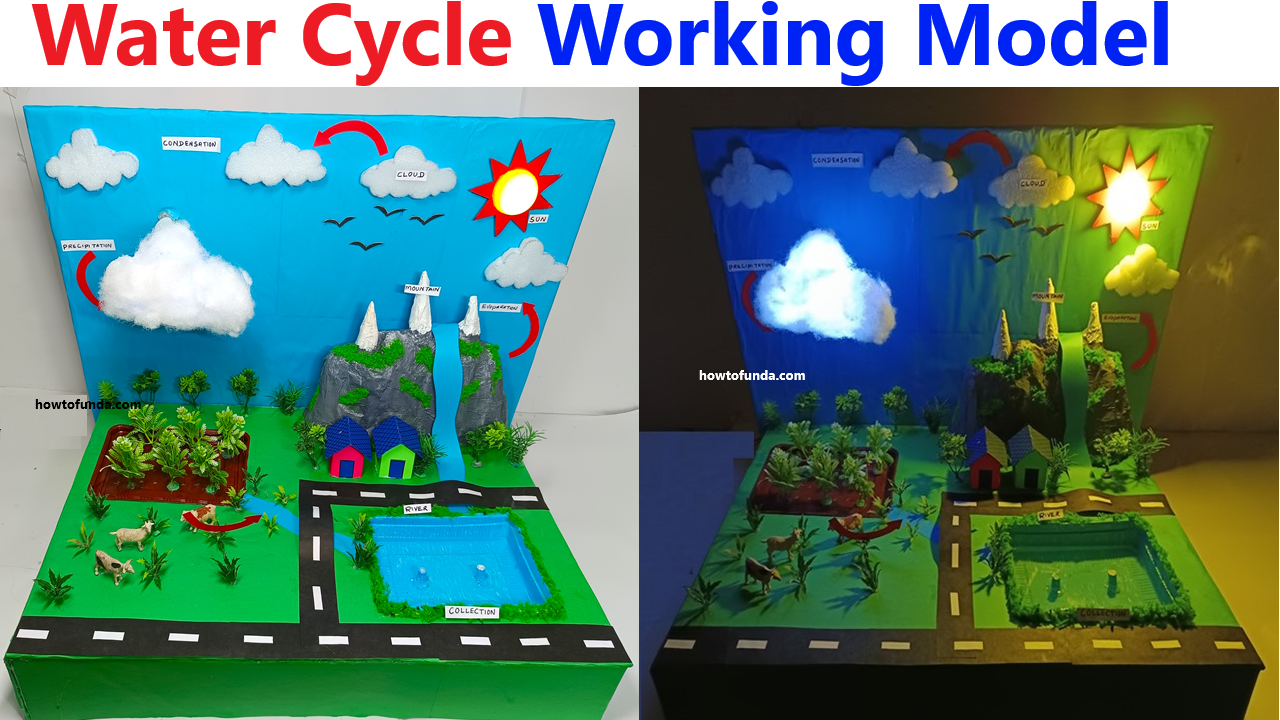
Creating a water cycle working model with features like mountain simulation, rain using a DC water pump, clouds, evaporation simulation with smoke, and a sun using an LED light is an engaging and educational project.

Here’s how to construct it step by step:
Materials Required
- Cardboard or Foam Boards: For the base and mountain simulation.
- Plastic Trays: To represent water bodies like lakes or oceans.
- Cotton or Synthetic Fiber: For clouds.
- DC Water Pump: To simulate rainfall.
- Small Tubes or Straws: For water flow.
- LED Light and Bulb Cover: To simulate the sun.
- 9V Battery: For powering the LED and water pump.
- Incense Sticks or Dry Ice: For evaporation (smoke simulation).
- Paints and Markers: For detailing and decoration.
- Glue, Tape, and Scissors: For assembly.
- Small Fan (optional): To enhance the evaporation effect.
Step-by-Step Guide Water Cycle Working Model
1. Construct the Base
- Use a large cardboard or foam board as the base.
- Divide it into sections:
- One for the mountain and clouds (precipitation).
- One for a lake/ocean (collection and evaporation).
- One for the sun.
2. Build the Mountain Simulation
- Create the Mountain:
- Shape the mountain using crumpled paper, foam, or papier-mâché.
- Paint it brown or gray to resemble a real mountain.
- Attach to the Base:
- Secure the mountain to the base using glue or tape.
- Add some greenery or snow at the top using paint or cotton.
3. Add the Clouds
- Position Clouds:
- Place cotton or synthetic fiber above the mountain to simulate clouds.
- Install Water Tubes:
- Run a thin tube or straw from the DC water pump to the clouds.
- Hide the tube within the cotton for a realistic look.
4. Create the Rain Simulation
- Setup the Water Pump:
- Place the pump in a small container filled with water.
- Connect the pump to the tubes leading to the clouds.
- Simulate Rain:
- When the pump is powered, water will drip down from the clouds onto the mountain and flow into the tray below, simulating rain and runoff.
5. Add Water Collection (Lakes/Oceans)
- Use plastic trays to represent lakes or oceans.
- Place them at the bottom of the mountain where the rainwater collects.
- Paint or line the trays blue for a water effect.
6. Simulate Evaporation
- Create Smoke:
- Use incense sticks or dry ice to simulate water vapor rising from the water body.
- Position a small fan near the tray to guide the “smoke” upward toward the clouds.
- Interactive Addition:
- Explain that this rising vapor represents evaporation in the water cycle.
7. Simulate the Sun
- Setup the LED Light:
- Use a bright yellow or orange LED to simulate the sun.
- Place a bulb cover around it for a glowing effect.
- Power the LED:
- Connect it to a 9V battery and position it over the water body to simulate sunlight aiding evaporation.
8. Assemble the Complete Cycle
Show the process:
- Rainwater falls on the mountain.
- Water flows into the lake/ocean (collection).
- Heat from the “sun” causes evaporation, which rises as vapor to form clouds.
- The clouds release rain, completing the cycle.
How to Use the Model at the Exhibition
- Start the Simulation:
- Turn on the LED (sun) and water pump to begin the rain simulation.
- Use incense or dry ice to demonstrate evaporation.
- Explain the Process:
- Walk viewers through each step of the water cycle: precipitation, collection, evaporation, and condensation.
- Interactive Questions:
- Ask viewers about the importance of the water cycle and its real-world impact.

