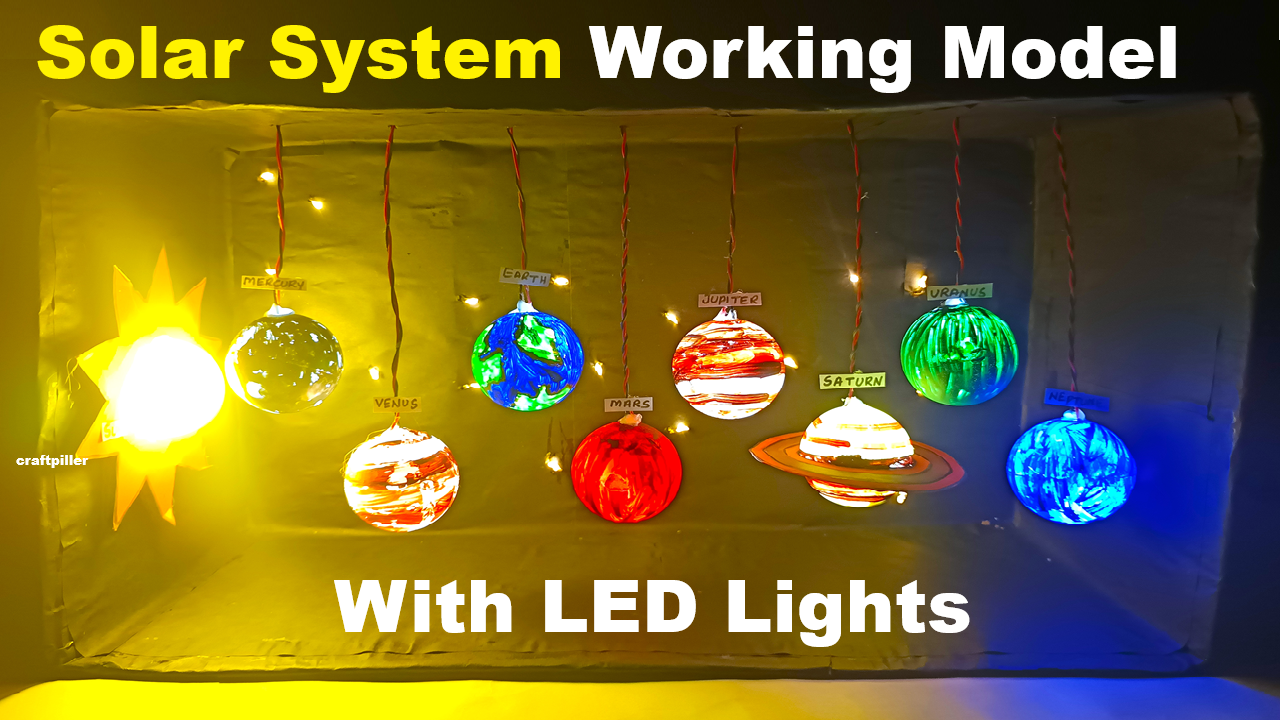
Solar System Working Model (Box Type) with LED Lights, where each planet glows from inside a painted plastic ball suspended in a decorated box.

This is a show-stopping science exhibition project that beautifully combines art + science + electronics!
MATERIALS REQUIRED
| Item | Quantity | Purpose |
|---|---|---|
| Cardboard box (shoe box / carton) | 1 | Base and outer structure |
| Plastic balls (ping-pong or DIY halves) | 8 | For 8 planets |
| Small LEDs (multi-color preferred) | 8 | To make each planet glow |
| Resistors (if needed) | 8 | To protect LEDs |
| Battery (9V or 12V) + holder | 1 | Power source |
| Switch | 1 | To control ON/OFF |
| Wires | As required | LED connections |
| Paints (Acrylic or Poster) | Set | Planet coloring |
| Thread / thin wire | 8 pieces | To hang planets |
| Hot glue gun / Fevicol | – | For fixing components |
| Cutter, scissors, ruler | – | For shaping box |
| Black chart paper / paint | – | For space background |
| Glitter stars / foil | optional | For space effect |
| Small name labels | 8 | For planet names |
WORKING PRINCIPLE
The model shows the Solar System where each planet glows using LED light powered by a battery circuit.
It visually demonstrates the order of planets from the Sun and how electric current lights up LEDs (energy conversion: electrical → light energy).
STEP-BY-STEP INSTRUCTIONS
Step 1: Prepare the Box
- Take a large cardboard box (open at the front).
- Paint the inside black or paste black chart paper to resemble space.
- Decorate with stars, glitter, comets, and a Milky Way effect.
- Cut small holes at the top where the threads for hanging planets will pass through.
Step 2: Make the Planets
- Take 8 plastic balls or ping pong balls — one for each planet.
- Make a small hole in each ball to insert an LED inside.
- Paint each ball to look like its planet:
| Planet | Color / Design Idea |
|---|---|
| Mercury | Grey |
| Venus | Yellowish-white |
| Earth | Blue & green |
| Mars | Red |
| Jupiter | Brown + orange stripes |
| Saturn | Yellow with ring (cut cardboard ring) |
| Uranus | Light blue |
| Neptune | Dark blue |
Step 3: Connect the LED Circuit
- Insert an LED into each plastic ball (planet).
- Pass the LED wires up through holes in the box ceiling.
- Connect all positive wires together and all negative wires together (parallel connection).
- Attach them to the battery pack and switch.
- Use tape or glue to secure wires neatly.
Step 4: Hang the Planets
- Tie threads/wires to each planet and hang them in order from Sun to Neptune.
- Arrange them at increasing distances to show the actual order:
Sun → Mercury → Venus → Earth → Mars → Jupiter → Saturn → Uranus → Neptune
- Adjust heights for a 3D floating look.
Step 5: Final Assembly
- Add a switch on the side of the box to turn the lights ON/OFF.
- Decorate the box exterior with space stickers, labels, and planet facts.
- Add a small solar panel sticker or light energy explanation card if desired.