Creating a skeleton system model using cardboard and paper is a fun and educational project.
Here’s a step-by-step guide to help you build a simple and effective skeleton model:

Materials Needed
- Cardboard
- White color paper
- Glue
- Scissors
- Black marker or pen
- String or yarn (optional, for joint connections)
- Ruler
- Pencil
Step-by-Step Instructions
1. Gather Reference Materials
- Find a detailed image or diagram of the human skeleton to use as a reference.
- You can print out a skeleton template or draw your own based on the reference image.
2. Drawing the Skeleton Parts
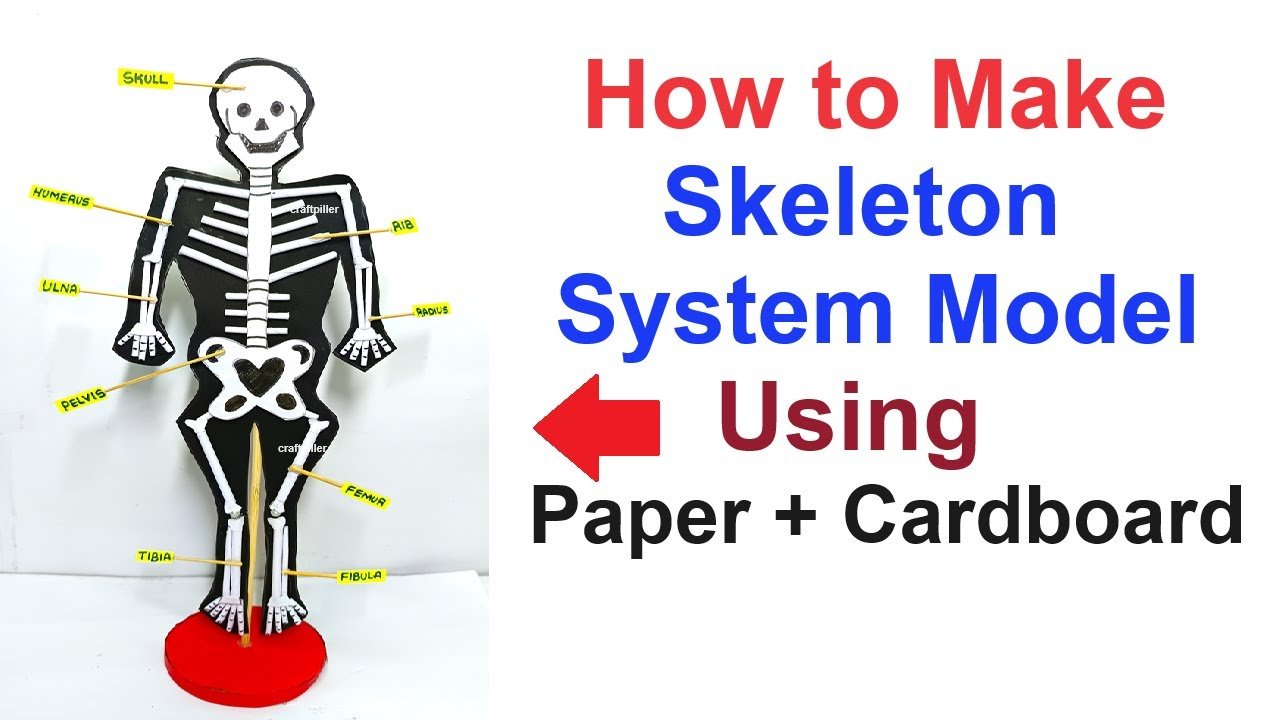
- Skull:
- Draw the shape of the skull on white paper. Include details like the eye sockets and nasal cavity.
- Rib Cage:
- Draw the rib cage with the sternum and ribs. Make sure to include the correct number of ribs (12 pairs).
- Spine:
- Draw the spine as a series of vertebrae. You can make it one continuous piece or several connected pieces.
- Arms:
- Draw the upper arms (humerus), lower arms (radius and ulna), and hands (carpals, metacarpals, and phalanges).
- Legs:
- Draw the upper legs (femur), lower legs (tibia and fibula), and feet (tarsals, metatarsals, and phalanges).
- Pelvis:
- Draw the pelvis with the hip bones.
3. Cutting Out the Skeleton Parts
- Carefully cut out each part of the skeleton from the white paper.
- Trace these parts onto cardboard and cut them out. This will give your skeleton model more stability.
4. Assembling the Skeleton
- Skull to Spine:
- Glue the skull to the top of the spine.
- Rib Cage:
- Attach the rib cage to the upper part of the spine.
- Arms:
- Attach the upper arms to the sides of the rib cage. You can use glue or string/yarn to create movable joints.
- Attach the lower arms to the upper arms and then attach the hands to the lower arms.
- Pelvis:
- Attach the pelvis to the bottom of the spine.
- Legs:
- Attach the upper legs to the pelvis. Again, use glue or string/yarn for movable joints.
- Attach the lower legs to the upper legs and then attach the feet to the lower legs.
5. Adding Details
- Use a black marker or pen to draw details on the skeleton, such as the joints, small bones in the hands and feet, and any other anatomical details.
- Label the major bones if you want to make it more educational.
6. Mounting the Skeleton (Optional)
- Base:
- Cut a piece of cardboard to use as a base.
- Attach a cardboard stand to the back of the skeleton to help it stand upright, or you can hang it from a string.
- Display:
- You can mount the skeleton on the base by gluing the feet to the base. Ensure it is stable.
Final Touches
- Make sure all parts are securely attached and properly aligned.
- If you used string or yarn for joints, ensure they allow for some movement but are tight enough to hold the parts in place.
- Check that all details are clearly visible and labeled.
Display and Explanation
- Explain the major bones and their functions.
- Show how the joints work if you made them movable.
- Highlight the overall structure of the skeleton and its importance in the human body.
By following these steps, you’ll have a comprehensive and educational skeleton system model made from cardboard and paper. This project can be a great addition to a science fair or classroom display.