
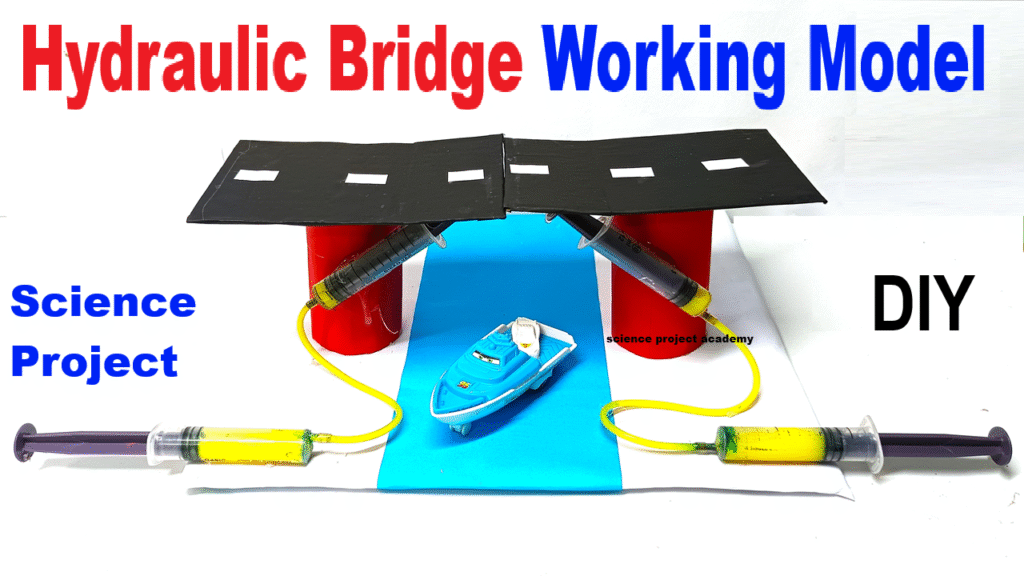
This is a hydraulic bridge working model. It uses Pascal’s Law of pressure in fluids. When I push the syringes, water transfers pressure to lift the bridge arms just like a real drawbridge opens for ships to pass.
It’s an eco-friendly, simple, and efficient technology used in many real-world machines.
How to Build the Hydraulic Bridge:
Step 1: Create the Base
- Cut a large rectangular base from cardboard (approx. 40 cm × 25 cm).
- Cover it with blue color paper to represent a river or water body.
Step 2: Make the Bridge
- Cut two rectangular bridge flaps (same size) from cardboard — these will be the parts that lift up.
- Use a hinge method (tape or paper hinge) to attach the bridge flaps to the base on both sides of the “river”.
- They should fold upward like a drawbridge.
Step 3: Add the Syringes
- Attach one syringe to each bridge flap using glue and tape.
- The syringe’s plunger should face inward so it pushes and lifts the bridge when extended.
Step 4: Connect Hydraulic System
- Attach a plastic tube to the nozzle of each bridge syringe.
- Connect the other ends of the tubes to control syringes (placed at front of model).
- Fill all four syringes with water (no air bubbles) before connecting.
Step 5: Decorate
- Use color paper and markers to:
- Decorate roads and bridge
- Add trees, cars, boats, or people
- Label: “Hydraulic Bridge Working Model”
How It Works:
When you push the control syringes, water flows through the plastic tube into the attached syringes.
This hydraulic pressure pushes the pistons, lifting the bridge flaps upward.
Releasing the pressure allows the bridge to come down slowly.
Scientific Principle:
- Pascal’s Law: Pressure applied to a confined fluid is transmitted equally in all directions.
- Real-life examples: Drawbridges, JCB cranes, Hydraulic lifts.