Creating a greenhouse working model using cardboard and transparent sheets is a fun and educational science project that demonstrates how greenhouses function to enhance plant growth by controlling environmental conditions.

Here’s a detailed guide on how to construct this model.
Objective:
To build a model of a greenhouse that illustrates the concept of controlled environment agriculture, showcasing how light and warmth help in plant growth.
Materials Needed:
- Cardboard sheets (for the base and frame of the greenhouse)
- Transparent plastic sheets (to simulate glass for the greenhouse structure)
- Scissors (for cutting cardboard and plastic)
- Glue or tape (for assembling parts)
- Ruler (for measuring)
- Pencil (for marking)
- Small pots or containers (for planting seeds)
- Soil (for planting)
- Seeds (e.g., bean seeds, small flowers)
- Crafting materials (like markers, stickers, etc., for decoration)
- Light source (like a small lamp for testing)
- Spray bottle (for watering the plants)
Steps to Create the Greenhouse Model:
1. Build the Base:
- Cut a rectangular piece of cardboard for the base of the greenhouse. A size of about 18 inches by 12 inches works well.
- This will serve as the foundation for the entire model.
2. Construct the Frame:
- Cut cardboard strips for the greenhouse frame. Use four vertical pieces for the corners and horizontal pieces to connect them at the top and sides.
- The height of the greenhouse can be around 12 inches. Make sure the frame is sturdy.
3. Attach the Vertical Supports:
- Use glue or tape to secure the vertical strips to the corners of the base. Ensure they are standing upright and stable.
- Attach the horizontal strips across the top to form a rectangle. This will provide the structure needed to hold the transparent sheets.
4. Prepare the Transparent Sheets:
- Cut transparent plastic sheets to fit the sides and top of the greenhouse frame. These will act as the “glass” of the greenhouse.
- Attach the transparent sheets to the frame using glue or tape, ensuring they are secure and create an enclosed space. Leave one side (preferably the back) open for easy access to the plants.
5. Plant Seeds:
- Place small pots or containers on the base inside the greenhouse. Fill them with soil and plant seeds according to the instructions on the seed packets.
- If you want to illustrate different plants, you can use multiple pots with various seeds.
6. Watering System:
- Use a spray bottle to water the plants regularly. This mimics the moisture retention properties of a real greenhouse.
- You can also demonstrate how humidity can be controlled within the greenhouse.
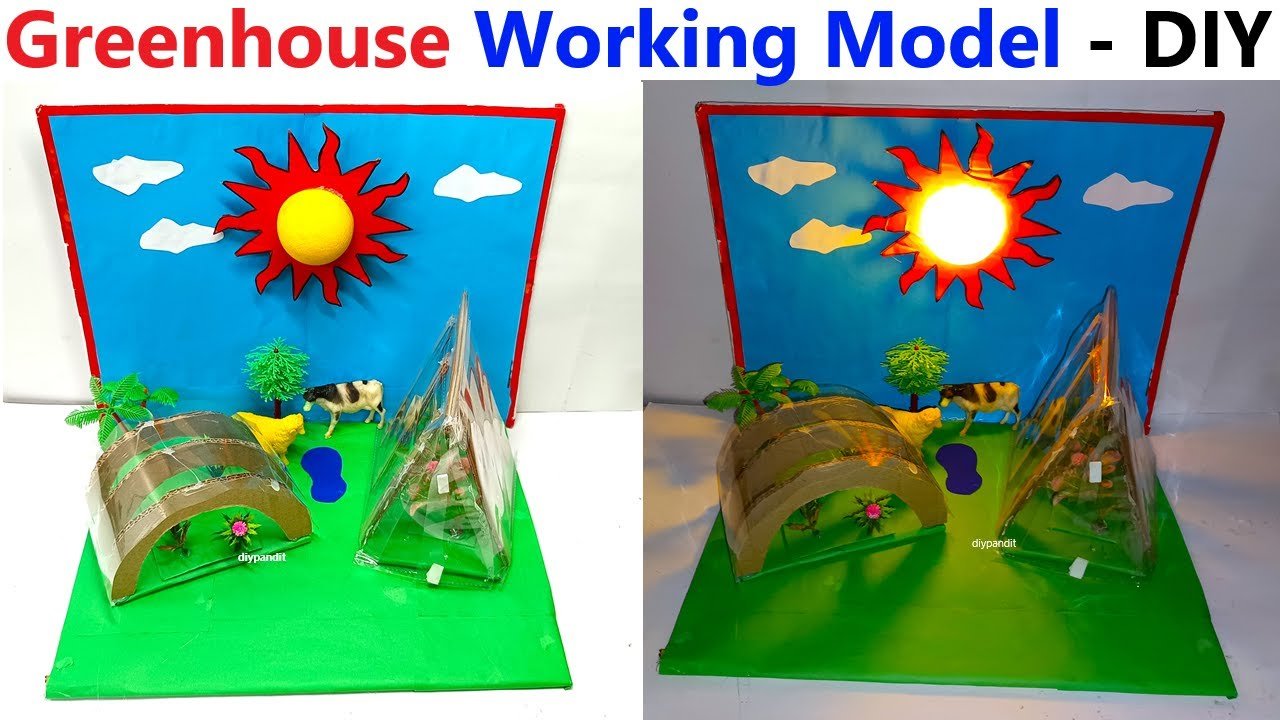
7. Light Source:
- Position a small lamp or LED light above the greenhouse to simulate sunlight. This will help illustrate how greenhouses allow sunlight to enter while retaining heat.
- Ensure the light is adjustable so you can demonstrate the effects of light on plant growth.
8. Decoration:
- Use markers or stickers to decorate the outside of the greenhouse. You can label different parts of the greenhouse (like “roof,” “walls,” and “plants”) for educational purposes.
- Add visuals like drawings of sun and clouds to represent weather conditions.
9. Observation:
- Keep a record of the plants’ growth over time. Take notes on how they grow faster compared to plants outside the greenhouse, due to controlled conditions.
- You can take photos to document the changes.
Educational Value:
- This model effectively demonstrates the principles of greenhouse agriculture, such as the importance of light, temperature, and humidity for plant growth.
- Students will learn about photosynthesis, plant biology, and the benefits of controlled environment agriculture.
- The hands-on experience of planting and observing growth reinforces concepts of biology and ecology.
Optional Enhancements:
- Mini Ventilation System: Create small openings or flaps that can be opened or closed to demonstrate how ventilation works in a real greenhouse.
- Temperature Monitoring: You can include a simple thermometer inside the greenhouse to monitor temperature changes with and without the light source.
- Weather Simulation: Use a spray bottle to simulate rain inside the greenhouse and observe how it affects the soil and plants.
This cardboard and transparent sheet greenhouse model will not only be a visually appealing project but also serve as a practical demonstration of how greenhouses benefit agricultural practices!