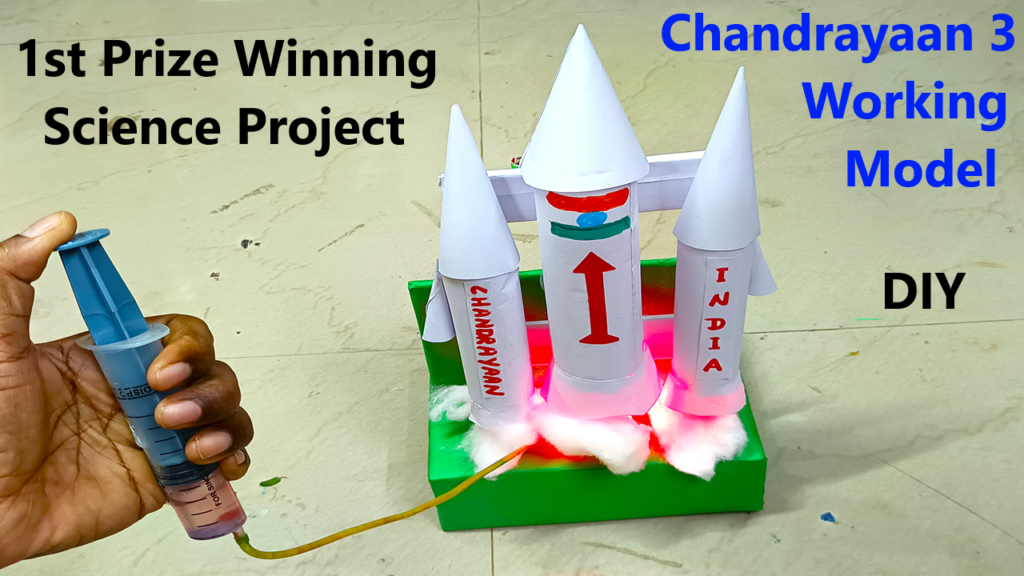
To create a Chandrayaan-3 rocket launching model using paper, cardboard, and syringes, follow these steps. This fun, hands-on project demonstrates the basic principle of hydraulic systems and the mechanics of a rocket launch.

Materials Needed
- Cardboard – for the rocket structure, launchpad, and base
- Syringes (2 large, 2 small) – for the hydraulic system
- Plastic tubing – to connect syringes
- Paper – to cover and decorate the rocket
- Scissors and cutter – for cutting shapes
- Glue, tape, and hot glue – for assembly
- Paints or markers – to decorate the rocket (optional)
- Straws or wooden sticks – for guiding the rocket
- Rubber bands – for holding parts securely
Instructions for Model Assembly
Step 1: Create the Rocket Body
- Roll paper into a cylindrical shape to form the body of the rocket.
- Cut out a cone from paper, glue it to the top of the rocket to resemble a nose cone.
- Add fins using cardboard for stability, attaching them at the base of the rocket.
Step 2: Build the Launch Pad
- Cut a base platform from cardboard (rectangle or square shape).
- Create guiding rails by attaching two straws or sticks vertically, which will help the rocket stay upright during launch.
Step 3: Assemble the Hydraulic System
- Take two large syringes and connect them with plastic tubing filled with water.
- Attach one large syringe to the launch pad (this will be the “pump” syringe). The other will act as a hydraulic piston for motion.
Step 4: Fix the Syringe Piston Mechanism
- Secure the second large syringe piston under the launch pad so that pressing it will raise or tilt the rocket.
- Use a rubber band or tape to attach a smaller syringe to the bottom of the rocket to assist with movement. This will make the hydraulic system more dynamic.
Step 5: Prepare the Rocket Stand
- Position the rocket inside the guiding rails so that it can move up smoothly when the syringe is pressed.
- Use cardboard supports to ensure everything stays stable during the launch.
Step 6: Connect the Hydraulic Tubing
- Join the syringe at the base of the rocket with another small syringe using plastic tubing. This will enable the rocket to “launch” by pushing the syringe connected to the tube.
Step 7: Test the Hydraulic System
- Fill the syringes with water and press one syringe to see if the piston extends and pushes the rocket upward or tilts it. Make sure there is no air trapped inside the tubing.
Step 8: Perform a Trial Launch
- Press the pump syringe forcefully. The hydraulic system will move the rocket upward on the launchpad rails, simulating liftoff.
Step 9: Decorate Your Rocket Model
- Use paints, markers, or stickers to write “ISRO” or “Chandrayaan-3” on the rocket to make it look more realistic.
How the Model Works
Hydraulic pressure: When you press the pump syringe, water pushes through the tubing into the piston syringe, raising the rocket on the launchpad.
- Simulation of launch: The guided motion on the launch pad mimics how a rocket takes off vertically. The syringe system allows you to demonstrate controlled movement and force, similar to how thrust works in real rockets.
Final Thoughts
This paper and cardboard rocket model with a syringe-powered hydraulic system is a creative way to understand how real rockets, like Chandrayaan-3, launch. It also demonstrates basic principles of hydraulics and controlled motion.

