Do you wanted to make the ceiling fan in simple steps using dc motor then you are in the right place where we show you making using best out of waste
#howtomake #ceilingfan #dcmotor #scienceproject #dcmotorproject #ceilingfanmaking #diypandit #scienceexhibition #sciencefair #electricity #electricityproject #physics #physicsworkingmodel

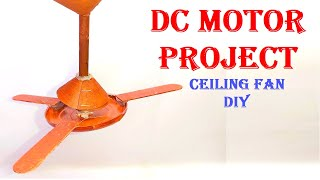
Making a ceiling fan using a DC motor and cardboard for a science project is an interesting and educational activity. Below is a step-by-step guide to create a basic model of a ceiling fan:
Materials Needed
- Cardboard
- DC motor (small-sized, preferably with wires attached)
- Propeller blades (can be made from cardboard or lightweight plastic)
- Battery pack (9V battery or AA batteries with holder)
- On/off switch (optional, for controlling the fan)
- Wires
- Glue or tape
- Scissors
- Ruler
- Marker
how to make ceiling fan in simple steps using dc motor
1. Prepare the Base and Motor Mount
- Base Setup:
- Cut a large circle from cardboard to serve as the base of the ceiling fan.
- Use a ruler to draw and cut out smaller circles or squares to mount the motor and attach the propeller blades.
- Mounting the Motor:
- Place the DC motor on one of the smaller cardboard pieces.
- Trace around the motor and cut out the circle so that the motor can fit snugly.
- Secure the motor in place using glue or tape.
2. Create Propeller Blades
- Blade Design:
- Cut out three or more identical shapes from cardboard to serve as propeller blades.
- Ensure each blade is the same size and shape for balanced rotation.
- Optionally, you can use lightweight plastic or foam board for more durable blades.
- Attach Blades to Motor:
- Attach the propeller blades evenly around the motor shaft.
- Use glue or tape to secure the blades to the motor shaft. Ensure they are balanced and spaced evenly.
3. Wiring the Motor and Power Source
- Connect the Motor:
- Identify the positive (+) and negative (-) terminals on the DC motor.
- Connect the positive wire of the battery pack to the positive terminal of the motor.
- Connect the negative wire of the battery pack to the negative terminal of the motor.
- Optional: Add a Switch:
- If you want to control the fan, attach an on/off switch between the battery pack and the motor.
- This allows you to turn the fan on and off easily.
4. Assembly and Testing
- Secure Components:
- Attach the motor and blades assembly to the base of the fan using glue or tape.
- Ensure the blades can rotate freely without obstruction.
- Test Rotation:
- Insert batteries into the battery pack.
- Turn on the switch (if added) to see if the motor and blades rotate properly.
- Adjust the blades or balance if necessary to ensure smooth rotation.
By following these steps, you’ll create an educational ceiling fan model using a DC motor and cardboard, demonstrating the conversion of electrical energy into mechanical motion. This project is ideal for showcasing basic principles of physics and engineering in a hands-on and creative manner.