
A tornado is a powerful and dangerous natural disaster. It is a rotating column of air that extends from a thunderstorm to the ground. Tornadoes are also called twisters because of their twisting, funnel-like shape.
Tornadoes form during severe thunderstorms when warm, moist air meets cold, dry air. This causes strong winds to spin in a circular motion. Tornadoes can move very fast and destroy almost everything in their path, including houses, trees, and vehicles. They can also cause floods and injuries.
Tornadoes are mostly measured by the Fujita scale, which rates their intensity based on wind speed and damage. Areas like the United States (Tornado Alley) experience tornadoes frequently.
How To Make This Tornado Model
Learn how to make a 3D Tornado working model for your science exhibition! This DIY tornado uses a DC motor, cotton, and cardboard to simulate the destructive effect of tornadoes on a town. Easy and innovative project idea for school science fairs.
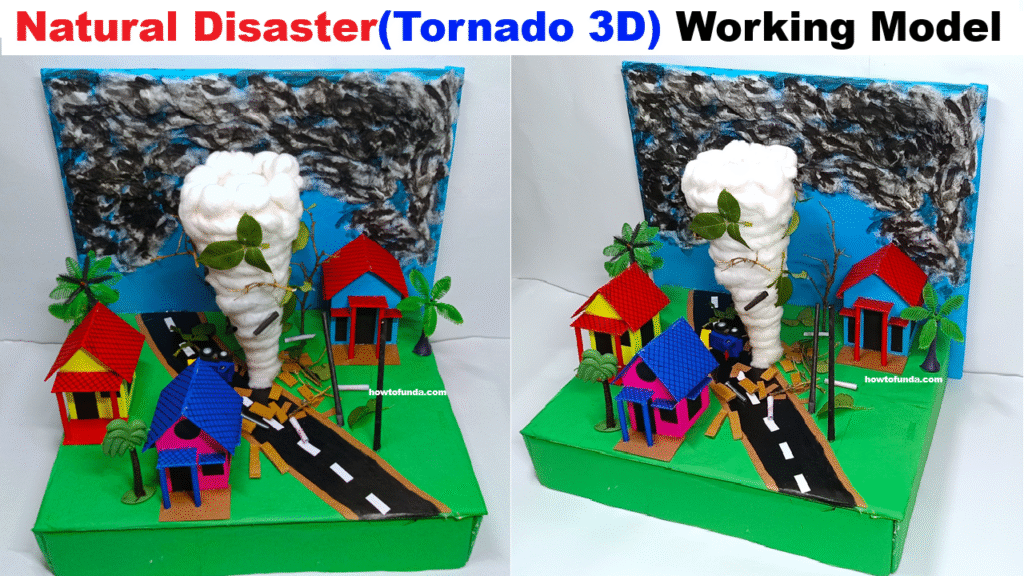
Simulate a rotating tornado using a cone-shaped cotton funnel, powered by a DC motor, and show damaged houses and vehicles made from cardboard to explain the destructive power of a tornado.
Materials Required:
- 1 small DC motor (3V–9V)
- Plastic cone or make one using thick chart paper
- Cotton (for the tornado effect)
- Cardboard base
- Small LED light (optional for effect)
- Houses, trees, cars – made from cardboard or color paper
- Battery holder with switch and 9V battery
- Glue gun, scissors, tape, wire, color paper
- Transparent acrylic sheet or plastic bottle (cut open) for the tornado chamber
- Thread or light sticks (to show spinning debris)
How to Make 3D Tornado Natural Disaster Working Model:
1. Build the Tornado Funnel:
- Use chart paper to form a cone shape about 15–20 cm tall.
- Wrap the cone in cotton and glue it spirally to give it a cloudy, tornado-like look.
2. Attach the Funnel to the DC Motor:
- Mount the DC motor vertically on the base.
- Use a small rod, skewer stick, or cap to connect the tornado cone to the motor shaft.
- When powered, the cone should spin slowly, simulating a swirling tornado.
3. Create the Tornado Scene:
- Use cardboard to create a village or town scene:
- A few houses – some intact, some broken (cut and bend the roof).
- Small cars and trees – tipped over or “flying”.
- Add a road or field with brown/green paper.
4. (Optional) Tornado Chamber:
- Place a cut plastic bottle or acrylic sheet around the tornado for a transparent barrier, like a simulation chamber.
5. Power Up:
- Connect the motor to a battery and switch.
- When you flip the switch, the tornado rotates, cotton swirls, and the scene appears as though a real tornado is destroying the town.