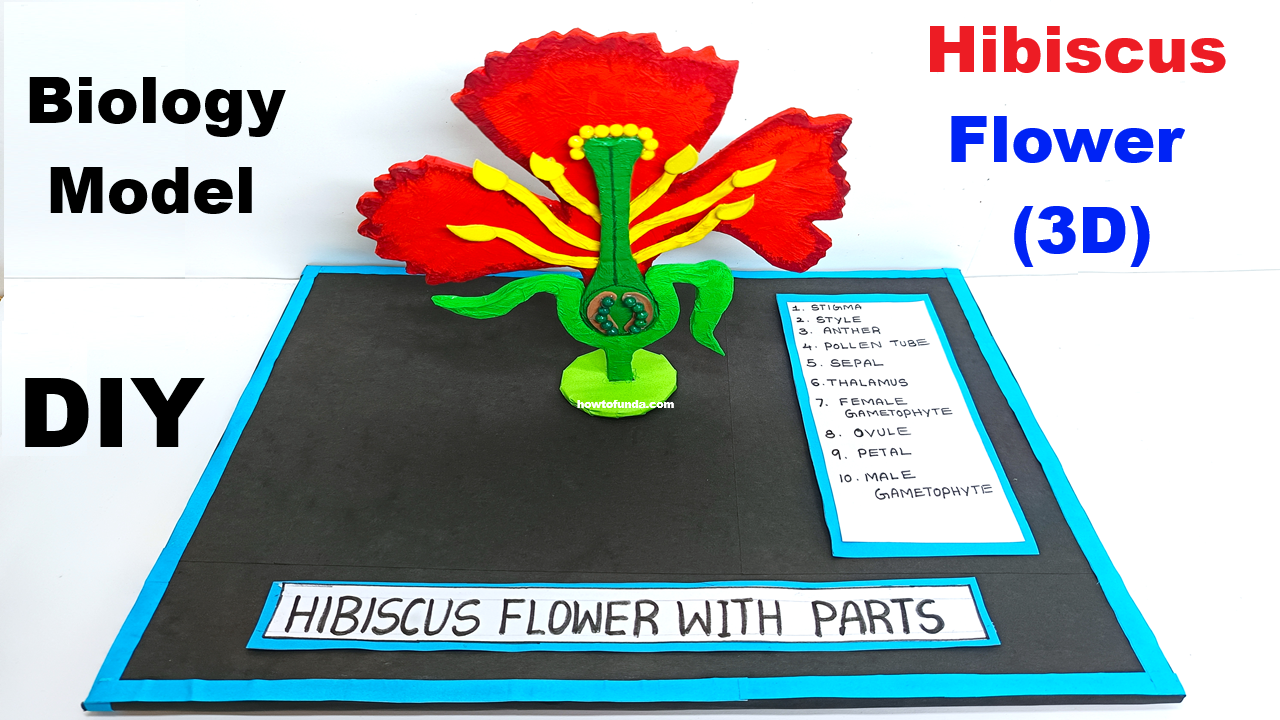
This 3D model of a hibiscus flower is designed to demonstrate the structure and parts of a complete flower.
Made using cardboard, tissue paper, fevicol, and paint, it creatively represents essential parts like petals, sepals, stamen, pistil (stigma, style, ovary), and leaves.
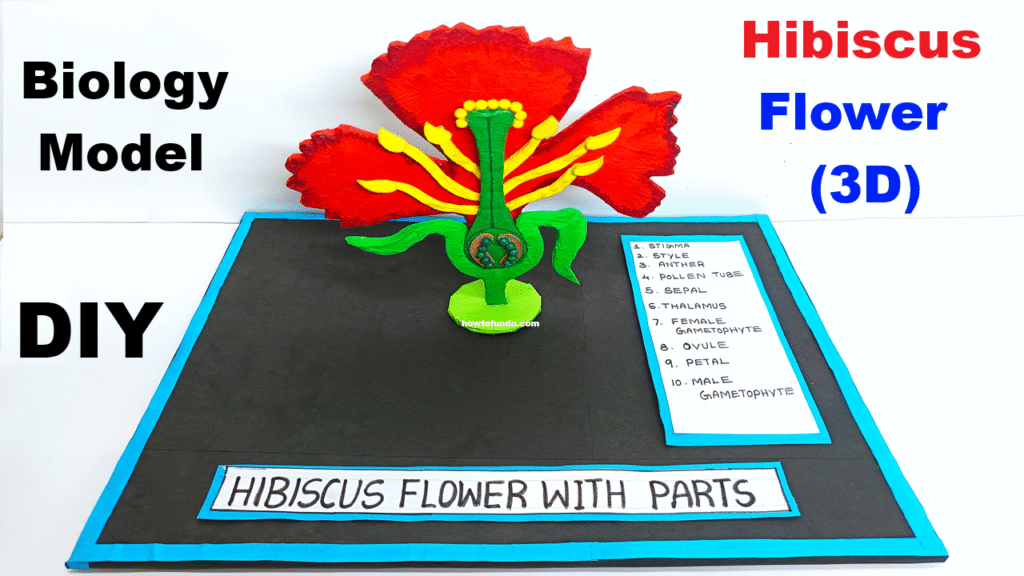
The model helps students visually understand the reproductive system of flowering plants. Each part is labeled clearly for educational purposes. Ideal for biology exhibitions, this low-cost model effectively showcases plant anatomy and highlights the hibiscus as a perfect flower used in many textbooks for botanical study.
Materials Required:
- Cardboard sheet (base + support)
- Tissue paper (for petals and texture)
- Fevicol / White glue
- Acrylic or poster paints (red, green, yellow, black)
- Scissors / Craft knife
- Thin sticks or straws (for stalks like stamen, style)
- Cotton buds / earbuds (anthers)
- Hot glue gun (optional for strength)
- Black marker / pen
- Small labels / printed tags (for parts)
Video Steps to Make the 3D Hibiscus Flower Model:
1. Create the Base
- Cut a circular or rectangular cardboard piece (20×20 cm) as the base.
- Paint it green or brown to look like a garden background.
2. Make the Petals
- Take cardboard and tissue paper and color it red or pink using diluted paint.
- Let it dry.
- Crumple and shape it into curved petals.
- Mount the petals in a radial pattern using fevicol on a cardboard circle (base of the flower).
3. Create Sepals (Green Base Leaves)
- Cut green painted cardboard into 5 pointed shapes.
- Attach behind the petals to represent sepals (calyx).
4. Central Column – Pistil & Stamens
- Use a thick straw or stick for the style (center part).
- Paint it yellow or light green.
- Fix cotton buds (painted yellow) around it as stamens (anthers on filaments).
- Make the stigma (tip of style) using a ball of tissue painted red or purple, attach to top.
5. Leaves and Stem
- Cut 1–2 hibiscus-shaped leaves from cardboard, paint green, add vein details with marker.
- Create a stem from a rolled tissue or stick, paint green, and attach beneath.
6. Label All Parts Clearly
Use printed or handwritten flags/labels to mark:
- Petal
- Sepal
- Stigma
- Style
- Ovary (you can show it at base with a small bulb)
- Stamen
- Anther
- Filament
- Leaf
- Stem