
This is a 3D atom model showing its internal structure.The center or nucleus contains protons and neutrons, while electrons revolve around it in orbits.
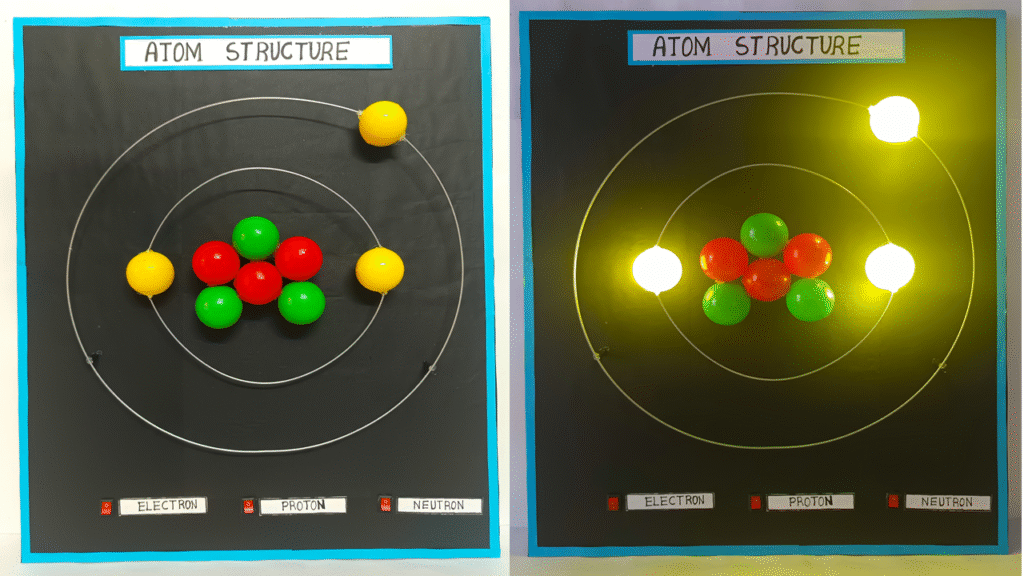
Each component is represented with colored balls and glowing LEDs, controlled using switches.
This model demonstrates how atoms are structured and the role of subatomic particles.
Video Construction Steps:
Step 1: Prepare the Base
- Take a square/round cardboard and cover it with black/blue paper.
- Draw 3 concentric circles for 3 electron orbits (optional styling).
Step 2: Make the Nucleus
- Glue 3 red (protons) and 3 blue (neutrons) balls in the center.
- Place small LEDs inside or behind each ball.
- Connect red LEDs to red balls, blue LEDs to blue balls.
Step 3: Create Orbits with GI Wire
- Bend GI wire into circular loops and fix on the cardboard.
- Attach yellow balls (electrons) on each orbit using glue or thread.
- Embed a green LED into or behind each electron ball.
Step 4: Wiring with Switches
- Group all proton LEDs to one switch
- Group all neutron LEDs to another switch
- Group all electron LEDs to the third switch
- Use resistors in series with each LED to prevent damage
- Connect the common ground and positive from battery to all switches
Step 5: Finishing Touch
- Hide wires neatly behind the cardboard
- Add labels:
- Protons (Red)
- Neutrons (Blue)
- Electrons (Yellow/Green)
- Nucleus
- Orbits (Shells)
- Decorate the background using stars, galaxy theme, etc.
Switch Demonstration at Exhibition:
- Switch ON 1 (Proton) → Red LEDs glow in nucleus
- Switch ON 2 (Neutron) → Blue LEDs glow in nucleus
- Switch ON 3 (Electron) → Green LEDs glow in orbits