Concept / Principle:
This model demonstrates the concept of global warming — how increased greenhouse gases (like CO₂, methane, etc.) trap heat in Earth’s atmosphere, raising the planet’s temperature.
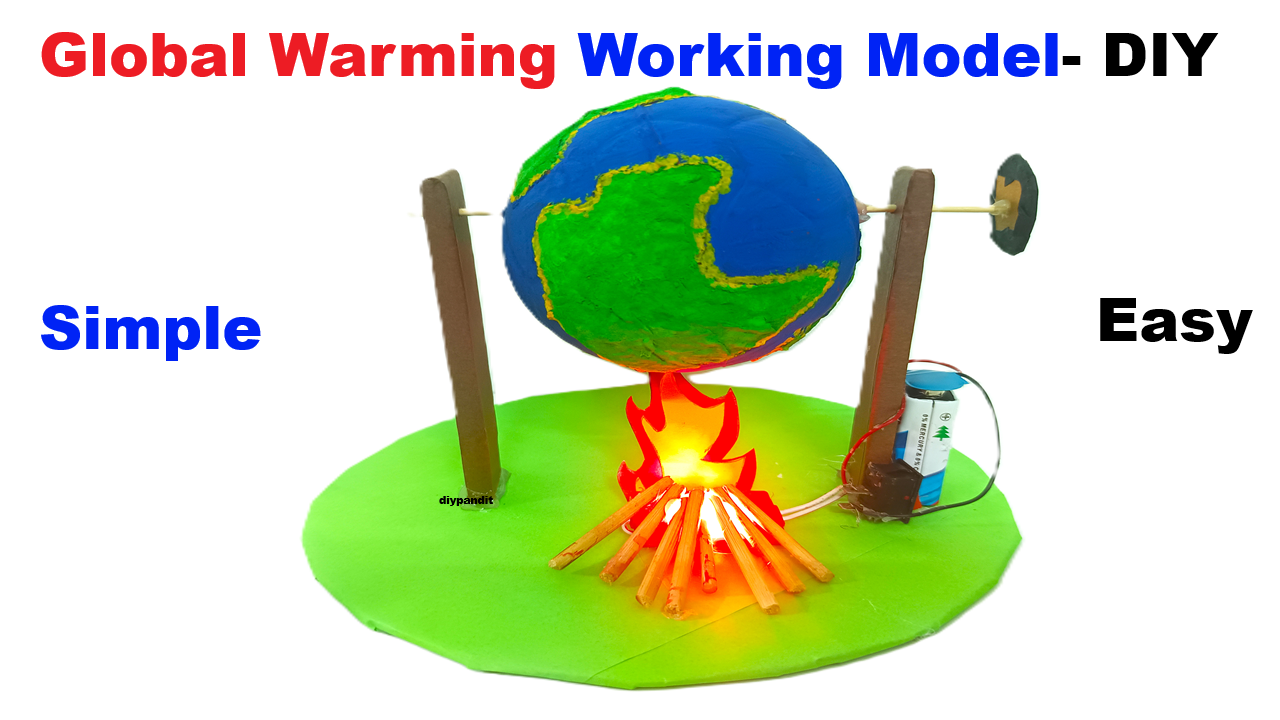
The rotating Earth represents our planet, and the LED lights + burning wooden sticks (or safe red LEDs) represent the rising heat and pollution from industries and deforestation.

Scientific Principle:
- The Earth rotates on its axis (simulated by a motor).
- The heat sources (red LEDs) represent infrared radiation trapped by greenhouse gases.
- Smoke or light shows the pollution effect.
- Demonstrates how human activities lead to rising global temperatures.
Materials Required:
Main Model Structure
- Styrofoam / thermocol ball (Earth model – 8 to 12 inches diameter)
- DC motor (3V–9V) with rotating stand
- Battery (9V) and switch
- Cardboard or wooden base (1×1 ft)
- Iron rod / thick straw (for Earth rotation axis)
- LEDs (red, orange, yellow – 4 to 6 pcs)
- Small wooden sticks or matchsticks (for factory smoke area)
- Cotton or black paper (to simulate smoke)
- Plastic bottle cut-outs / factory chimney models
- Glue gun, tape, Fevicol, markers, paints
Decoration Materials:
- Paints (blue & green for Earth, grey/black for factories)
- Toy trees, clouds, and cars
- Chart paper labels (e.g., “Deforestation”, “Factories”, “Vehicles”, “Melting Ice”)
- Thermocol cutouts for “glaciers” and “sea level rise”
Step-by-Step Model Making:
Step 1 – Making the Earth (Rotating Sphere)
- Take a thermocol ball and paint it blue & green to look like the Earth.
- Fix a thin metal rod or straw through the center (acting as the Earth’s axis).
- Attach one end of the rod to a DC motor (below the base).
- Secure the motor under the wooden or cardboard base with glue.
- When powered, the Earth will rotate slowly — just like the real one!
Step 2 – Making the Base
- Take a wooden or cardboard base (1×1 ft).
- Mount the Earth model in the center using the rod and motor setup.
- Add mini factory models made of small boxes or bottle caps around the Earth.
- Stick cotton smoke or black paper at the chimneys for effect.
Step 3 – Adding LED Heat Effect
- Place red and orange LEDs around the Earth (especially near factory areas).
- Connect all LED positive wires together and negative wires together.
- Join to battery and switch — when you turn ON, the red glow will simulate heat around the Earth.
- You can also place a few LEDs under the Earth to show trapped heat beneath the atmosphere.
Step 4 – Adding “Burning” Simulation
- Instead of real fire, safely glue small wooden sticks near the factory area.
- Place red LEDs under or behind them — when lit, they’ll look like they are burning
- Optional: use a small fog or incense stick (under teacher supervision) to show smoke.
Step 5 – Finishing & Labeling
- Add labels like:
- “Earth Rotation”
- “Factories releasing CO₂”
- “Melting Ice Caps”
- “Greenhouse Gases Trap Heat”
- “Global Warming Effect”
- Add toy trees and a small cut-out polar bear on ice to make it realistic.
- Paint the base with blue (oceans) and brown (land areas).
Electrical Connections:
Motor:
- Connect motor + to battery +, and motor – to battery –.
- Add a switch between motor + wire for control.
LEDs:
- Connect all LEDs in parallel with a 9V battery.
- Add a switch between battery + and LED + line.
Optional: Use two switches — one for rotation and one for heat LEDs, so you can explain them separately.
Explanation (For Presentation):
“This is a working model of Global Warming.
The rotating Earth shows our planet surrounded by factories, vehicles, and deforestation areas.
The red LED lights represent heat being trapped in the atmosphere due to greenhouse gases like CO₂ and methane.
This trapped heat increases the Earth’s temperature, leading to melting glaciers, rising sea levels, and climate changes.
The project demonstrates how human activities contribute to global warming and the need to protect our planet.”