The purpose of creating a working model on action verbs is to provide a visual and interactive tool for learning about this essential part of speech in English grammar.
Action verbs are words that express actions, processes, or states of being, and understanding them is fundamental for constructing meaningful sentences and communicating effectively in English.
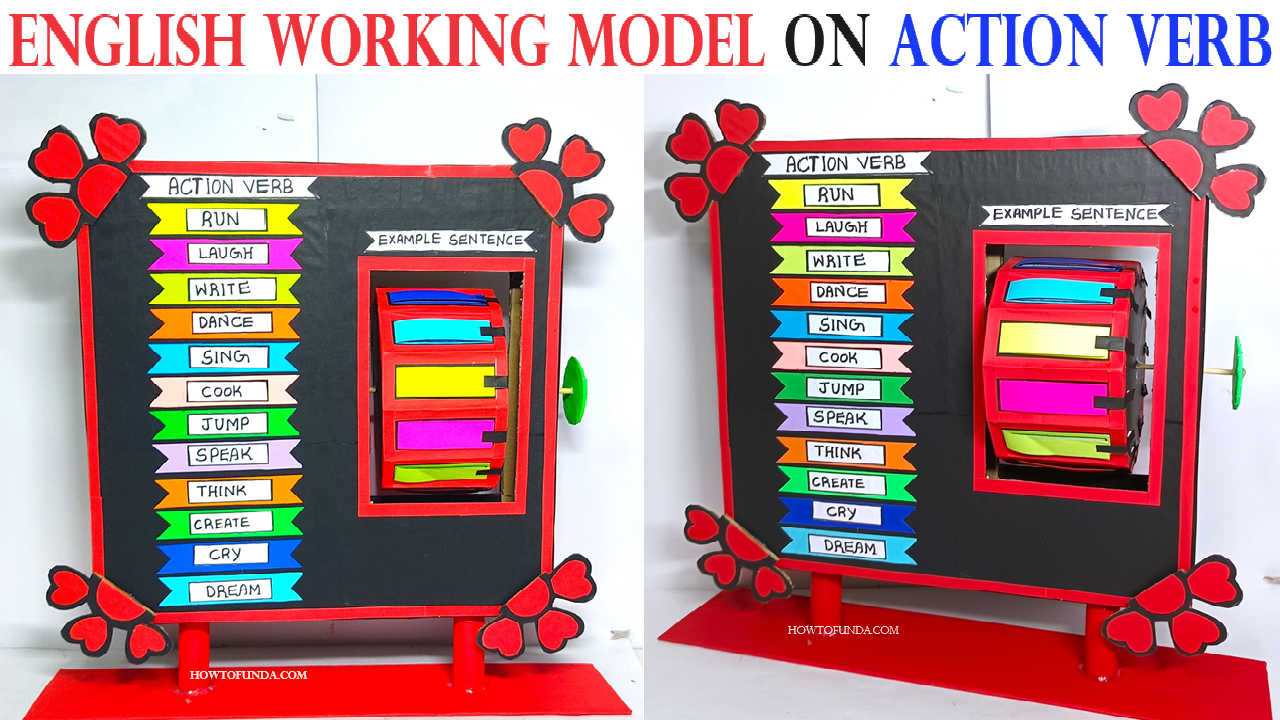
Creating a working model to demonstrate action verbs using cardboard, colored paper, and chopsticks can be a fun and interactive way to teach students.

Here’s a step-by-step guide to help you build it:
Materials Needed:
- Cardboard: For the base and parts of the model
- Colored paper: For visual appeal and labeling
- Chopsticks: For moving parts
- Glue: Hot glue or strong adhesive
- Scissors/Cutter: For cutting cardboard and paper
- Markers/Pens: For writing and decorating
- Brads/Paper fasteners: For making movable joints
- Ruler: For measurements
- String: For connecting moving parts
Step by Step Video Instructions on Action Verb :
1. Prepare the Base:
- Cut a large rectangular piece of cardboard (about 12×12 inches) for the base.
2. Create Action Figures:
- Draw and cut out simple human figures from cardboard. These figures will perform different actions.
- Attach arms and legs using brads so they can move.
3. Design Action Scenes:
- Create various scenes representing different action verbs (e.g., running, jumping, eating, reading) using colored paper and cardboard.
- Decorate the scenes to make them visually appealing.
4. Attach Figures to the Base:
- Secure the cardboard figures to the base with glue or tape. Ensure the figures can move freely at their joints.
5. Create Labels for Action Verbs:
- Cut small rectangles from colored paper and write action verbs on them (e.g., run, jump, eat, read).
- Attach these labels to the base near each figure.
6. Chopstick Mechanism for Movement:
- Attach one end of a string to the hand or leg of a figure using a small hole and a knot.
- Thread the other end of the string through a hole in the base, attach it to a chopstick underneath the base. This will allow you to pull the string and create movement.
- Repeat this process for each figure you want to be movable.
7. Setting Up the Control:
- Create a control panel on the side of the base using cardboard.
- Secure the chopsticks so they can rotate or move back and forth when manipulated. This movement will pull the strings and make the figures move.
8. Final Assembly:
- Test the movement mechanisms to ensure the figures can perform their actions smoothly.
- Adjust the length of the strings and the position of the chopsticks if necessary.
9. Decoration and Finishing Touches:
- Decorate the base and control panel with colored paper and markers.
- Label each scene and figure clearly to indicate the corresponding action verb.