Creating a DIY 3D working model of the water cycle using a light bulb and a plastic tray as an evaporator can be both fun and educational.

Here’s a step-by-step guide:
Materials Needed:
- Plastic tray or shallow container
- Light bulb or LED lamp
- Small water pump
- Small plastic tubing
- Small water reservoir or container
- Plastic or glass container (to collect condensed water)
- Cardboard or foam board
- Colored paper or markers
- Glue or adhesive
- Scissors
- Optional: Decorative materials (e.g., cotton balls, plastic trees)
Step by Step Video Instructions:
1. Prepare the Base:
- Start by setting up your plastic tray or shallow container. This will serve as the main platform for your water cycle model.
2. Sunlight Simulation:
- Attach the light bulb or LED lamp above the plastic tray to simulate sunlight. You can use a lamp stand or any other support to position the bulb.
3. Water Reservoir and Pump System:
- Place a small water reservoir or container next to the plastic tray.
- Connect the small water pump to the water reservoir using the plastic tubing. Make sure the pump is submerged in water.
4. Evaporation Chamber:
- Fill the plastic tray with water to create the evaporator chamber. This is where water will be heated and evaporated.
- Place the tray under the light bulb so that the heat from the bulb causes the water to evaporate.
5. Condensation Area:
- Position a plastic or glass container near the evaporator to collect condensed water vapor. This will represent the condensation phase of the water cycle.
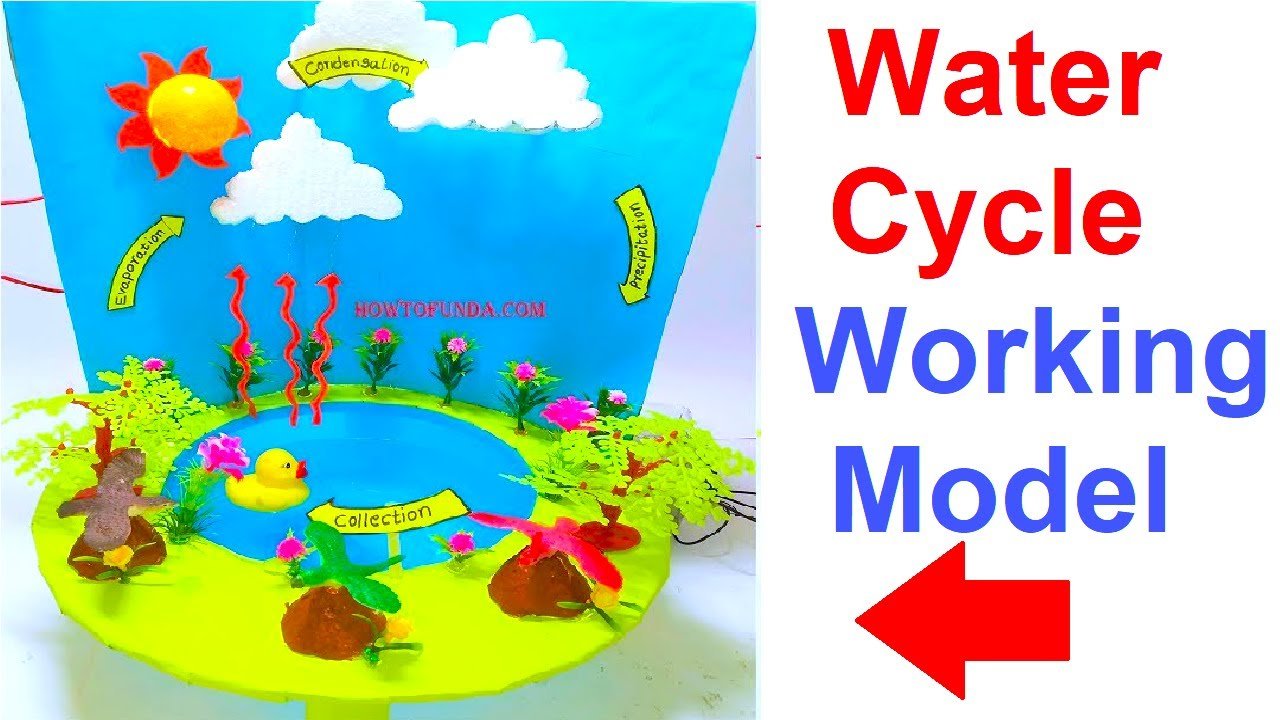
6. Decorate and Label:
- Use cardboard or foam board to create labels for each stage of the water cycle (e.g., evaporation, condensation, precipitation).
- Decorate the base and containers with colored paper or markers to represent clouds, raindrops, and other elements of the water cycle.
- Add optional decorative materials like cotton balls for clouds or plastic trees for scenery.
7. Assembly and Testing:
- Assemble all the components on the plastic tray according to the layout described above.
- Fill the water reservoir with water and turn on the water pump to start the water cycle process.
- Observe how the heat from the light bulb causes water to evaporate from the tray, condense on the walls of the collection container, and collect as water droplets, simulating the water cycle in nature.
Educational Value:
- Use the model to explain the stages of the water cycle: evaporation, condensation, and precipitation.
- Discuss the importance of the water cycle in regulating Earth’s climate and supporting life.
- Highlight how human activities can impact the water cycle and the environment.