The purpose of creating a working model of an atta chakki flour mill is to demonstrate the process of grinding wheat grains into flour, a staple food ingredient in many cultures.
This model helps individuals understand the traditional method of flour milling and appreciate the significance of atta chakki mills in food production and nutrition.
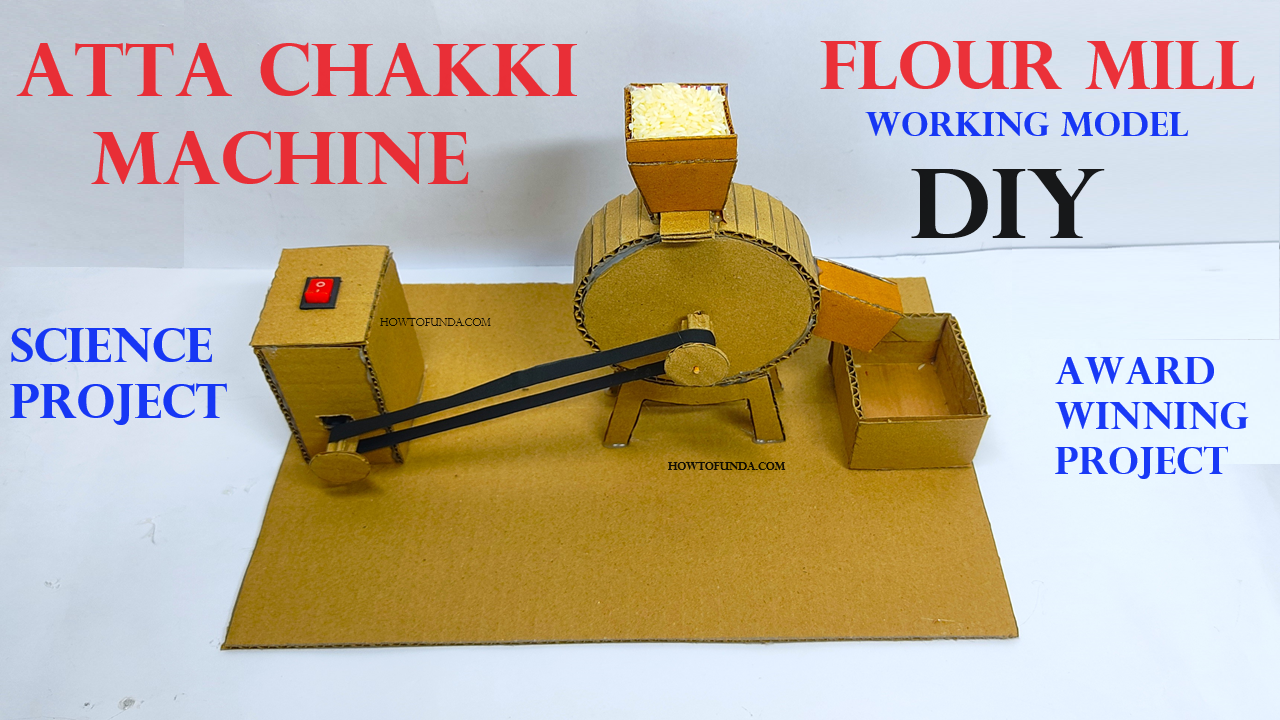
Creating a working model of an atta chakki (flour mill) using cardboard, a DC motor, and abrasive paper is an interesting and educational project.

Here’s a step-by-step guide to help you build it:
Materials Needed:
- Cardboard: For the body and various parts of the mill
- DC motor: To drive the mill
- Abrasive paper: For grinding
- Glue: Hot glue or strong adhesive
- Scissors/Cutter: For cutting cardboard
- Tape: Clear tape
- Ruler: For measurements
- Marker/Pencil: For marking measurements
- Battery: To power the DC motor
- Switch: To control the motor
- Wires: For connecting the motor to the battery and switch
- Small container: To collect the ground flour
- Small funnel: For pouring grains into the mill
Step by Step Video Instructions:
1. Design the Flour Mill Body:
- Base: Cut a rectangular piece of cardboard for the base. This will support the entire structure.
- Walls: Cut four pieces of cardboard to form the walls of the mill. The height should be around 6-8 inches.
2. Create the Grinding Mechanism:
- Grinding Chamber: Create a box-shaped chamber where the grinding will take place. Cut a hole in one side to attach the DC motor.
- Grinding Plates: Cut two circular pieces of cardboard for the grinding plates. Attach abrasive paper to both circles.
- Motor Connection: Attach one grinding plate to the shaft of the DC motor securely. This will be the rotating plate.
3. Assembly of the Grinding Mechanism:
- Position the grinding chamber on the base.
- Fix the DC motor so that the grinding plate attached to it is inside the grinding chamber.
- Place the second grinding plate inside the chamber, ensuring it is aligned with the motor-driven plate but not fixed. It should be able to move slightly to allow the grains to be ground between the two plates.
4. Feed Mechanism:
- Create a funnel using cardboard and attach it to the top of the grinding chamber. This will allow grains to be poured into the mill.
- Ensure the bottom of the funnel directs grains between the grinding plates.
5. Collecting the Flour:
- Create a small opening at the bottom of the grinding chamber to allow ground flour to fall into a container placed below.
6. Motor and Power Connection:
- Connect the DC motor to a switch and battery using wires. Make sure the connections are secure.
- Attach the switch to the side of the mill for easy operation.
7. Assembly:
- Assemble all parts together. Glue the walls to the base and secure the grinding chamber inside the mill.
- Fix the funnel at the top and ensure it aligns with the grinding plates.
- Place the collection container at the bottom to collect the ground flour.
8. Testing:
- Pour some grains into the funnel.
- Turn on the switch to start the motor.
- Observe as the grains are ground into flour and collected in the container below.