
in this blog post I am writing on how to make atomic models – atom structure – boron 3d atomic models – diy using waste materials available at your home
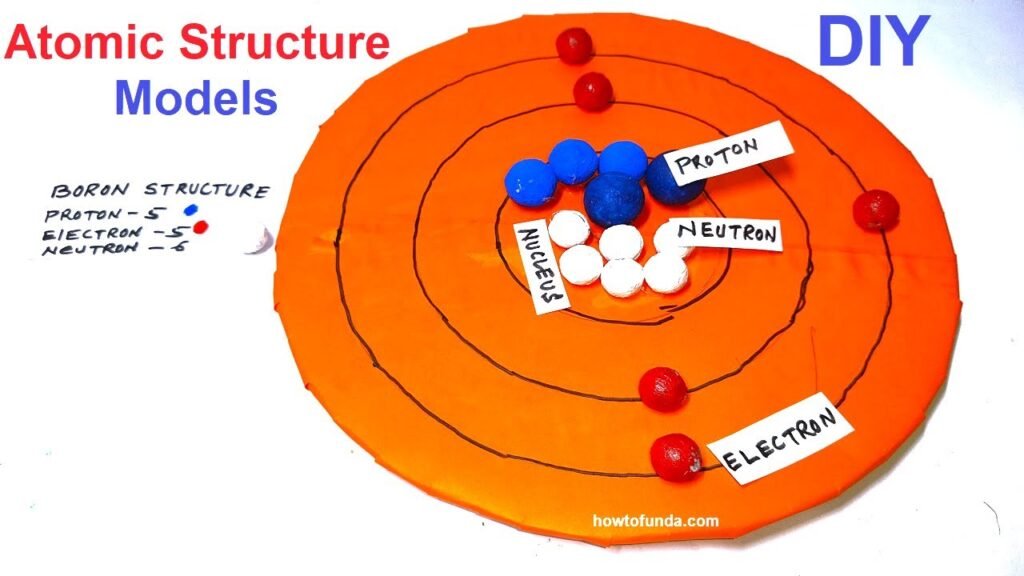
Creating a 3D atomic model of boron using cardboard, balls, and color is an engaging project that helps visualize the structure of an atom. Boron has an atomic number of 5, which means it has 5 protons and 5 electrons. Here’s a step-by-step guide to creating the model:
Materials Needed:
- Cardboard: For the base and supporting structure.
- Balls: Different colors or sizes to represent protons, neutrons, and electrons.
- Paint or Markers: To color the balls.
- Glue or Hot Glue Gun: For assembling the parts.
- Scissors and Craft Knife: For cutting the cardboard.
- Wire or Sticks: To create electron orbits.
- String: To suspend the electron orbits.
- Labels: To mark protons, neutrons, and electrons.
Step by Step Video on atomic models – atom structure – boron 3d atomic model
1. Prepare the Base:
- Cut a circular piece from the cardboard to serve as the base of your model.
2. Create the Nucleus:
- Use balls to represent protons and neutrons. Typically, you can use one color for protons and another for neutrons.
- For boron, you need 5 protons and 6 neutrons (common isotope Boron-11).
- Paint or color the balls accordingly.
- Glue the balls together to form a cluster representing the nucleus. Allow it to dry completely.
3. Form the Electron Orbits:
- Boron has two electron shells: 2 electrons in the first shell and 3 in the second shell.
- Use wire or sticks to form circular or elliptical orbits around the nucleus.
- Attach the orbits to the base using string or wire. Ensure they are evenly spaced and securely attached.
4. Place the Electrons:
- Use smaller balls to represent electrons.
- Paint or mark the electron balls in a distinct color.
- Attach the electron balls to the orbits using glue. Place 2 electrons in the first orbit and 3 in the second orbit.
5. Assemble the Model:
- Place the nucleus in the center of the base.
- Attach the electron orbits around the nucleus, ensuring they are stable.
6. Label the Parts:
- Use labels or markers to indicate protons, neutrons, and electrons.
- Optionally, label the electron shells (K and L).
This 3D atomic model of boron will effectively demonstrate its atomic structure, making it an excellent educational tool. Enjoy your project!
#atomicstructures #atomicmodel #3d #chemistrymodel #chemistryproject