
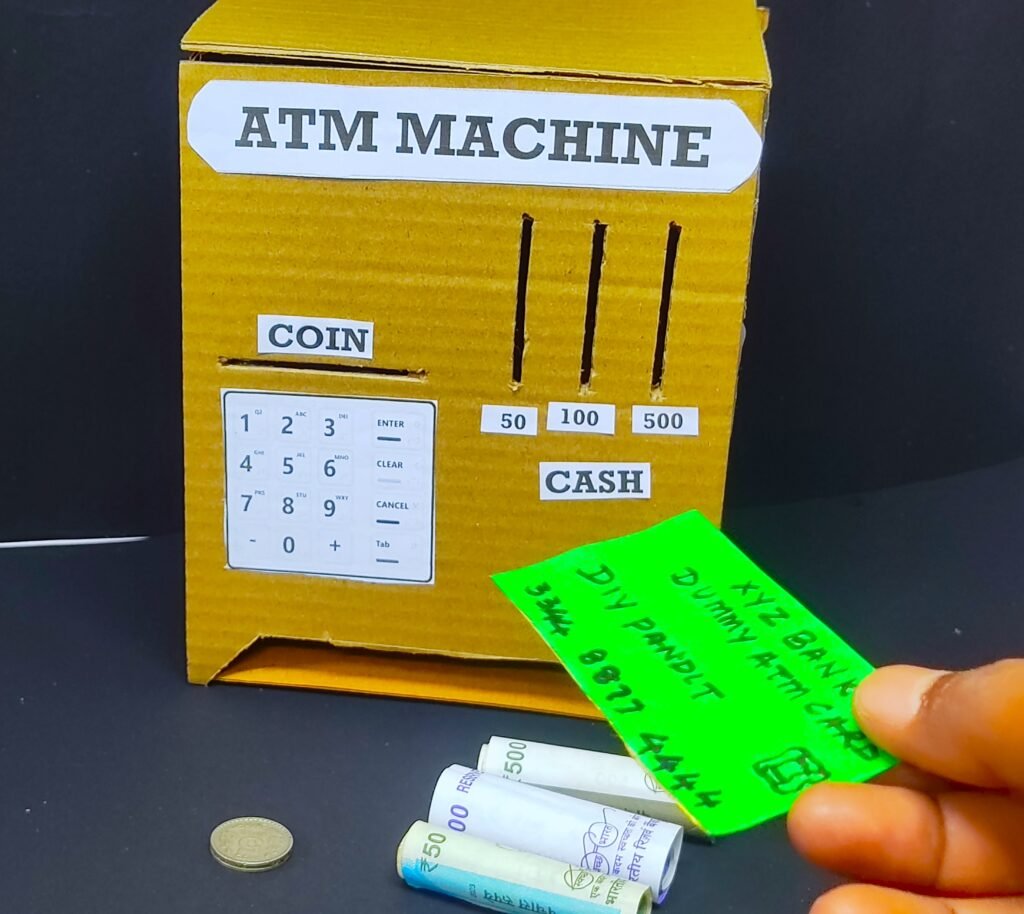
Creating an ATM machine project working model using cardboard is a fun and educational project. Here’s a step-by-step guide to making one:
Materials Needed:
- Cardboard
- Scissors or utility knife
- Markers or colored paper
- Glue or tape
- Small wooden dowels or sticks
- Small box or container (for cash dispenser)
- Small drawer or box (for card insertion)
- Buttons or keys (can be made from cardboard)
- LED lights or small screens (optional, for display)
- Coins or paper money (for pretend currency)
Steps by Steps Video Instructions:
1. Prepare the Base:
- Cut out pieces of cardboard to create the base and sides of the ATM machine.
- Fold the pieces and glue or tape them together to form a box-like structure.
- Leave one side open for the front panel.
2. Create the Front Panel:
- Cut out a piece of cardboard for the front panel.
- Cut holes for the display, buttons, card slot, and cash dispenser.
- Decorate the panel with markers or colored paper to make it look like a real ATM.
3. Make the Buttons and Display:
- Cut out small squares or circles from cardboard to create the buttons.
- Draw numbers, symbols, or letters on the buttons to represent functions like “Enter”, “Cancel”, and numerical keys.
- Optionally, use LED lights or small screens to represent the display. You can draw a display on cardboard if screens aren’t available.
4. Construct the Cash Dispenser:
- Cut a small box or container to hold the cash (paper money or coins).
- Attach this box to the inside of the ATM, behind the cash dispenser hole.
- Create a mechanism using small wooden dowels or sticks that allows the cash to be dispensed when activated.
5. Add the Card Insertion Slot:
- Cut a small drawer or box to act as the card insertion slot.
- Attach it securely to the front panel of the ATM, leaving enough space for cards to be inserted and removed.
6. Assembly:
- Attach the front panel to the rest of the ATM structure.
- Make sure all components are securely attached and aligned properly.
7. Test Your ATM:
- Insert “cards” (pieces of cardboard) into the card slot.
- Press the buttons to simulate entering PIN numbers or making selections.
- Activate the cash dispenser mechanism to “withdraw” money.
- Test the functionality of each component.
Explanation:
- This cardboard ATM model simulates the basic functions of a real ATM machine.
- Users can insert a card, enter a PIN, and withdraw pretend money.
- It’s a great way to learn about the workings of an ATM and the basics of banking.
By following these steps, you can create a simple yet functional ATM machine project working model using cardboard. It’s a fun and interactive way to learn about banking and technology!