
1. Introduction
Water is one of the most important natural resources required for our daily life. We use water for drinking, cooking, washing, cleaning, agriculture and many other activities.
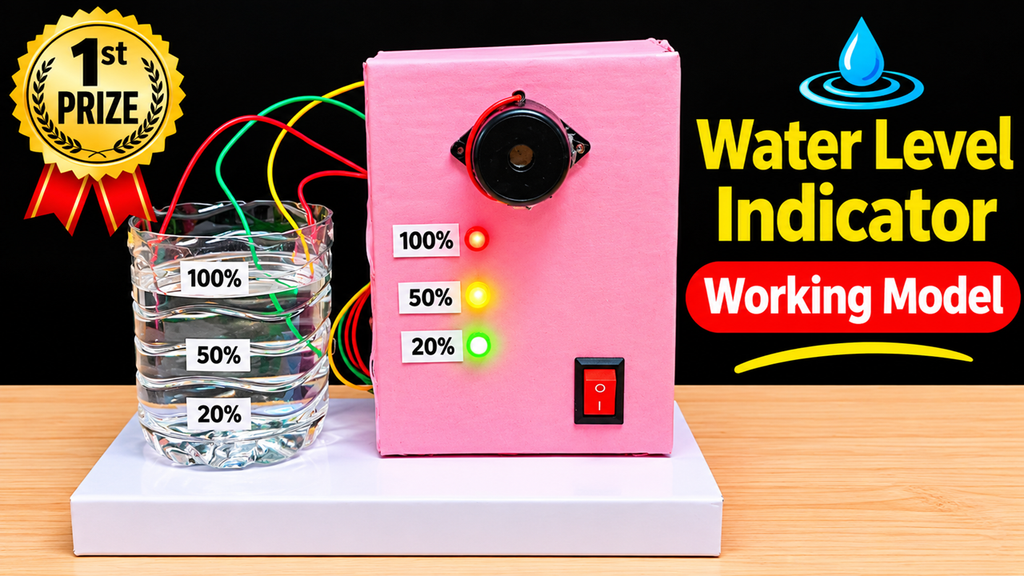
In many houses, water is stored in overhead tanks. Sometimes, the tank becomes completely full, and water starts overflowing. This leads to unnecessary water wastage. Similarly, when the water level becomes too low, people may not know when the tank needs to be refilled.
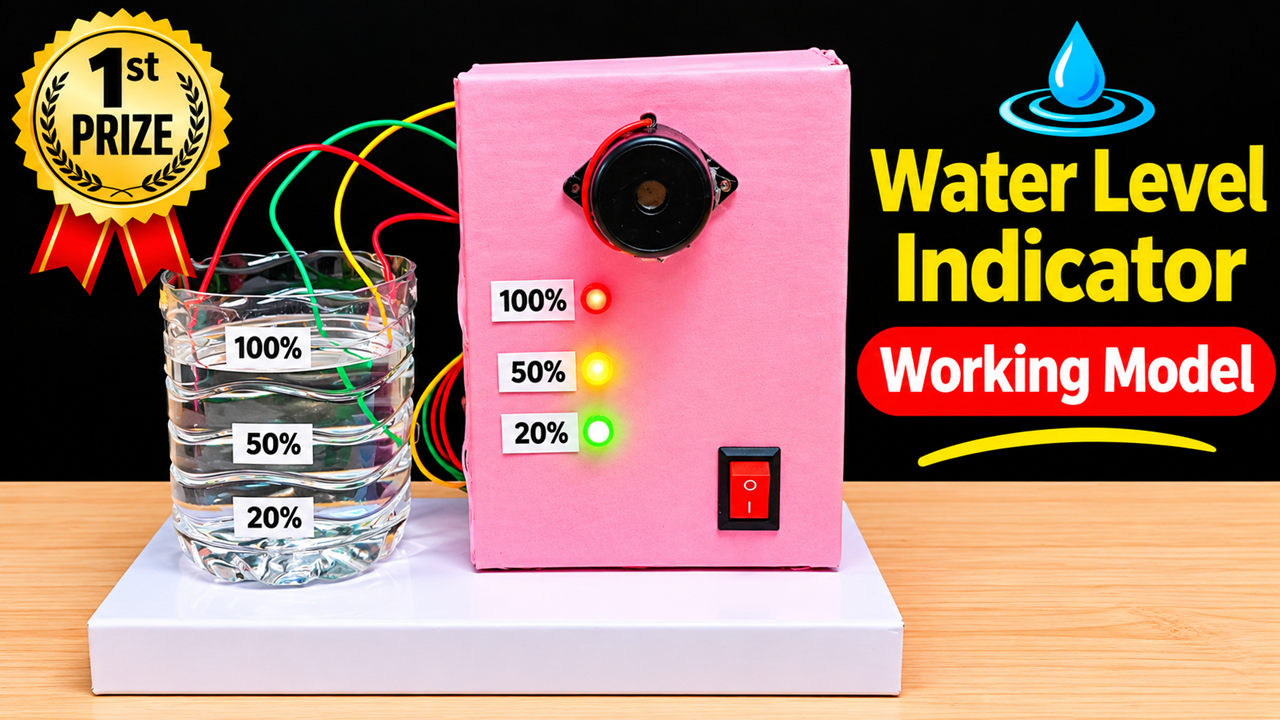
To solve this problem, we have designed a Water Level Indicator Working Model.
This project uses sensors, LEDs and a buzzer to indicate the amount of water present inside a tank. It displays three important levels: 20%, 50% and 100%.
The main objective of this project is to prevent water wastage, monitor tank water levels and encourage the efficient use of water.
2. Materials Required
To prepare this working model, we need the following materials:
- One transparent plastic bottle or container.
- Cardboard box for the circuit control panel.
- Three LEDs – green, yellow and red.
- Three or more water-level sensor probes or metal wires.
- One buzzer.
- Connecting wires.
- One battery (9V or suitable DC power supply).
- One ON/OFF switch.
- Resistors suitable for the LEDs.
- Transistor or comparator circuit, if required.
- Small breadboard or circuit board.
- Pink, white and other colour papers for decoration.
- Glue gun, scissors and adhesive tape.
3. How to Make the Model
Step 1: Prepare the Base
Take a rectangular cardboard sheet and cover it with white colour paper. This will act as the supporting base for the project.
Step 2: Prepare the Water Tank
Take a transparent plastic bottle or container. Cut the upper portion if required to make an open water tank.
Mark three water levels on the container:
- 20% – Low water level.
- 50% – Medium water level.
- 100% – Full water level.
Paste small labels near each marking so that the water levels can be identified easily.
Step 3: Prepare the Control Panel
Take a small cardboard box and cover it with pink colour paper. This box represents the electronic control panel.
Make three small holes on the front side of the box and fix the LEDs.
Arrange the LEDs according to their levels:
- Green LED – 20% water level.
- Yellow LED – 50% water level.
- Red LED – 100% water level.
Fix a buzzer at the top and an ON/OFF switch at the bottom.
Step 4: Install the Water Level Sensors
Take three metal wires or water-level sensor probes.
Fix them at different heights inside the water tank.
- First sensor: 20% level.
- Second sensor: 50% level.
- Third sensor: 100% level.
Place a common reference probe near the bottom of the tank.
These probes detect the presence of water at different heights.
Step 5: Connect the Electronic Circuit
Connect the sensor probes to the corresponding LED indicator circuits.
Use suitable transistors, resistors or a comparator circuit to detect the water level and control the LEDs.
Connect the buzzer to the full-level detection circuit so that it produces an alert when the water reaches the 100% mark.
Connect the battery through the ON/OFF switch to supply power to the circuit.
Step 6: Arrange the Wires
Connect the tank sensors to the control panel using insulated wires. Make sure that the connections are secure and properly insulated.
For a reliable demonstration, use a low-voltage battery-powered circuit and suitable electronic components.
Step 7: Final Decoration
Fix the water tank and control panel on the base. Add labels such as 20%, 50%, 100%, WATER LEVEL SENSOR and BUZZER.
Your Water Level Indicator Working Model is now ready.
4. How Does the Working Model Work?
The working process begins when we switch ON the power supply.
The water level sensors are placed at different heights inside the tank. These sensors detect the presence of water and send signals to the electronic control circuit.
Stage 1 – 20% Water Level:
When the water reaches the first sensor, the circuit detects the water. The green LED glows, indicating that the tank contains approximately 20% water.
Stage 2 – 50% Water Level:
As more water enters the tank, it reaches the second sensor. The electronic circuit detects this level and the yellow LED glows, indicating approximately 50% water.
Stage 3 – 100% Water Level:
When the water reaches the third sensor, the red LED glows. At the same time, the buzzer produces a sound to alert us that the tank is full.
The buzzer reminds us to stop the water supply and prevents unnecessary overflow.
Thus, this system helps us monitor the water level without continuously checking the tank manually.
Note: The LEDs can be designed to remain ON cumulatively as the water rises. The exact indication depends on the electronic circuit used.
5. Applications of Water Level Indicator
- Overhead water tanks in houses.
- Underground water storage tanks.
- Apartments and residential buildings.
- Schools, colleges and hospitals.
- Industrial water storage tanks.
- Agricultural water storage systems.
- Swimming pools and reservoirs.
- Automatic water pumping systems.
6. Advantages of This Project
- Prevents water overflow.
- Reduces unnecessary water wastage.
- Helps monitor water levels easily.
- Provides an alert when the tank becomes full.
- Reduces the need for manual checking.
- Saves time and effort.
- Can be connected to automatic water pumps.
- Encourages responsible water management.
7. Conclusion
Our Water Level Indicator Working Model demonstrates how electronic sensors, LEDs and a buzzer can help monitor the water level inside a storage tank.
The green LED indicates a low water level, the yellow LED indicates a medium water level and the red LED with a buzzer indicates that the tank is full.
This simple technology can be used in homes, schools, apartments, industries and agricultural systems.
By using a water level indicator, we can prevent water overflow, reduce wastage and conserve one of our most valuable natural resources.
Our message is: EVERY DROP COUNTS – SAVE WATER, SAVE LIFE!
8. Science Exhibition – Short Presentation Script
Good morning, respected judges, teachers and my dear friends.
My project name is Water Level Indicator Working Model.
Water is a precious natural resource. In many houses, overhead water tanks overflow because people do not know when the tank becomes full.
To solve this problem, I have designed a water level indicator system.
In our model, we have three sensors placed at different heights inside the water tank.
When the water reaches 20%, the green LED glows.
When the water reaches 50%, the yellow LED glows.
When the water reaches 100%, the red LED glows and the buzzer produces an alert sound.
This helps us identify the water level without manually checking the tank.
We can also connect this system to an automatic water pump to stop pumping when the tank becomes full.
The main advantage of this project is that it prevents water overflow and saves water.
My message is: DON’T LET WATER OVERFLOW, EVERY DROP IS VALUABLE!
Thank you!