The water cycle is a natural process in which water continuously moves between the Earth and the atmosphere. It is one of the most important processes in nature because it helps maintain life on Earth.
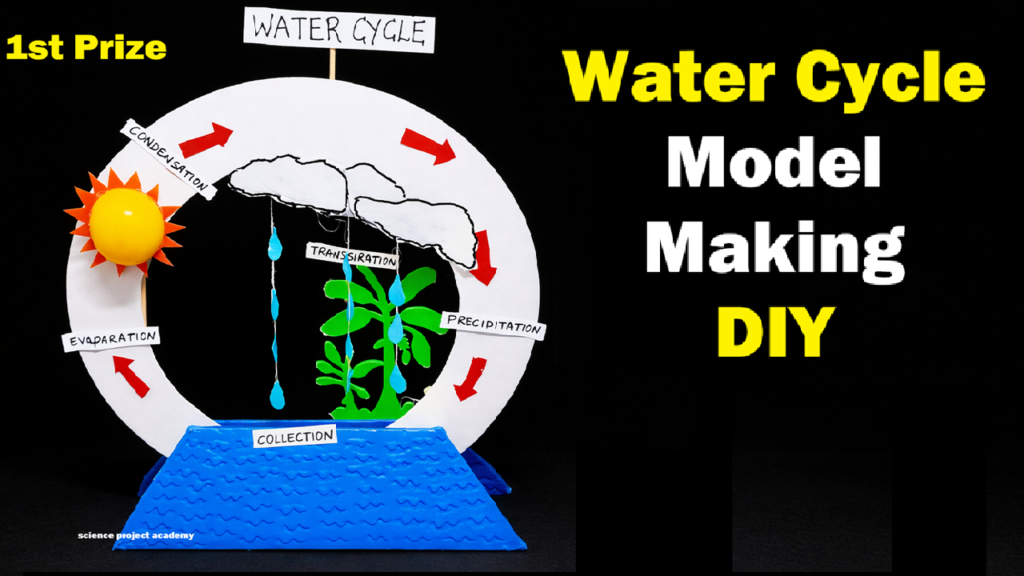
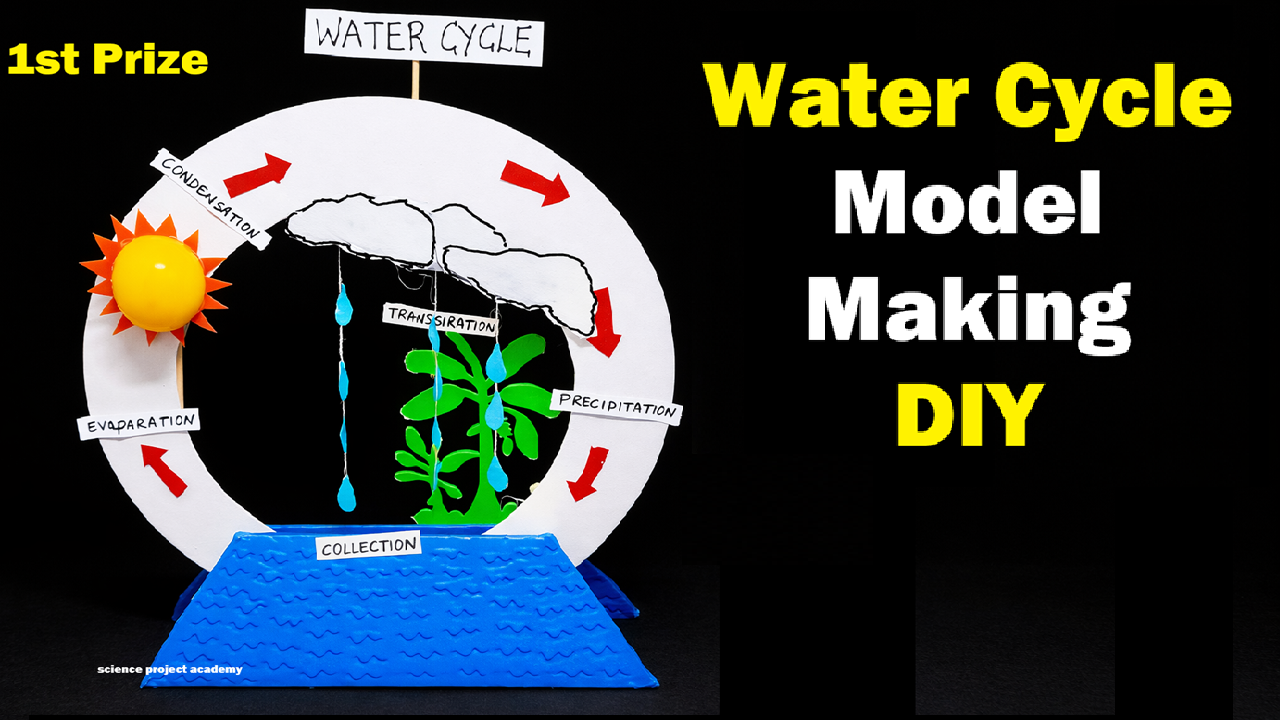
This simple and easy water cycle model is an excellent science project for school exhibitions. It helps students understand the stages of the water cycle such as evaporation, condensation, precipitation, transpiration, and collection in a creative and practical way.
Aim of the Project
The aim of this project is to demonstrate the different stages of the water cycle and explain how water circulates in nature.
Materials Required
- Cardboard or foam sheet
- Colored paper
- Cotton
- Glue and tape
- Scissors
- Blue chart paper
- Sketch pens or markers
- Thermocol or paper plate ring
- Small artificial plants
- Yellow paper for sun
- Thread and paper drops for rain
How to Make the Water Cycle Model
Step 1: Prepare the Base
Take a cardboard sheet and cover it with blue chart paper. This will represent the water body such as a lake, river, or ocean.
Step 2: Make the Circular Frame
Cut a large circular ring using thermocol or cardboard. Fix it vertically on the base using glue. This ring represents the continuous cycle of water.
Step 3: Add the Sun
Cut a sun shape using yellow and orange paper and paste it on one side of the circular frame. The sun provides heat energy for evaporation.
Step 4: Create Clouds
Use cotton to make clouds and attach them at the top of the frame. Label this stage as “Condensation.”
Step 5: Show Rainfall
Hang blue paper drops or water droplets using thread below the clouds. Label this process as “Precipitation.”
Step 6: Add Plants
Place small artificial plants or paper plants near the center. Label the process as “Transpiration,” which shows water vapor released by plants.
Step 7: Show Water Collection
At the bottom, create a water body using blue paper. Label it as “Collection.” This represents rivers, lakes, and oceans where water gathers.
Step 8: Add Arrows and Labels
Use red arrows to show the direction of the water cycle. Clearly label all stages such as evaporation, condensation, precipitation, transpiration, and collection.
Working Principle
The water cycle begins when the sun heats water from oceans, rivers, and lakes. This water changes into water vapor and rises into the atmosphere. This process is called evaporation.
As the water vapor rises, it cools and forms clouds. This process is known as condensation. When the clouds become heavy, water falls back to Earth in the form of rain, snow, or hail. This process is called precipitation.
Plants also release water vapor into the atmosphere through transpiration. Finally, water collects in rivers, lakes, oceans, and underground sources. The cycle then repeats continuously.
Importance of Water Cycle
- Maintains the balance of water on Earth
- Helps plants, animals, and humans survive
- Refills rivers, lakes, and groundwater
- Controls weather and climate
- Supports agriculture and ecosystems
Conclusion
The Water Cycle Model is a simple and educational science project that helps students understand how water moves in nature. It clearly explains the important stages of the water cycle through a creative working model. This project is easy to make using low-cost materials and is highly suitable for science exhibitions. It also creates awareness about the importance of water conservation and the role of nature in maintaining life on Earth.