A printer is an important output device used to print text and images from a computer onto paper. This printer working model is a simple DIY science project made using cardboard and syringes.

It is an excellent project for school science exhibitions because it demonstrates the basic working principle of hydraulic pressure and mechanical movement. The model is easy to build, low-cost, and helps students understand how machines and printers work.
Aim of the Project
The aim of this project is to create a simple printer working model using cardboard and syringes to demonstrate the movement of paper and the printing mechanism using hydraulic pressure.
Materials Required
- Cardboard sheets
- Two syringes
- Plastic pipe or tube
- Glue gun or adhesive
- Scissors and cutter
- Colored paper
- White paper strips
- Marker pen
- Tape and ruler
How to Make the Printer Working Model
Step 1: Prepare the Printer Body
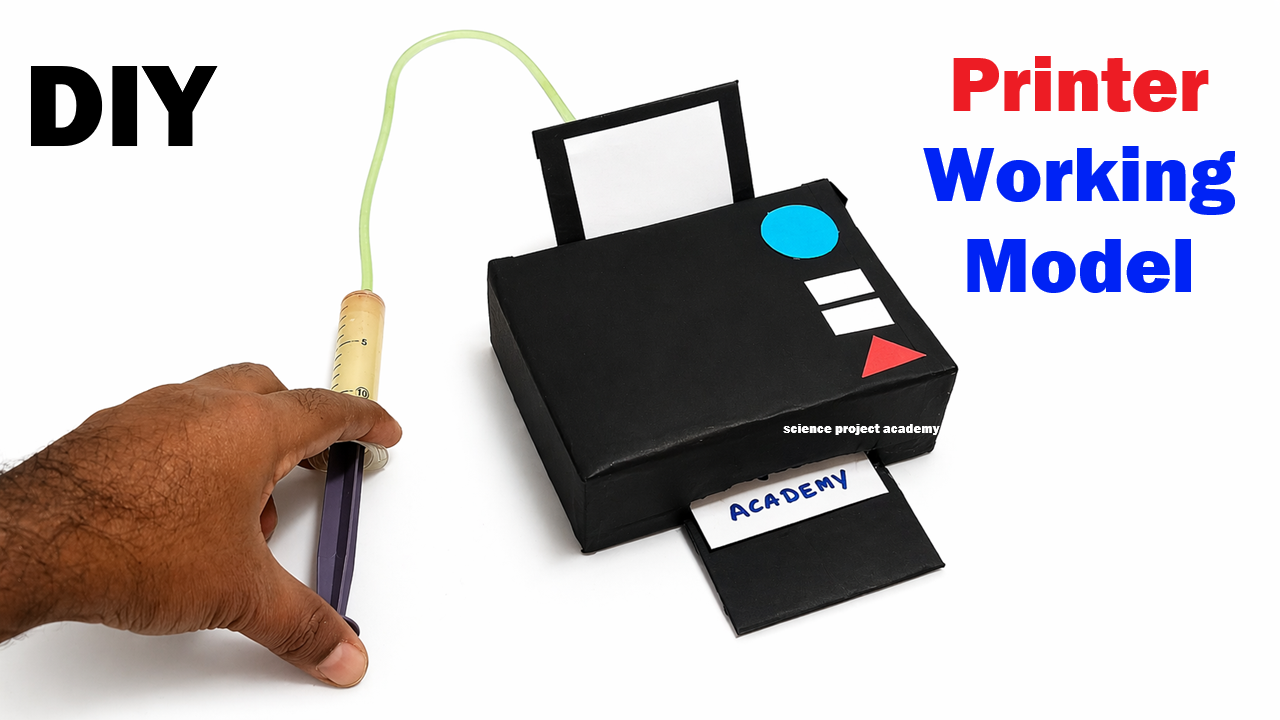
Take thick cardboard and cut it into rectangular pieces. Use these pieces to make a box-shaped structure that looks like a printer. Fix all sides properly using glue or tape. Cover the model with black or colored paper to make it attractive.
Step 2: Create Paper Input and Output Slots
Make one slot at the top of the printer for inserting paper and another slot at the front for paper output. Ensure the paper strip can move smoothly through the openings.
Step 3: Attach the Syringe System
Take two syringes and connect them using a plastic tube filled with air or water. Fix one syringe outside the printer model and the other inside near the paper movement area.
Step 4: Connect the Moving Mechanism
Attach the inner syringe to a cardboard platform connected to the paper strip. When the outer syringe is pressed, pressure moves the inner syringe forward, pushing the paper outside like a real printer.
Step 5: Add Decorative Buttons
Use colored paper to create buttons and display panels on the printer model. This makes the model look more realistic and attractive for the science exhibition.
Step 6: Test the Model
Insert a paper strip into the printer model. Press the outer syringe slowly. The hydraulic pressure will move the inner syringe, causing the paper to come out from the front slot. This demonstrates the working principle of a printer.
Working Principle
This printer model works on the principle of hydraulic pressure. When pressure is applied to one syringe, the force is transferred through the tube to the second syringe. The second syringe moves and pushes the paper forward. This movement is similar to how rollers inside a real printer move paper during printing.
Although this model does not print ink on paper, it effectively demonstrates the mechanical paper-feeding process used in printers. Real printers use motors, rollers, and electronic systems to print text and images.
Advantages of the Model
- Easy and low-cost project
- Demonstrates hydraulic pressure clearly
- Improves creativity and engineering skills
- Useful for understanding machine mechanisms
- Attractive for science exhibitions
Applications
- School science exhibitions
- Learning hydraulic systems
- Demonstrating mechanical movements
- Understanding printer technology
Conclusion
The Printer Working Model using cardboard and syringes is a creative and educational science project. It helps students understand the basic working mechanism of printers and hydraulic systems in a simple way. The project is economical, easy to build, and highly effective for demonstrating scientific concepts. It also develops problem-solving, creativity, and practical learning skills among students.