Introduction
Renewable energy is becoming increasingly important as the world searches for cleaner and more sustainable ways to produce electricity. Among the many renewable energy sources available today, hydroelectric power is one of the oldest and most widely used methods of generating electricity. It uses the natural flow of water to produce energy without polluting the environment.

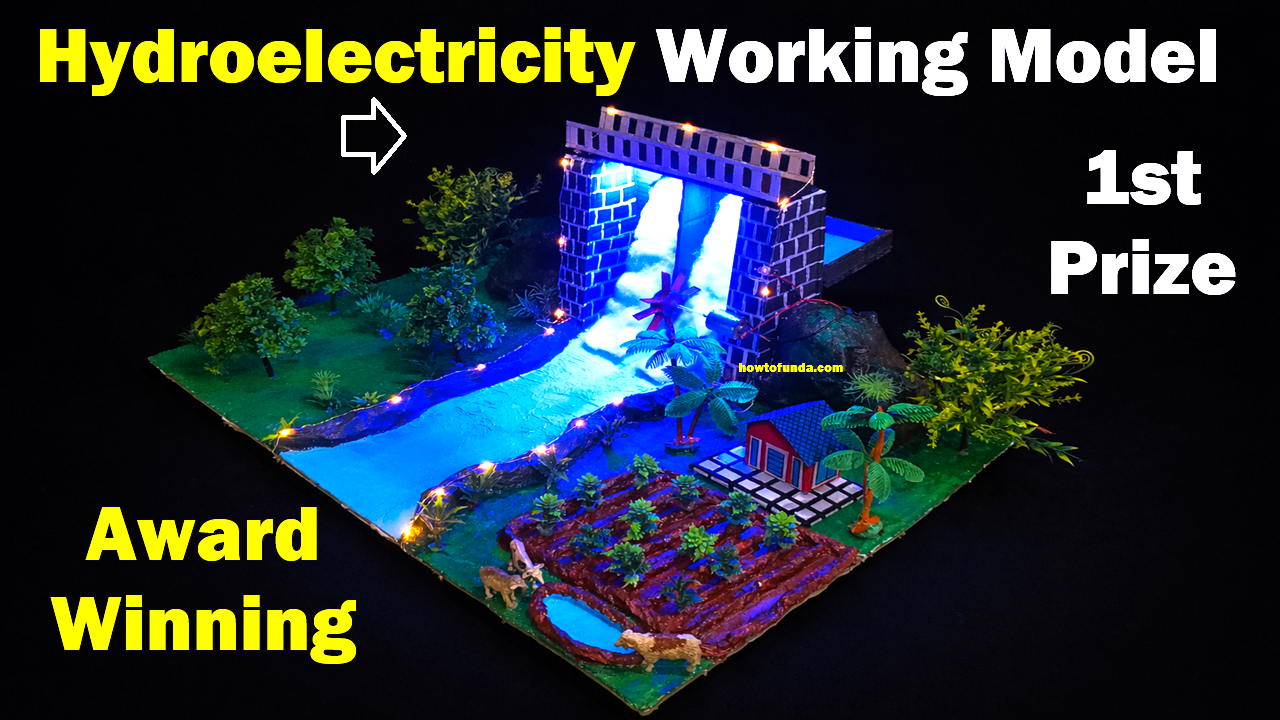
A hydroelectricity working model is an excellent project for a science exhibition because it demonstrates how water can be used to generate electricity. The attached project model shows a miniature dam structure with flowing water, a turbine system, agricultural land, houses, trees, and LED lights representing electricity generation and distribution. This type of model clearly explains the working principle of hydroelectric power plants in a creative and visually attractive way.
This article explains the concept, materials, construction process, and working principle of a DIY hydroelectric power plant model, similar to the award-winning project design shown in the image.
Concept of Hydroelectric Power
Hydroelectric power plants generate electricity by converting the energy of moving water into electrical energy. In real hydroelectric plants, a large dam stores water at a high elevation. When the water is released, it flows through turbines, causing them to rotate. The turbines are connected to generators that produce electricity.
The process involves three major energy conversions:
- Potential Energy – Water stored at height in the dam.
- Kinetic Energy – Flowing water moving downward.
- Electrical Energy – Electricity generated by a turbine-driven generator.
The science exhibition model demonstrates this same process in a simplified way.
Features of the Working Model
The hydroelectric model shown in the image includes several important elements that make it visually impressive and scientifically accurate.
1. Dam Structure
At the center of the model is a miniature dam made from cardboard or foam board. The dam holds water at the top and allows it to flow down through two openings. LED lights around the dam enhance the appearance and highlight the water flow.
2. Waterfall and River Flow
Below the dam, water flows downward like a waterfall and enters a small river channel. The river carries water across the landscape, creating a realistic representation of a natural water system.
3. Turbine System
Near the base of the dam is a small turbine wheel. When water flows down from the dam, it rotates the turbine. The turbine is connected to a small DC motor, which acts as a generator and produces electricity.
4. Lighting System
Small LED lights are placed around the dam, river, and house. These lights represent electricity generated by the hydroelectric power plant. When the turbine spins, it powers the LEDs, demonstrating electricity production.
5. Village and Agricultural Area
The model also includes a small house, trees, crops, and animals, showing how electricity generated from hydroelectric plants supports rural life, agriculture, and homes.
6. Decorative Landscape
Green grass, plants, trees, and pathways create a realistic environment. This makes the model visually attractive and helps viewers understand the connection between renewable energy and sustainable living.
Materials Required
To build a hydroelectric working model like the one shown in the image, you will need the following materials:
- Thermocol sheet or cardboard (base platform)
- Cardboard or foam board (for dam structure)
- Small DC motor (generator)
- Plastic wheel or bottle caps (for turbine)
- LED lights
- Electric wires
- Hot glue gun
- Plastic pipes or straws
- Small water pump (optional for continuous flow)
- Paints and brushes
- Artificial grass or green chart paper
- Small toy trees, houses, and animals
- Transparent plastic sheet for water effect
- Battery (if pump is used)
- Cutter and scissors
Most of these materials are inexpensive and easily available in craft stores or at home.
Steps to Build the Hydroelectric Model
Step 1: Prepare the Base
Take a large thermocol or cardboard sheet and use it as the base of your model. Cover the base with green paper or artificial grass to represent land.
Mark areas for the dam, river, house, and agricultural fields.
Step 2: Construct the Dam
Build a rectangular dam using cardboard or foam board. Paint it to look like a concrete structure with brick patterns. Leave openings at the bottom where water will flow down.
Install LED lights around the dam walls to highlight the structure.
Step 3: Create the Water Channel
Design a sloping river channel from the dam to the lower part of the model. You can use clay, thermocol carving, or cardboard to create the river path.
Paint the river with blue paint or place transparent plastic sheets to give the appearance of water.
Step 4: Install the Turbine
Place a small turbine wheel below the dam opening where water flows. The turbine can be made by attaching plastic spoons or bottle caps around a circular disc.
Connect the turbine to a DC motor so that when the turbine rotates, the motor produces electricity.
Step 5: Connect the LED Lights
Attach wires from the DC motor to small LED lights placed around the dam and house. When the turbine spins, it generates electricity and lights up the LEDs.
This visually demonstrates the generation and use of electricity.
Step 6: Add Landscape and Decorations
Add small trees, plants, houses, and agricultural fields to make the model look realistic. Use clay or colored paper to create farmland.
Place toy animals and plants to show how hydroelectric power supports villages and farming.
Step 7: Add Water Flow System
To demonstrate the working model, you can either:
- Pour water manually from the top reservoir, or
- Install a small water pump that continuously circulates water.
When water flows down, it spins the turbine and lights up the LEDs.
Working Principle of the Model
The hydroelectric model works in the following way:
- Water is stored in the dam reservoir at the top.
- Water flows downward through openings in the dam.
- The flowing water rotates the turbine wheel.
- The turbine spins the DC motor generator.
- The generator produces electricity.
- The electricity powers LED lights in the model.
This clearly demonstrates how real hydroelectric power plants generate electricity.
Advantages of Hydroelectric Energy
Hydroelectric energy has many benefits:
- It is renewable and sustainable.
- It produces no air pollution or greenhouse gases.
- Water is naturally replenished through the water cycle.
- Hydroelectric plants have low operating costs.
- It supports agriculture, irrigation, and drinking water supply.
Educational Importance
This model is very useful for science exhibitions because it helps students understand:
- Renewable energy sources
- Energy conversion principles
- Hydroelectric power generation
- Environmental sustainability
- Engineering design and creativity
It also improves students’ skills in model building, problem solving, and scientific presentation.
Conclusion
The hydroelectricity working model is an innovative and engaging project for science exhibitions. It effectively demonstrates how renewable energy can be generated using the natural flow of water. By building a miniature dam, turbine, and electricity system, students can visually explain the functioning of hydroelectric power plants.
The model shown in the image is an award-winning project design because it combines scientific accuracy with attractive presentation. With simple materials and creativity, anyone can build a similar DIY model and showcase the importance of renewable energy for a sustainable future.
Such projects encourage young minds to think about clean energy solutions and inspire the next generation of scientists and engineers to develop technologies that protect our planet.