Introduction
An electric bell is a common device used in schools, offices, and homes to produce a sound signal when activated. It works on the principle of electromagnetism, where electric current creates a magnetic field that attracts a metallic hammer to strike a bell or steel plate. The electric bell is an important example of converting electrical energy into mechanical energy and sound.

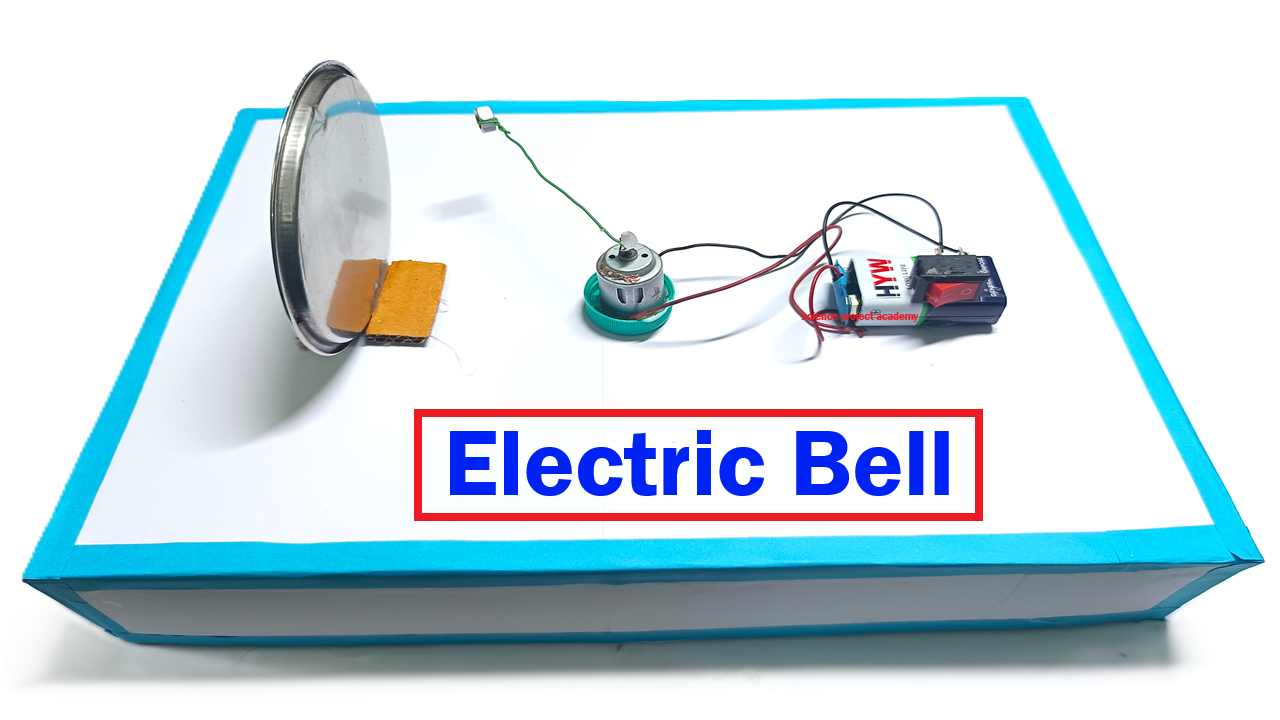
This Electric Bell Working Model is a DIY science exhibition project made using simple materials such as a DC motor, steel plate, and nut. The model demonstrates the working mechanism of an electric bell in a clear and interactive manner.
Aim of the Project
The main objectives of this project are:
- To understand the working principle of an electric bell
- To demonstrate electromagnetism in action
- To show the conversion of electrical energy into sound energy
- To create a low-cost DIY science exhibition project
Materials Used
- DC motor (acts as electromagnet)
- Steel plate (to strike for sound)
- Nut (to act as striker or hammer)
- Cardboard or wooden base
- Wires and battery
- Switch
- Glue, tape, and scissors
- Marker pens for labeling
Principle of the Electric Bell
The electric bell works on electromagnetic induction:
- When the switch is pressed, electric current flows through the coil in the DC motor.
- The current produces a magnetic field that attracts the nut or metallic hammer.
- The hammer strikes the steel plate, producing a ringing sound.
- When the hammer moves, the circuit is temporarily broken and reconnected, producing continuous ringing as long as the switch is pressed.
Construction of the Model
- Prepare a sturdy cardboard or wooden base for mounting the components.
- Fix the DC motor securely on the base.
- Attach the nut to the motor shaft or to a small lever to act as the hammer.
- Place the steel plate in front of the hammer so that it produces sound when struck.
- Connect the battery to the DC motor using wires and include a switch to control current flow.
- Optional decoration and labeling can be done for clarity and visual appeal.
Working of the Model
- Close the switch to allow electric current to flow to the DC motor.
- The DC motor generates a magnetic field, attracting the nut hammer.
- The hammer strikes the steel plate, producing a ringing sound.
- The hammer moves back and forth due to the switching action, causing continuous ringing as long as the circuit is powered.
This working model clearly shows the interaction of electricity and magnetism to produce mechanical motion and sound.
Scientific Explanation
- Electrical Energy → Magnetic Energy → Mechanical Energy → Sound Energy
- Demonstrates the principle of electromagnetism
- Shows continuous motion using a simple on-off mechanism
Educational Importance
- Helps understand fundamental physics principles
- Demonstrates practical applications of electromagnetism
- Ideal for science exhibition and viva
- Encourages hands-on learning and DIY creativity
Advantages of the Model
- Low-cost and easy to make
- Interactive and engaging
- Demonstrates real-life application of physics
- Safe and reusable
Conclusion
The Electric Bell Working Model using DC Motor, Steel Plate, and Nut is a simple and effective science exhibition project. It demonstrates the principle of electromagnetism and energy conversion in a clear and interactive way. This DIY model is highly suitable for school science exhibitions, helping students understand a practical application of physics.