
Learn how to make a Congruent Triangles Working Model for your maths projects!
This DIY TLM (Teaching Learning Material) tutorial is perfect for students, teachers, and math enthusiasts who want a simple yet effective way to demonstrate congruent triangles visually.
In this video, we cover step-by-step instructions to create a craft-based, interactive maths model that helps in understanding triangle congruence rules like SSS, SAS, ASA, AAS.
Perfect for class 9 and 10 students and ideal for science and maths exhibitions.
Materials Needed
Cardboard: For the main structure and base.
Colored Paper: To cover the cardboard and create the triangles.
Scissors/Cutter: For precise cutting.
Glue: A glue gun or strong craft glue is best.
Drawing tools: Pencil, ruler, and a protractor.
Fasteners (Optional): Small wooden screws or rubber bands can be used for interactive elements on the side panels.
Step-by-Step Instructions
Step 1: Construct the Main Display Structure
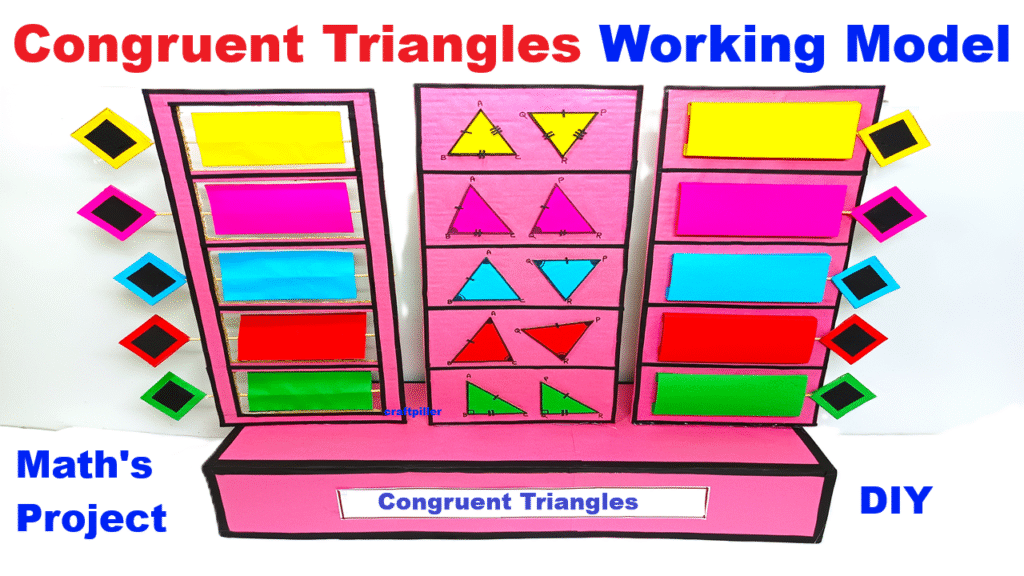
Build the pink, 3D display stand using cardboard pieces. The image shows a central panel for the triangle examples and two side panels for storing or displaying additional elements. Cover the entire structure with pink colored paper for a neat finish.
Step 2: Design and Cut the Triangles
On different colored papers, draw and cut out various pairs of congruent triangles (triangles with the exact same size and shape).
Ensure some pairs demonstrate specific congruence rules like SSS (Side-Side-Side), SAS (Side-Angle-Side), ASA (Angle-Side-Angle), AAS (Angle-Angle-Side), and RHS (Right angle-Hypotenuse-Side).
You can add small markings (arcs for angles, dashes for sides) to indicate which parts are congruent, as seen in the image.
Step 3: Prepare the Display Sections
Central Panel: Glue the pairs of congruent triangles onto separate backings (e.g., small white cards) and attach them vertically to the central panel, one below the other.
Side Panels: The side panels can be designed with pockets or shelves to hold additional information cards or different triangle examples.
Decorative Elements: Cut out small, colorful diamond or square shapes and attach them to the sides for decoration.
Step 4: Label and Explain
Add labels and a main title to your project using white paper strips and markers. This helps explain the purpose of the model and the different congruence criteria being demonstrated.
Step 5: Add the Finishing Touches
Ensure all pieces are securely glued. The finished model can serve as a visual aid to explain the properties of congruent triangles for a math project or exhibition.