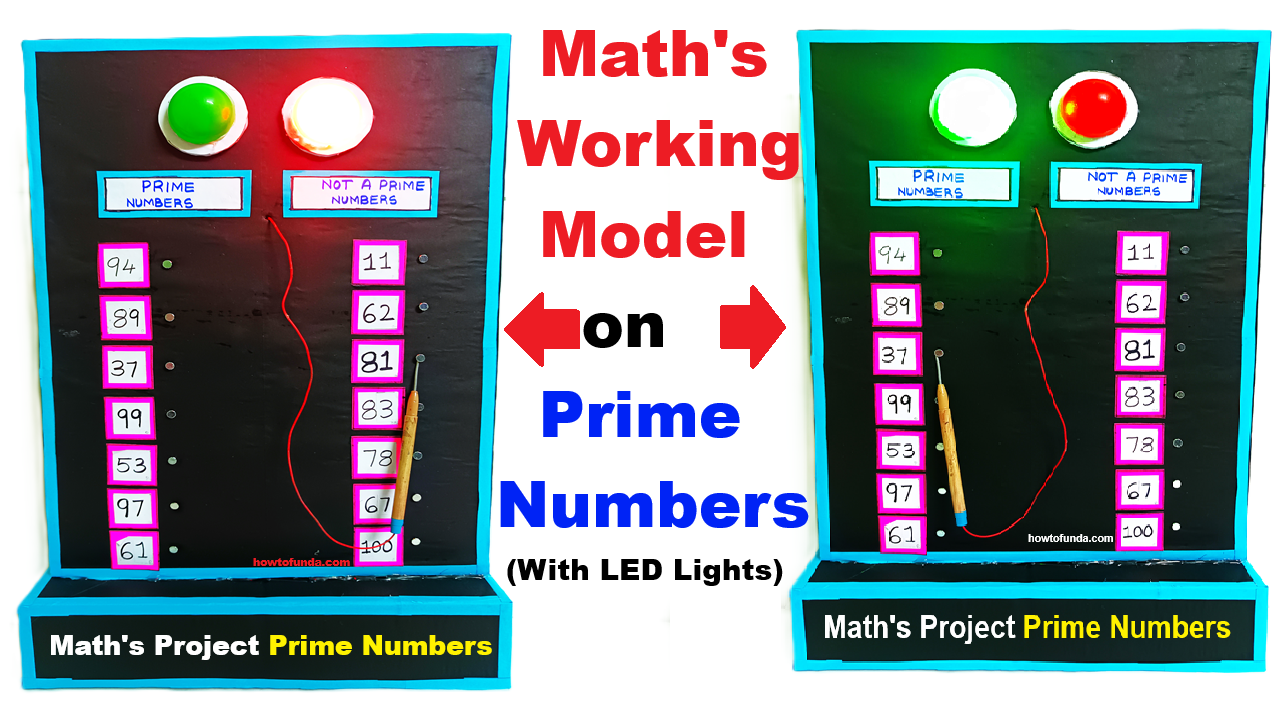
In this video, we show how to make an amazing Maths Working Model that identifies Prime Numbers and Non-Prime Numbers using LED lights, metal nails, and a simple touch-probe switch.
When you touch the probe to any number, the Green LED glows for Prime numbers and Red LED glows for Non-Prime numbers.

1) MATERIALS REQUIRED
Electronics
- 9V Battery
- 2 LED bulb caps OR bright 5V LEDs
- 1 Green
- 1 Red
- 2 × 220Ω resistors (for LEDs)
- nails
- Wires (red & black)
Mechanical
- Chart board / cardboard sheet
- Foam sheet for border
- Metal nails (one nail per number)
- Hot glue gun
- Wooden probe (thin bamboo stick)
- A piece of copper wire to wrap at probe tip (acts as touch conductor)
2) BASIC WORKING PRINCIPLE
The probe carries +9 volts.
Each nail is connected to a diode that leads either to:
✔ Green LED driver → if number is prime
✔ Red LED driver → if number is not prime
Touching probe to a nail sends +9V through the correct diode → transistor → correct LED lights up.
4) BOARD MAKING STEPS (Exactly like picture)
STEP 1 — Prepare display board
- Take a chart board or cardboard.
- Wrap with black paper for clean background.
- Add blue foam sheet border like image.
- Divide into two columns
STEP 2 — Fix number plates
- Cut small white rectangles
- Outline with pink sketch (same as your picture)
- Write numbers (94, 89, 37, 99, 53… etc.).
- Paste them in two vertical rows.
STEP 3 — Insert nails
- Make holes next to each number label
- Insert nails so only the metal head is visible
- Hammer gently so they stay firm
- Inside the board, connect wires to each nail
These nails become touch switches.
STEP D — Connect all NON-PRIME nails
Nail → Diode → BR (base of RED transistor)
Non-prime numbers in picture:
11, 62, 81, 83, 78, 67, 100, etc.
These → connect to red base node (BR)
6) PROBE MAKING (Important)
- Take a bamboo stick
- Wrap copper wire at the tip (only 1–2 cm exposed)
- Connect wire from tip → +5V supply
- Insulate entire stick except tip
- This is your metal touch probe
Now whenever probe touches a nail → that nail gets +5V.
7) FINAL ASSEMBLY
✔ Glue wires neatly
✔ Add a base stand (foam board + cardboard)
✔ Add labels:
PRIME NUMBERS
NOT A PRIME NUMBERS
Math’s Project Prime Numbers
✔ Hide electronic parts inside the base
8) TESTING
- Power the circuit with 5V.
- Touch probe to a prime nail → Only green light turns ON.
- Touch probe to a non-prime nail → Only red light turns ON.
- No light?
- Check diode direction
- Check base resistor
- Check transistor pins (C-B-E)