Concept / Principle:
This model demonstrates how wind energy is converted into electrical energy using a wind turbine.
When air (wind) blows on the blades, it makes them rotate — this rotation drives a DC motor (acting as a generator) that produces electric current to light up an LED bulb.
Scientific Principle:
Mechanical energy (rotation of turbine) → Electrical energy (via electromagnetic induction)

Scientific Principle Explained:
When the turbine blades spin the rotor of a motor, a magnetic field cuts through copper coils inside the motor.
According to Faraday’s Law of Electromagnetic Induction, an electric current is generated in the coil — this powers an LED or small bulb connected to the motor terminals.
Materials Required:
- DC motor (6V–12V) – acts as generator
- Fan blades / plastic bottle blades / cardboard blades (3–5 pcs)
- LED bulb (3V–6V)
- Connecting wires
- PVC pipe / pen refill / straw (for turbine shaft support)
- Wooden / cardboard base
- Glue gun / Fevicol / tape
- Battery (optional – for demo if no wind available)
- Hair dryer or table fan – to simulate wind
- Decorative items (paper trees, hills, etc.)
Step-by-Step Model Making:
Step 1 – Making the Blades
- Cut 3–5 equal-sized blades from plastic bottle or cardboard.
- Shape each blade slightly curved — this helps catch the wind effectively.
- Attach the blades evenly around a bottle cap or hub (use glue or tape).
- Fix the hub tightly onto the DC motor’s rotating shaft.
Step 2 – Mounting the Motor
- Fix the DC motor vertically on a PVC pipe or thermocol stand (about 15–20 cm tall).
- Secure it with rubber bands or glue so it doesn’t wobble when the blades spin.
- Place this setup on your wooden or cardboard base.
Step 3 – Wiring
- Connect two wires to the motor terminals.
- Connect the free ends of the wires to the LED bulb.
- You can also connect it to a small voltmeter to measure voltage.
- Ensure connections are firm and not shorted.
Step 4 – Testing the Model
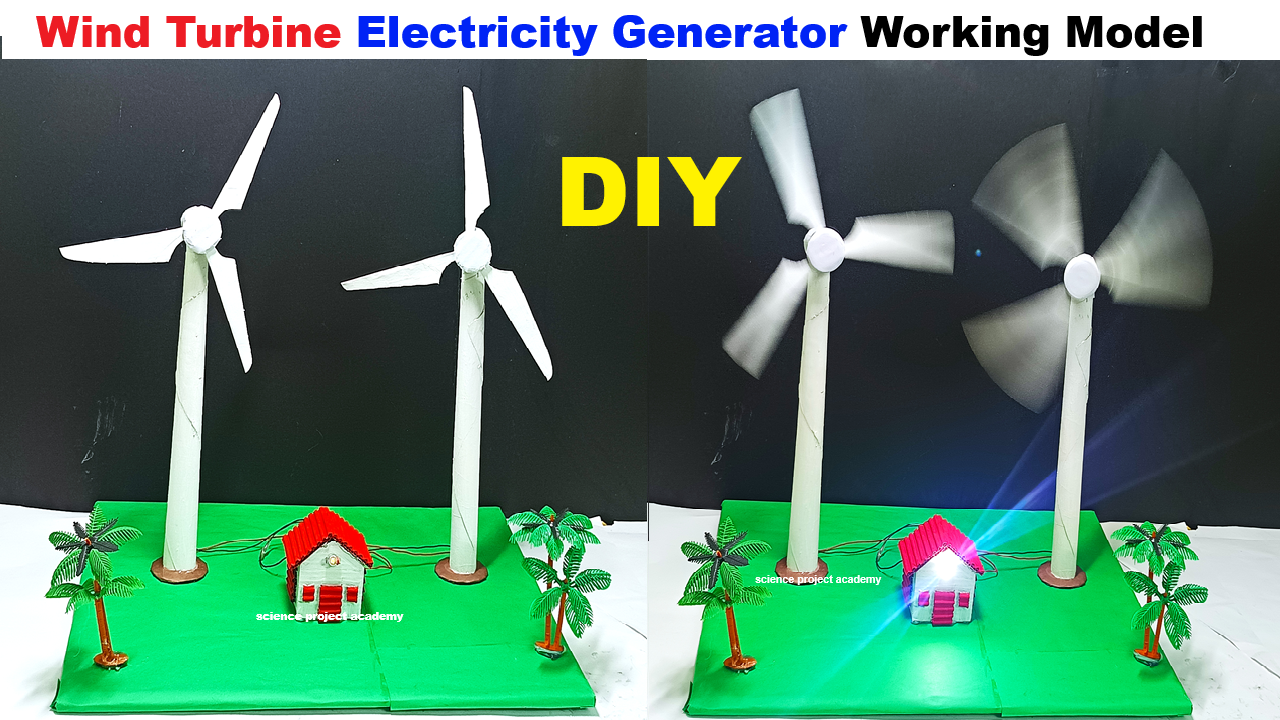
- Place the model in front of a fan or blow air using a hair dryer.
- As the blades spin, the motor rotates and produces current.
- The LED light glows, showing electricity generation from wind energy.
(Tip: Reverse LED wires if it doesn’t light — DC polarity matters!)
Step 5 – Decoration & Labeling
- Add paper hills, trees, and a small house to make a wind farm scene.
- Label components:
- “Wind Blades”
- “DC Motor (Generator)”
- “LED Bulb (Electric Output)”
- “Wind Energy → Electrical Energy”
- Write title: “Wind Turbine Electricity Generator – Renewable Energy Source”
Explanation (For Presentation):
“This is a working model of a wind turbine electricity generator.
When wind blows on the blades, it causes them to rotate.
This rotation drives a small DC motor, which generates electricity through electromagnetic induction.
The generated power lights up the LED, showing that wind energy can be converted into electrical energy.
It demonstrates how wind turbines work to produce renewable and pollution-free electricity.”
Applications:
- Wind farms for large-scale electricity production
- Remote area power generation
- Hybrid renewable systems (wind + solar)
- Environmentally friendly energy source